KitchenAid Parts

KitchenAid Appliance Parts
Shop By Appliance Type

Popular KitchenAid Parts

$7.51
In Stock
Light Bulb - 40W
★★★★★
★★★★★
2 Reviews
Fix Number FIX884734
Manufacturer Part Number 8009
This is a genuine OEM 40-Watt replacement light bulb that is compatible with various types of appliances. It has a frosted glass bulb with a standard metal socket base, making it easy to screw and unscrew by hand to replace. It is designed to tolerate extreme temperatures, which is why it is commonly used to light the inside of refrigerators and ovens. Depending on the appliance and location of the bulb, disconnecting the power is recommended. This bulb is sold individually.
Installation Instructions
Helen from Quincy, MA
lightbulb in refrigerator went out
Removed plastic shield on top of refrigerator. Removed old bulb.. Replaced new bulb. Reinstalled plastic shield. Voila! Read more...
$44.92
Special Order
Dishwasher Lower Dishrack Wheel Assembly - Gray
★★★★★
★★★★★
12 Reviews
Fix Number FIX11722152
Manufacturer Part Number W10195416V
This OEM gray plastic lower dishrack wheel assembly allows the rack to slide in and out of the dishwasher with ease. It measures roughly 3 by 6 inches. If it breaks or becomes damaged it may make sliding in and out feel difficult. This is a normal wear and tear item and will need to be replaced when this happens. It attaches directly to the dishrack and is a quick and easy repair. There are 4 dishrack wheel assemblies in total on your appliance, so this is a good time to inspect all 4, as this part is sold individually. To repair, open the dishwasher door and pull out the lower dishrack. Next, push the tab from both sides and it should pop out. To install the new wheel assembly, place it on the rack and make sure the caps overlap the wire from the inside before you clip it in place by pushing the wheel.
Fixes these symptoms
  • Door latch failure
  • Door won’t close
  • Leaking
  • See more...
Installation Instructions
Anthony from Helena, MT
Wheels and hubs have melted and broken frequently
Easy to install. Snap right on to lower basket. Read more...
$10.46
In Stock
Lower Door Closing Cam
★★★★★
★★★★★
1 Review
Fix Number FIX11739042
Manufacturer Part Number WP2182179
The lower door closing cam raises the door to keep it from touching the refrigerator liner when the door is closed. It fits both the left and right side of the refrigerator door. The most common reasons for replacing this part are the fridge door slips down when opened, the door does not open smoothly, or does not close by itself. This original part is made of durable black plastic, is approximately 1.1 inches by 1.5 inches, and is sold individually. To effectively install this part, you will need a 5/16 nut driver and a small flat blade screwdriver. Before you begin, disconnect the power and the water supply. We suggest lubricating this part before installing. To make the repair, remove the top hinge cover, then the top hinge support. Lift the door from the bottom support and remove the old door cams. Replace the cams and put the door back on the lower hinge support. Replace the top hinge support and that completes the repair.
Fixes these symptoms
  • Clicking sound
  • Door Sweating
  • Door won’t open or close
  • See more...
Installation Instructions
Curtis from Highland, UT
The door would not stay closed, the closing cams were completely worn out.
This is a very simple repair, by far the hardest part was emptying all of the condiments out of the door. After that was done I removed the top hinge cover and then the hinge. I lifted the door off of the refrigerator and set it on a card table so that it was off the ground. I took the worn cams off of the door and the refrigerator cabinet (one screw for each of them). I screwed the new cams into position and lubricated them with petroleum jelly. Then I put the door back in position and reattached the top hinge. It works perfectly again. Read more...
$30.86
In Stock
Refrigerator Door Switch
★★★★★
★★★★★
3 Reviews
Fix Number FIX12728638
Manufacturer Part Number W11384469
Door switch turns the light off when you close the door.
Fixes these symptoms
Installation Instructions
Marilyn from Dublin, OH
Light switch no longer worked
Turn off and unplug your refrigerator. I used the screwdriver on the left side of the part (where the plug is) and used the putty knife at the same time on the right side to push the spring lock portion of the part in. The part snapped out. I unplugged the left contact from the plug and put it on the new part, then I unplugged the right contact and put it on the new part. I did this so the wires would not go up into the refrigerator and be hard to find. I put the left side of the new part where the plug and contacts are in first then I snapped the right side in place. I plugged the refrigerator back in and it worked perfectly. Just take your time and gently remove and reconnect the new part. The store where I bought my refrigerator wanted $69.95 for a service call plus an hourly charge and part charge. Count on this site for your parts and do it yourself. I ordered the part on Monday, it was delivered on Tuesday around noon and I made the repair that afternoon. Read more...
$16.77
In Stock
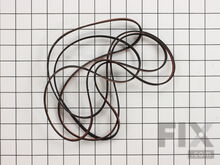
Multi Rib Belt - 92-1/4"
★★★★★
★★★★★
17 Reviews
Fix Number FIX346995
Manufacturer Part Number 341241
This multi rib belt is an OEM replacement part for a dryer. It attaches to the drum, idler pulley, and motor pulley, and is responsible for spinning the drum. Over time, the belt can become frayed, brittle, and inflexible. If you can hear the motor running, but the drum does not turn, it is likely that the belt is broken. Other symptoms of a broken multi rib belt include unusual noises, failing to start, no heat, a burning smell, and an unresponsive touchpad. Depending on the model, you will find the belt by looking behind the front panel or under the main top of the dryer. This belt is 1/4-inches wide, has a length of 92-1/4-inches, and has four ridges and three groves on the belt. Each belt is sold separately.
Fixes these symptoms
  • Drum Not Spinning
  • Heat stays on after drum has stopped
  • Noisy
  • See more...
Installation Instructions
carolyn from phila, PA
not spinning
follow the vidio Read more...
$19.15
In Stock
Dryer Thermal Fuse
★★★★★
★★★★★
15 Reviews
Fix Number FIX11741460
Manufacturer Part Number WP3392519
The dryer thermal fuse, also sometimes referred to as the thermal cut off or temperature fuse, is a 2 by 1/2-inch, white, plastic safety mechanism that halts the flow of electricity to the motor circuit when a dryer overheats. If the fuse is missing or broken, your dryer will not start. A thermal fuse fails when the exhaust temperature exceeds the fuse rating, that is when the temperature rises above the temperature that the fuse is intended to manage. This can be caused by the heating element shorting, a regulating thermostat or thermistor failure, or with a partially restricted exhaust vent. The fuse attaches to the blower wheel housing. It must be replaced when there is no longer continuity between the terminals. This is a one-time fuse, meaning it cannot be re-set. The replacement part features two 3/16-inch terminals. While performing this repair, we recommend checking to make sure all vents are cleared and vacuumed. This OEM part is sold individually.
Fixes these symptoms
  • Heat stays on after drum has stopped
  • Not Heating
  • Too hot
  • See more...
Installation Instructions
gary from apex, NC
dryer not heating
Checked the heating element and found a break in the heating coil. Decided to change the thermal fuse and the the cycling thermostat because of the age of the dryer. Read more...
$75.23
In Stock
Refrigerator Water Filter
★★★★★
★★★★★
2 Reviews
Fix Number FIX11722128
Manufacturer Part Number EDR3RXD1
It is recommended to replace your refrigerator water filter every 6 months or 200 gallons of water. This will ensure consistently good-tasting water that is free of pollutants. This NSF-certified filter is designed so it is easily accessible and simple to replace. It can be found in the front, bottom panel of your appliance. Remove your new filter from the packaging, making sure to remove the port cover. Pop out the older filter by pressing the push-button to the left of the filter, reapply the bottom cap to the new one, and slide it into the holder until you hear a click. To activate the filter, thoroughly run the dispenser, a loud air pressure sound is normal. This filter is sold individually.
Fixes these symptoms
  • Ice maker dispenses too little ice
  • Ice maker not making ice
  • Ice maker won’t dispense ice
  • See more...
Installation Instructions
Lula from Kansas City, MO
Water Filter needed to be changed
I found where the filter was located and let my husband replace the filter. Read more...
$32.31
In Stock
Door Balance Link Kit
★★★★★
★★★★★
6 Reviews
Fix Number FIX972325
Manufacturer Part Number 8194001
If your dishwasher door is not opening or closing properly, it may be time to install a new balance kit. This part helps to support the weight of the door as it opens and closes. You should also check on the condition of the door springs as well, as they work with the balance kit and may also need to be replaced when you do this repair. This genuine OEM parts kit includes two door balance links and two door balance mounts with wheels, which will replace both the left and righthand sides. If you do need to replace the springs, please note that these are sold separately and are not part of this kit. Installing the parts is a simple job, however you will need access to both sides of your dishwasher. This will require pulling it out from under your counter or cabinets. You will need a 5/16 nut driver to remove and replace the new balance mounts, and you may need a Philips screwdriver to remove the mounting hardware in order to pull your dishwasher out to work on. This kit can also be known as a door spring cable kit, or the door cable kit.
Fixes these symptoms
  • Door latch failure
  • Door won’t close
  • Leaking
  • See more...
Installation Instructions
Rex from Fuquay-Varina, NC
Broken balance link nylon cord (cable) due to improper installation. Too much tension.
Looked at video and followed instructions. Be sure to set the link assembly at correct angle - follow what you see in video. The assembly should be straight up & down, not at an angle. Setting at angle causes too much tension on the nylon cord (cable) and makes the door hard to open and keeping in one position. Read more...
$16.44
In Stock
Mounting Bracket
★★★★★
★★★★★
1 Review
Fix Number FIX11745496
Manufacturer Part Number WP8269145
The mounting bracket is used to secure the top part of your dishwasher to the underside of your counter or cabinet. If you have solid surface counters (granite, quartz, etc.) you will likely need to side mount your appliance, and this type of bracket is sold separately. It is important to properly secure your dishwasher, as it helps to keep it level, and prevents it from moving, shaking, or tilting forwards. This is an authentic OEM part, made entirely of metal, and approximately 3 inches in length. These mounting brackets are sold individually, however most dishwashers require at least two brackets to secure the appliance to the countertop. It is recommended to check and replace all brackets at the same time, as they tend to wear at the same rate. Attaching the mounting bracket to the top of the dishwasher is simple, and just requires a pair of needle nose pliers to bend the tabs into place. When it comes time to attach your dishwasher to the countertop, please note that you will need screws (sold separately), a screwdriver, and if this is the first time the brackets are being attached, you will also need to use a drill bit to make pilot holes for the screws.
Fixes these symptoms
  • Door latch failure
  • Door won’t close
  • Leaking
  • See more...
Installation Instructions
julie from arroyo grande, CA
Mounting bracket broken. Upper rack wheel broken.
Upper Rack Wheel Assembly - This is a little time consuming (maybe 15 minutes), but easy. You will need to remove the entire upper rack assembly before replacing the wheels. After you remove rack assembly and the dishwasher from under the cabinet (see guidance below for brackets), you will see two hex head sheet metal screws with integral washers on the outside of the dishwasher holding the wheel assembly onto the dishwasher. Use the pliers to remove the screws and the old wheel assembly. Install the new wheel and mount assembly using the old screws since the wheel assembly doesn't come with the mounting screws. Mounting Bracket - Pretty easy. Remove port cover for both left & right mounting screws on inside of dishwasher. Remove the screws (if they haven't already fallen out). Careful - they will drop to the floor. Pull the dishwasher partially out from under the counter. Remove the old bracket(s) and install the new one(s). You will need pliers to bend the tabs over to secure them. For the Kenmore, you need to break off the longer end. Slide the dishwasher back under the counter and align the screw holes with the cabinet. I use masking tape to hold the screw on the screwdriver so it doesn't fall off when inserting into the screw hole in the cabinet. Use the flashlight to help see that the holes are aligned. Tighten the screw and you're done. Read more...
$2.63
In Stock
Door Catch Kit
★★★★★
★★★★★
10 Reviews
Fix Number FIX334230
Manufacturer Part Number 279570
This kit includes two door strikes, and three door catches, to service doors that have one or two catches. The strike is mounted on the body of the dryer, while the catch is mounted on the dryer door. These two parts work together to keep the dryer door shut while in operation. If your appliances lid will not close, or it will not start, it may be time to replace the door catch. If this part is malfunctioning, it should be replaced immediately, as it is not safe to run a dryer with the door not properly closed. This kit also comes with a set of instructions to help with the repair.
Fixes these symptoms
  • Door Pops Open
  • Door won’t close
  • Lid or door won’t close
  • See more...
Installation Instructions
jeffrey from Brookhaven, PA
Dryer would run, but not heat
Needed it running quick, so no diagnostics. Ordered one of everything that could fix problem (plus a new door catch). Tipped it onto it's back & popped the bottom cover off. Element, thermal cutoff, thermistor, and fuse. were right in front and held by 2 screws each (don't drop them, don't ask). A little bit tight inside, but no big issue. vacuumed the inside, replaced everything (it was the Heating Element, by the way), slapped the cover on, and put it back in its spot. works like it was new. Yes, I unplugged it first. Remember! Safety Third! Read more...

Appliance Type

Popular KitchenAid Models