Jenn-Air Parts

Jenn-Air Appliance Parts

Popular Jenn-Air Parts

★★★★★
★★★★★
12 Reviews
Fix Number
FIX3406971
Manufacturer Part Number
W10195416
This OEM gray plastic lower dishrack wheel assembly allows the rack to slide in and out of the dishwasher with ease. It measures roughly 3 by 6 inches. If it breaks or becomes damaged it may make sliding in and out feel difficult. This is a normal wear and tear item and will need to be replaced when this happens. It attaches directly to the dishrack and is a quick and easy repair. There are 4 dishrack wheel assemblies in total on your appliance, so this is a good time to inspect all 4, as this part is sold individually. To repair, open the dishwasher door and pull out the lower dishrack. Next, push the tab from both sides and it should pop out. To install the new wheel assembly, place it on the rack and make sure the caps overlap the wire from the inside before you clip it in place by pushing the wheel.
Fixes these symptoms
  • Door latch failure
  • Door won’t close
  • Leaking
  • See more...

Installation Instructions

Anthony from Helena, MT
Wheels and hubs have melted and broken frequently
Easy to install. Snap right on to lower basket. Read more...
Rack Track Stop
$7.71
In Stock
★★★★★
★★★★★
2 Reviews
Fix Number
FIX11746591
Manufacturer Part Number
WP8565925
This is a single rack track stop clip used to prevent the upper dish rack from sliding all the way out of the dishwasher. It is made of gray plastic and can wear with time. This is an easy repair that should not take very long to complete. Start by opening the dishwasher door, depress the tabs to remove both the front stop clips and remove the upper dish rack from the appliance. Now, using your small flat head screwdriver, release the retaining tab to remove the rear stop track that you are replacing, and pull the clip up to remove it. Install the new clip by inserting it into the support rail from the top and press it down to secure it in place.
Fixes these symptoms
  • Door latch failure
  • Door won’t close
  • Not cleaning dishes properly
  • See more...

Installation Instructions

Richard from Austin, TX
Wheels on original upper rack adjust fell off and end stops would not stay on.
Removed old end stops. Pulled rack out of machine. Carefully removed old adjusters. Snapped in new adjusters. Slid rack back into the runners. Clipped in the new end stops. Done. Read more...
★★★★★
★★★★★
18 Reviews
Fix Number
FIX346995
Manufacturer Part Number
341241
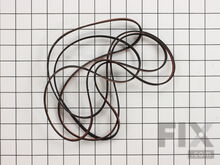
This multi rib belt is an OEM replacement part for a dryer. It attaches to the drum, idler pulley, and motor pulley, and is responsible for spinning the drum. Over time, the belt can become frayed, brittle, and inflexible. If you can hear the motor running, but the drum does not turn, it is likely that the belt is broken. Other symptoms of a broken multi rib belt include unusual noises, failing to start, no heat, a burning smell, and an unresponsive touchpad. Depending on the model, you will find the belt by looking behind the front panel or under the main top of the dryer. This belt is 1/4-inches wide, has a length of 92-1/4-inches, and has four ridges and three groves on the belt. Each belt is sold separately.
Fixes these symptoms
  • Drum Not Spinning
  • Heat stays on after drum has stopped
  • Noisy
  • See more...

Installation Instructions

carolyn from phila, PA
not spinning
follow the vidio Read more...
Dishwasher Upper Rack Adjuster
$43.85
In Stock
★★★★★
★★★★★
4 Reviews
Fix Number
FIX11756150
Manufacturer Part Number
WPW10546503
This dishrack adjuster attaches to the side of the top dishrack and fits both the left and ride side. If you are looking to replace both sides, you will need to order 2 of this part, as they are sold separately. It connects to the track, making it possible to move the rack in and out as well as raise up and down to accommodate different size items. If this part breaks, it may make it difficult for the rack to slide in and out with ease, in which case it will need to be replaced, as this can lead to further issues. For this repair, remove the upper rack from the dishwasher, detach the adjuster housing cover and then detach the front and rear adjuster support straps from the tines. Pry off the stop clip to detach the old adjuster. Align the new adjuster on the rack and snap the stop clip in place to secure it. Place the front and rear support straps back on. Position the adjuster housing and place the cover back on to secure. Place the rack back into the dishwasher.
Fixes these symptoms
  • Door latch failure
  • Door won’t close
  • Leaking
  • See more...
Refrigerator Ice and Water Filter
$103.96
In Stock
★★★★★
★★★★★
1 Review
Fix Number
FIX11701542
Manufacturer Part Number
EDR1RXD1
Your refrigerator water and ice filter should be replaced at least every 6 months, to prevent water that has an undesirable taste and odor, or if left for too long, can cause leaks and ice maker malfunction. The location of this filter can vary depending on your model. Some common locations to check include the top right corner of the interior compartment, the bottom left grille, or the middle of the interior. This filter is an original manufacturer part and NSF-certified. It has a straightforward, quick-turn installation feature that does not require the use of tools.
Fixes these symptoms
  • Ice maker dispenses too little ice
  • Ice maker not making ice
  • Ice maker won’t dispense ice
  • See more...

Installation Instructions

Marilyn from Darrouzett, TX
Filter needed to be replaced
I opened the small door and observed how the arrows lined up on the bottom of the one in the slot. I pulled the cylinder our and placed the new one with the arrows pointing the same way and pushed it in and closed the small door. Then pushed the reset button until the green light came back. Be sure to take the coverings off the two openings! Read more...
Lower Dishrack Wheel Assembly
$36.73
In Stock
★★★★★
★★★★★
6 Reviews
Fix Number
FIX11750057
Manufacturer Part Number
WPW10195417
This gray plastic lower dishrack roller is a part for your dishwasher. It attaches to the bottom of the lower dishrack, allowing it to move in and out smoothly. If the lower dishrack stops moving in and out easily or preventing you from being able to shut the dishwasher door, inspect the dishrack roller for damage. The assembly includes 2 rollers and the bracket that attaches to the dishrack (parts are not sold separately). This assembly is sold individually, so you will need 4 assemblies to replace them all in your appliance. For this easy repair, start by removing the lower dishrack from the appliance and set it on the counter. Use a screwdriver to pry off the old roller assembly from the lower tabs. Align the new part on the dishrack by snapping it in place.
Fixes these symptoms

Installation Instructions

JEROME from MAPLE GROVE, MN
Wheel fell off the wheel assembly.
Step 1: Snapped the old wheel assembly off.
Step 2: Snapped the new wheel assembly on.
Read more...
★★★★★
★★★★★
9 Reviews
Fix Number
FIX1570070
Manufacturer Part Number
12001541
This OEM drum support roller kit contains the parts needed to replace one roller on your dryer. This kit includes one drum roller and two bearings. Most dryers use two drum rollers, and it is recommended to change both at once for optimal performance. The drum support roller holds the drum in position while it spins on the support wheels. It rotates on the roller shaft located on the rear bulkhead. It may need to be replaced if your dryer is noisy, will not tumble, leaves marks on clothes, or will not start. This part is prone to wear and tear, and if broken will need to be replaced. This part measures roughly 3 inches in diameter and is made of plastic, metal, and rubber. Each kit is sold individually (two would be needed to replace both drum support rollers, which is recommended).
Fixes these symptoms
  • Drum Not Spinning
  • Marks left on clothes
  • Noisy
  • See more...

Installation Instructions

James from Gainesville, GA
"Sqealing" noise when drum rotating
Disconnected power supply, removed front panel, removed tub support bracket, removed electrical lines from light and door switch( to have better access to install front guide kit), removed belt, removed drum, removed old rollers, installed new rollers and rest of installation was in reverse order of taking machine apart. In order to install the front guide kit(which I've never done before), I had to watch the installation instructions via you-tube. This was a tremendous aide as the instructions were simple and very adequate. Read more...
Bake Element
$73.37
In Stock
★★★★★
★★★★★
7 Reviews
Fix Number
FIX11703285
Manufacturer Part Number
W10779716
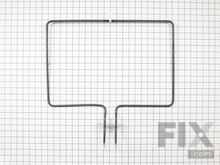
This authentic OEM bake element is square in shape with the terminals in the center and sits at the bottom of your oven. The purpose of this part is to heat your oven in order to cook your food. If your oven is not coming up to temperature, has hot spots, or will not heat up at all, you may need to replace the bake element. To complete this repair, you will need to disconnect the power to the appliance along with pulling it out far enough to access the back panel. Please note that the new element may look different from the original part in your range, but the replacement part will work with your model.
Fixes these symptoms
  • Element will not heat
  • Little to no heat when baking
  • Oven is too hot
  • See more...

Installation Instructions

Jefffrey from EATON, OH
Element stopped working
Disconnected power, removed oven pan that covered element, took off back panel of stove that covered the wiring, disconnected the wires, unscrewed bracket in oven. Removed element then did everything in reverse order. Read more...
Light Bulb - 40W
$8.87
In Stock
★★★★★
★★★★★
3 Reviews
Fix Number
FIX2376034
Manufacturer Part Number
8206232A
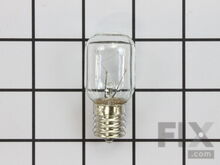
To access the exterior lightbulb, the bottom panel of the microwave will need to be removed. It is secured in place with screws, so will require a Philips screwdriver to remove it. Screw the new light bulb directly into the light socket. If this is the first time you have replaced this light bulb, the old light bulb might be held in place with silicone. This silicone will need to be cut off using either a utility knife or dental floss before removing the light bulb. Once this silicone and old bulb has been removed, the replacement bulb can be screwed in its place.

Installation Instructions

Mark from North East, PA
Bulb burnt out
Removed the screw holding the bulb cover replaced the bulb. Reinstalled the cover and screw. Remove dirty grease filter replaced with new grease filter. Read more...
★★★★★
★★★★★
4 Reviews
Fix Number
FIX11722130
Manufacturer Part Number
EDR4RXD1
This package contains one individual water filter that is NSF-certified, and OEM approved. To ensure that the filter is successfully removing contaminants, it will need to be replaced at least every 6 months or 200 gallons of water. This will ensure tasteless and odor-free water. It has approximate measurements of 2-1/2 inches deep, 1-1/2 inches wide, and 8 inches high. This is a simple installation. This filter is found on the interior of the refrigerator in a drop-down style housing. Pop out the old filter, slide the new filter in place and turn it until it clicks. Be careful not to over-tighten. Close the cover. Run your dispenser to activate the filter and clear out air bubbles. A loud air pressure sound is completely normal. Reset your water filter indicator if applicable.
Fixes these symptoms
  • Fridge too cold
  • Ice maker dispenses too little ice
  • Ice maker not making ice
  • See more...

Installation Instructions

Blaine from Huntley, IL
Needed new h2o filter
Used my hands only...no tools necessary Read more...

Appliance Type

Popular Jenn-Air Models