LG Parts

LG Appliance Parts
Shop By Appliance Type

Popular LG Parts

$74.11
In Stock
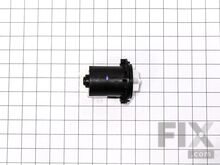
Washing Machine Drain Pump
★★★★★
★★★★★
3 Reviews
Fix Number FIX3579318
Manufacturer Part Number 4681EA2001T
This is a drain pump motor assembly for washers. This OEM part is responsible for removing water from the washer during the drain part of the cycle. When this part is clogged, damaged or defective it can cause the washer to not drain properly. Keep in mind that the pump casing is sold separately. This repair is rated medium-difficulty and can vary depending on the model. For this repair you will need a Philips screwdriver, a small flat blade screwdriver, needle nose pliers, and slip joint pliers. Do not forget to disconnect the power before you begin this repair. In general, this repair can be started by removing the top of the washer followed by the front panel. Moving down the front of the appliance, remove the door, latch, tub gasket, and drainer cover. The drain hoses and clip will need to be disconnected from under the drain assembly. To install the new pump motor, reassemble parts in the reverse order. We recommend taking photos while disassembling and keeping screws and parts neatly organized.
Fixes these symptoms
  • Draining Issues
  • Engine runs but does not pump water
  • Leaking
  • See more...
Installation Instructions
Betty from monticello, GA
Drain clogged and pump burned up
I followed the repair video on your site and had it done in no time at all. Excellent video for novice like me. Read more...
$54.28
In Stock
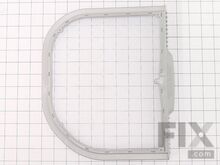
Dryer Lint Filter
★★★★★
★★★★★
1 Review
Fix Number FIX3531962
Manufacturer Part Number ADQ56656401
The Dryer's Lint Filter is used to collect lint during the dryer cycle as it passes through the dryer vent, in order to prevent damage to the machine. This manufacturer-approved part comes in gray, measures around 12 inches wide by 11 inches high, and is easy to install. It slides into the lint filter slot in your dryer. If there is visible damage to the screen then it's time to replace the part. We recommend that you thoroughly clean the lint filter before every load, but even with good maintenance, this hard-working part is often damaged or worn over time. If your dryer isn't drying quickly, the filter may be responsible. The manufacturer has made an authorized substitution to the lint filter. Special details: When replacing lint screen ADQ56656401 you may need to also replace lint screen housing MCK49049101 and lint screen guide MEA49050001 to prevent items from catching on the lint screen, depending on your model.
Fixes these symptoms
Installation Instructions
Frank from Eau Claire, WI
Damaged lint dryer and guide, kid didn't push down lint filter and nap sack rope caught it yanked apart assembly.
Removed screws, took a whopping 5 minutes, including unpacking box assembly of screw driver. Grab a vacuum, good time to clean out inside of dryer while torn apart. EZ repair. Read more...
$87.42
In Stock
PARTS ASSEMBLY, SVC (2 Pack)
★★★★★
★★★★★
1 Review
Fix Number FIX16763594
Manufacturer Part Number AGM75510755
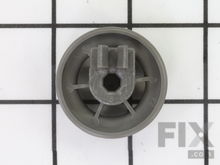
The drum roller for your dryer holds the drum in place while the drum turns on the support wheels. The drum roller is round with a bearing in the middle and measures approximately 3 inches in diameter. Over time, these rollers can become worn, and it may cause your dryer to be noisy during operation. The bearing inside this roller is self-lubricating, so no grease will be required.
Fixes these symptoms
Installation Instructions
John from Seaford, NY
Noisy Dryer
I took the dryer apart and found the forward drum support roller was wobbling. I decided to replace all 4 rollers and the drive belt. Parts arrived within 3 days and the install took less than an hour. I didn't notice any lubricant on the new roller shafts, so I took them apart and applied a very thin film of synthetic grease. I also did the same to the tensioning roller assembly. The install worked out fine. Read more...
$31.27
In Stock
Dryer Drum Belt
Fix Number FIX11705916
Manufacturer Part Number 4400EL2001F
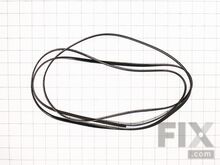
If the drum in your dryer will not tumble, or it is noisy while operating, there may be an issue with the drum belt. The belt is found looped around the dryer drum, a tension pulley, and a motor pulley and is used to rotate the drum so that your laundry tumbles. Over time the belt can become stretched out, or it becomes brittle and will snap. If this happens the belt will need to be replaced. If you need a replacement, this is a genuine OEM dryer drum belt. The belt measures about a quarter inch wide, and has four ribs and three groves. Please be sure to disconnect the power supply to your dryer before beginning this repair.
Fixes these symptoms
Installation Instructions
John from Seaford, NY
Noisy Dryer
I took the dryer apart and found the forward drum support roller was wobbling. I decided to replace all 4 rollers and the drive belt. Parts arrived within 3 days and the install took less than an hour. I didn't notice any lubricant on the new roller shafts, so I took them apart and applied a very thin film of synthetic grease. I also did the same to the tensioning roller assembly. The install worked out fine. Read more...
$31.60
In Stock
Refrigerator Door Switch
Fix Number FIX3529268
Manufacturer Part Number 6600JB1010A
If the light inside your fridge is not coming on, or if it is staying on continuously, there may be an issue with your door switch. When the door to your fridge is closed, the button on the switch is pressed down, which breaks the circuit and turns the lightbulb off. When the door opens and the button is released, the circuit is connected, and the light comes on. If you are unsure if the issue is with the door switch, or if your lightbulb has burned out, you can test the switch for continuity with a multimeter. If necessary, replacing the door switch is a simple repair, but please be sure to disconnect the power supply to your refrigerator before beginning any electrical repairs. This genuine OEM part is white in color and measures approximately 2.5 inches long.
Fixes these symptoms
Installation Instructions
Jeffrey from Freehold, NJ
Light switch went bad (second time)
Popped it out installed new one. Done Read more...
$26.80
In Stock
Water Inlet Valve - Hot
★★★★★
★★★★★
2 Reviews
Fix Number FIX3527427
Manufacturer Part Number 5220FR2006H
The hot water valve is found at the back of your washer and controls the flow of hot water into the machine. If the valve is defective, the washer may leak, overfill, fill slowly, or not fill with water at all. If this happens the valve should be replaced. There are a couple different methods for testing if your hot water valve is defective. The first is to use a multimeter on the solenoid, the second is to unplug the washer while it is running. If water continues to flow into the machine, then the valve is defective. This genuine OEM part has a standard hose fitting inlet, one water outlet, and measure approximately 3 inches long by 3 inches wide. To complete this repair, you will need to disconnect the water and power supply to your washer and pull it out from the wall so you can access the back panel.
Fixes these symptoms
  • Leaking
  • No hot or cold water
  • Water Filling Issues
  • See more...
Installation Instructions
Frederick from Kennesaw, GA
Washer was leaking at the bottom
I actually looked on you tube for the type of washer and the issue. I checked all the areas the various videos showed me. The last one I checked was the inlet valves. All that is needed is a Phillips head and a wrench. Took the top off. Unplugged the washer. Unplugged the hoses. Unscrewed the valves and removed the hoses and the circuit pieces. Replaced one at a time. Everything worked perfect. Hooked hoses back up. No more leaks. Attached the top back and pushed back into place. No more leaking. Read more...
$22.28
In Stock
Moisture Sensor
Fix Number FIX3529161
Manufacturer Part Number 6500EL3001A
This genuine OEM sensor is also known as a moisture sensor or a humidity sensor. It is found underneath the lint filter in your dryer, and is used to detect the amount of moisture present in the drum. This is to prevent the dryer from running longer than necessary, and will shut off once your laundry has been sufficiently dried. If your dryer is shutting off too soon, or it is running excessively long, there may be an issue with the sensor and it should be replaced. Before beginning this repair, please be sure to disconnect the power supply to your dryer. If your dryer has two moisture sensors, we recommend replacing both at the same time to ensure even wear.
Installation Instructions
Ronald from Conyers, GA
Insufficient drying in reasonable time.
Remove lint filter. Remove plastic frame for filter with phillips screwdriver. Detach both moisture sensor wires with needle nose pliers. Reattach wires to new sensors and reassemble frame. Read more...
$35.51
In Stock
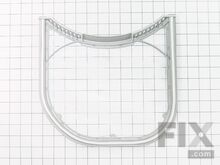
Dryer Lint Filter Assembly
★★★★★
★★★★★
1 Review
Fix Number FIX3527575
Manufacturer Part Number 5231EL1001C
A fully functional lint filter is an essential part for your dryer. It helps to trap lint and other debris from your laundry and prevents it from entering the ducts. An excess buildup of lint can be dangerous as it becomes a fire hazard. Regular cleaning of the filter can help to prevent this from happening. If your lint filter becomes damaged, replacing it is an easy repair that does not require any tools. Simply remove the broken filter from your filter and put the new one in its place.
Fixes these symptoms
Installation Instructions
Janice from Park City, UT
Broken lint catcher.
Remove the old one and put in the new one. Read more...
$76.82
In Stock
Water Filter
Fix Number FIX3591904
Manufacturer Part Number 5231JA2006F
This filter is good for 300 gallons and it reduces chlorine, taste and odor, sediment and rust. Sold individually.
Fixes these symptoms
Installation Instructions
Chris from Saratoga springs, NY
Crisper cover frame was broken in several places which caused the crisper drawer to not open/ close properly
Emptied the food from the crisper shelf and removed the crisper drawers. The shelf came out in several pieces. Removed the glass shelf incert and the plastic crisper liners and reinstalled the into the near shelf frame. The glass shelf needed some gentle persuasion to fit into the shelf recess. Slid the shelf back into the refrigerator and put the shelf support and the crisper drawers back in place. Reloaded the food and was done in less than 15 minutes without the need for any tools. Nice! Read more...
$24.24
In Stock
Thermal Fuse
★★★★★
★★★★★
4 Reviews
Fix Number FIX3530485
Manufacturer Part Number 6931EL3003D
If your dryer is not turning on, or not heating up, there could be an issue with your thermal fuse. This OEM fuse is designed to act as a high-limit thermostat, and will turn off the heating element in your dryer if the appliance overheats. It does this by cutting off power to the dryer. If the fuse has blown, it will need to be replaced as they cannot be reset. You can test the fuse with a multimeter, and should receive a reading of 0 ohms of resistance if the fuse is still good. A common reason for a dryer to overheat is if the air vents are blocked, as the hot air is contained in the dryer causing the fuse to blow. Be sure to keep your dryer filter and vents clean of lint and other debris to prevent this from happening.
Fixes these symptoms
Installation Instructions
Richard from Harrison, OH
No heat
Removed screw holding vent tube, pulled vent tube out. The thermal fuse and thermostat assy are left of inside the hole on the back of the dryer where the vent tube came out. The screws are easy to take out with one hand using a phillips screwdriver. I had to use a long screwdriver because the drum was in the way with a shorter one. The screws were pretty tight, so use a phillips with a good point, dont want to strip the screws. Because i can only get one hand in there, it was a little tricky getting the new parts lined up and starting the first screws at the same time, that took a little while but I finally got them started. If i couldnt get the first screws started i was goint to cut the bottom holes on the brackets for the parts, start the screw, slip the bracket onto the screw and then start the second screws. I used a magnetic flashlight inside the dryer, could put it in different places to see better in there. I should have put a few layers of masking tape arround the vent hole edge, its pretty sharp and when i was done i realised i had cut my arm on that edge. Dryer works again and dear Wife is happy.. I did test the old parts, thermal fuse was blown, probably because of too much lint in the flexable dryer hose, i shoulda replaced the dryer hose sooner. Read more...

Appliance Type

Popular LG Models