KitchenAid Microwave Oven Combo Parts
Find Parts Fast
Guaranteed Fit
Repair Videos


Popular KitchenAid Microwave Oven Combo Parts
- Fix Number
- FIX2376034
- Manufacturer Part Number
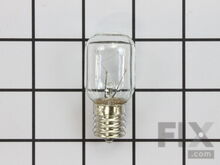
- 8206232A
Installation Instructions
Mark from North East, PA
Bulb burnt out
Removed the screw holding the bulb cover replaced the bulb. Reinstalled the cover and screw. Remove dirty grease filter replaced with new grease filter.
Read more...
- Fix Number
- FIX884734
- Manufacturer Part Number
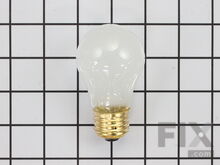
- 8009
Installation Instructions
Helen from Quincy, MA
lightbulb in refrigerator went out
Removed plastic shield on top of refrigerator. Removed old bulb.. Replaced new bulb. Reinstalled plastic shield. Voila!
Read more...
- Fix Number
- FIX11740695
- Manufacturer Part Number
- WP308180
Fixes these symptoms
- Element will not heat
- Little to no heat when baking
- Oven is too hot
- See more...
Installation Instructions
peter from potomac, MD
Bake element burnt out
1 Turned off power to stove at distribution box. 2 Removed oven racks to make room to work. 3 Illuminated oven interior. 4 Selected screw driver with largest grip, and correct phillips bit. 5 Undid two screws holding element to back wall of oven. 6 Gently pulled element towards front of oven to expose spade connectors to internal wiring. 7 Separated connectors and removed element. 8 Replaced with new element by retracing steps 7 through 1. 9 Success! Two difficulties: A. The retaining screws were stuck with age, and required a large torque to release. B. Similarly the spade connectors were stuck and required care to separate without damaging the wiring.
Read more...
- Fix Number
- FIX340571
- Manufacturer Part Number
- 330031
Fixes these symptoms
- Element will not heat
- See more...
Installation Instructions
Doris from Skoke, IL
Elements heat sporatically
I followed the steps in the instructions which were very easy, once the electric power was turned off to the range. I replaced 2 burner plug in blocks in less than 30 minutes. I am embarrassed to say that these burners have not been functional for almost 3 years. I thought that I could not work with electric. Just make sure you have the tools on hand and read the instructions first. I am a mid-50's female, if I can do this so can anyone else!
Read more...
- Fix Number
- FIX11742543
- Manufacturer Part Number
- WP4449259
- Fix Number
- FIX12728515
- Manufacturer Part Number
- W11373838
Fixes these symptoms
- Tray won’t turn
- See more...
Installation Instructions
elizabeth from albuquerque, NM
with wet hands, I carried the microwave's cooking tray to the sink, and dropped it. Bad move. It broke into four pieces.
I very carefully opened the excellent packing, with dry hands, extracted the glass tray, and put it into the microwave.
Read more...
- Fix Number
- FIX11756138
- Manufacturer Part Number
- WPW10545255
Fixes these symptoms
- Door won’t open after self cleaning cycle
- Touchpad does not respond
- Will Not Start
- See more...
- Fix Number
- FIX385132
- Manufacturer Part Number
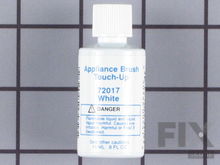
- 72017
Installation Instructions
Al from Cape Coral, FL
No heat when trying to dry clothes .
Followed instructions on your videos. Everything went as planned and the dryer works like new....
Read more...
- Fix Number
- FIX11748765
- Manufacturer Part Number
- WPW10131825
Fixes these symptoms
- Element will not heat
- Little to no heat when baking
- Oven is too hot
- See more...
Installation Instructions
Alison from Beaverton, OR
The range doesn't maintain constant heat and doesn't know the accurate temperature
Followed the excellent instructions, but it didn't work :(I think the control panel is bad.
Read more...
- Fix Number
- FIX11766760
- Manufacturer Part Number
- W10909479
Installation Instructions
Michael from Lake Worth, FL
element mounting bracket broke (i broke it)
Hold clip 90degrees to finished position, slide in slot (very brittle! Do not force! ) rotate into final position. Your done!
Read more...
Appliance Type
Related Pages
- KitchenAid Microwave Oven Combo Doors
- KitchenAid Microwave Oven Combo Elements and Burners
- KitchenAid Microwave Oven Combo Hardware
- KitchenAid Microwave Oven Combo Hinges
- KitchenAid Microwave Oven Combo Lights and Bulbs
- KitchenAid Microwave Oven Combo Racks
- KitchenAid Microwave Oven Combo Seals and Gaskets
- KitchenAid Microwave Oven Combo Switches
- KitchenAid Microwave Oven Combo Trim


