Microwave Oven Combo Parts
Find Parts Fast
Guaranteed Fit
Repair Videos

Popular Microwave Oven Combo Parts
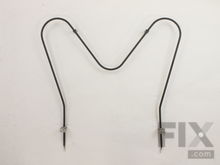
- Fix Number
- FIX438018
- Manufacturer Part Number
- 316075103
Fixes these symptoms
- Element will not heat
- Little to no heat when baking
- Little to no heat when broiling
- See more...
Installation Instructions
Werkheiser from Saylorsburg, PA
Bake element broke
Extremely easy. I unscrewed two screws and pulled out old element and plugged in the new one. Pushed back in and screwed the screws back in. That's it
Read more...
- Fix Number
- FIX471605
- Manufacturer Part Number
- 5304409888
Fixes these symptoms
- Element will not heat
- Little to no heat when baking
- Little to no heat when broiling
- See more...
- Fix Number
- FIX437595
- Manufacturer Part Number
- 316048413
Fixes these symptoms
- Element will not heat
- See more...
Installation Instructions
Mike from Buffalo, NY
Replaced accessories for top of electric range
I was simple. Using this site online afforded me the opportunity to conveniently replace accessories that were in bad shape. I will always use this site for my self-installation needs in the future. Mike , NY
Read more...
- Fix Number
- FIX437596
- Manufacturer Part Number
- 316048414
Fixes these symptoms
- Element will not heat
- See more...
Installation Instructions
Mike from Buffalo, NY
Replaced accessories for top of electric range
I was simple. Using this site online afforded me the opportunity to conveniently replace accessories that were in bad shape. I will always use this site for my self-installation needs in the future. Mike , NY
Read more...
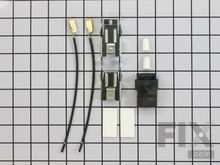
- Fix Number
- FIX470125
- Manufacturer Part Number
- 5303935058
Fixes these symptoms
- Element will not heat
- Oven not heating evenly
- Will Not Start
- See more...
Installation Instructions
SHIRLEY O from boxborough, MA
burner would not heat
removed burners, cut wires to each burner, installed new wires from terminal block kit. reinstalled surface element. Followed directions from video located at site of the ordered items
Read more...
- Fix Number
- FIX2376034
- Manufacturer Part Number
- 8206232A
Installation Instructions
Mark from North East, PA
Bulb burnt out
Removed the screw holding the bulb cover replaced the bulb. Reinstalled the cover and screw. Remove dirty grease filter replaced with new grease filter.
Read more...
- Fix Number
- FIX884734
- Manufacturer Part Number
- 8009
Installation Instructions
Helen from Quincy, MA
lightbulb in refrigerator went out
Removed plastic shield on top of refrigerator. Removed old bulb.. Replaced new bulb. Reinstalled plastic shield. Voila!
Read more...
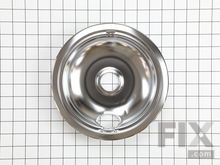
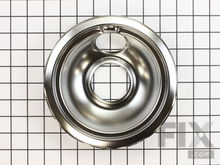
- Fix Number
- FIX11750107
- Manufacturer Part Number
- WPW10196405
Fixes these symptoms
- Element will not heat
- See more...
Installation Instructions
Henry from St Louis, MO
Replace old drip Bowls
Remove heating elements, remove old drip bowl, install new drip bowls replace heating elements.
Read more...
- Fix Number
- FIX434227
- Manufacturer Part Number
- 3051163
Fixes these symptoms
- Door won’t close
- See more...
Installation Instructions
Nelson E. Holley from Pottsville, PA
- Fix Number
- FIX12751166
- Manufacturer Part Number
- 316538904
Installation Instructions
Chris from Lillington, NC
Broken bake element & light bulb
Turned of the power at the fuse box as the oven was hard wired to the electrical source and then removed the old element via the screws at the back of the oven. Disconnected the wires from the element and then reconnected those to the new element. Screwed the element base to the back wall of the oven and then replaced the light bulb.
Read more...
Brands
- Admiral Microwave Oven Combo Parts
- Amana Microwave Oven Combo Parts
- Caloric Microwave Oven Combo Parts
- Electrolux Microwave Oven Combo Parts
- Frigidaire Microwave Oven Combo Parts
- General Electric Microwave Oven Combo Parts
- Gibson Microwave Oven Combo Parts
- Hardwick Microwave Oven Combo Parts
- Hotpoint Microwave Oven Combo Parts
- Jenn-Air Microwave Oven Combo Parts
- Kenmore Microwave Oven Combo Parts
- KitchenAid Microwave Oven Combo Parts
- Litton Microwave Oven Combo Parts
- Magic Chef Microwave Oven Combo Parts
- Maytag Microwave Oven Combo Parts
- Roper Microwave Oven Combo Parts
- Tappan Microwave Oven Combo Parts
- Whirlpool Microwave Oven Combo Parts
Related Pages
- Microwave Oven Combo Brackets and Flanges
- Microwave Oven Combo Caps and Lids
- Microwave Oven Combo Circuit Boards and Touch Pads
- Microwave Oven Combo Doors
- Microwave Oven Combo Drawers and Glides
- Microwave Oven Combo Drip Bowls
- Microwave Oven Combo Ducts and Vents
- Microwave Oven Combo Electronics
- Microwave Oven Combo Elements and Burners
- Microwave Oven Combo Fans and Blowers
- Microwave Oven Combo Filters
- Microwave Oven Combo Fuses
- Microwave Oven Combo Glass Trays and Supports
- Microwave Oven Combo Handles
- Microwave Oven Combo Handles and Latches
- Microwave Oven Combo Hardware
- Microwave Oven Combo Hinges
- Microwave Oven Combo Hoses and Tubes
- Microwave Oven Combo Insulation
- Microwave Oven Combo Knobs
- Microwave Oven Combo Latches
- Microwave Oven Combo Lights and Bulbs
- Microwave Oven Combo Motors
- Microwave Oven Combo Panels
- Microwave Oven Combo Racks
- Microwave Oven Combo Seals and Gaskets
- Microwave Oven Combo Sensors
- Microwave Oven Combo Springs and Shock Absorbers
- Microwave Oven Combo Switches
- Microwave Oven Combo Thermostats
- Microwave Oven Combo Trays and Shelves
- Microwave Oven Combo Trim
- Microwave Oven Combo Wire Plugs and Connectors
Popular Microwave Oven Combo Models
- LMV1680ST ((CSBELGA)) Lg Lmv1680st / Csbelga Microwave Oven
- ME18H704SFS ((AA-00)) Samsung Me18h704sfs/Aa-00 Microwave/Hood Combo
- ME18H704SFS ((AA-01)) Samsung Me18h704sfs/Aa-01 Microwave/Hood Combo
- LMV1813ST ((00)) Lg Lmv1813st/00 Microwave/Hood Combo
- LMV1680WW ((CWHELGA)) Lg Lmv1680ww / Cwhelga Microwave Oven
- KEMS308SSS00
- KEMC308KSS01
- KEMC308KSS0
- SCB1001KSS01 Counter Top
- KEMS309BSS00
- KEMS308SSS04
- KEMC308KSS04
- SMH1816S ((XAA-00)) Samsung Smh1816s/Xaa-00 Microwave/Hood Combo
- LMH2016ST ((01)) Lg Lmh2016st/01 Microwave Oven
- SCB2001FSS02 Counter Top
- KEMS308SSS05
- YKEMC308KM01
- GMC305PRS01 Wall, Built-in, Electric
- SMH9207ST ((XAA-00)) Samsung Smh9207st/Xaa-00 Built-In Microwave Oven
- SMH9207ST ((XAA-01)) Samsung Smh9207st/Xaa-01 Built-In Microwave Oven


