Crosley Parts

Crosley Appliance Parts
Shop By Appliance Type

Popular Crosley Parts

$42.47
In Stock
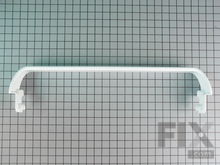
Door Shelf Retainer Bar
★★★★★
★★★★★
1 Review
Fix Number FIX734935
Manufacturer Part Number 240534901
This is a genuine door shelf retaining bar for a refrigerator. It attaches to the inside of the door on the refrigerator and helps to secure items placed on the shelf. It is made of white plastic and can be easily installed without the use of tools. Start by making sure the projection on the inner door panel fits into the recessed area at the top of the shelf retainer bar. Once they are lined up, press it into place until you hear a snap. This part measures approximately 25-inches wide, 3-inches high, and 5-inches deep. If it breaks, cracks or warps over time, it will need to be replaced. This part is sold as an individual part. We recommend taking this opportunity to inspect the other shelf retaining bars for damage in case they also need to be replaced at the same time.
Fixes these symptoms
Installation Instructions
Kathleen from Parsippany, NJ
Needed to replace a broken bottom door shelf retainer bar on our older fridge.
I took the shelf retainer bar out of the shipping box, looked at the middle shelf to see how the bar sits on the brackets, and put it on. Took about 2 minutes. No tools needed. Done! Easy peasy! Read more...
$7.70
In Stock
Light Bulb - 40W
★★★★★
★★★★★
2 Reviews
Fix Number FIX884734
Manufacturer Part Number 8009
This is a genuine OEM 40-Watt replacement light bulb that is compatible with various types of appliances. It has a frosted glass bulb with a standard metal socket base, making it easy to screw and unscrew by hand to replace. It is designed to tolerate extreme temperatures, which is why it is commonly used to light the inside of refrigerators and ovens. Depending on the appliance and location of the bulb, disconnecting the power is recommended. This bulb is sold individually.
Installation Instructions
Helen from Quincy, MA
lightbulb in refrigerator went out
Removed plastic shield on top of refrigerator. Removed old bulb.. Replaced new bulb. Reinstalled plastic shield. Voila! Read more...
$19.73
In Stock
Light Bulb
Fix Number FIX12751166
Manufacturer Part Number 316538904
Clear, 120 Volt, 40 Watt.
Installation Instructions
Chris from Lillington, NC
Broken bake element & light bulb
Turned of the power at the fuse box as the oven was hard wired to the electrical source and then removed the old element via the screws at the back of the oven. Disconnected the wires from the element and then reconnected those to the new element. Screwed the element base to the back wall of the oven and then replaced the light bulb. Read more...
$48.78
In Stock
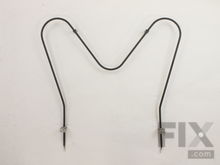
Oven Bake Element
★★★★★
★★★★★
10 Reviews
Fix Number FIX438018
Manufacturer Part Number 316075103
This genuine OEM bake element is located on the bottom of the oven cavity to supply heat for baking. The approximate size is 19-1/2 inches wide by 18-1/2 inches long and has 3-1/2 inch inserts. The element terminals are male quarter inch spade connectors and have push-on wire terminals. If your oven is not heating evenly, the element will not heat, or there is little to no heat when baking, you may need to replace the element. Please remember to disconnect the power to your oven before you start your repair. Next, remove the 2 screws securing the old element, pull it out, and discard. Connect the new element prongs where the old element fit and screw it back in place. This is a very simple repair that anyone can do.
Fixes these symptoms
  • Element will not heat
  • Little to no heat when baking
  • Little to no heat when broiling
  • See more...
Installation Instructions
Werkheiser from Saylorsburg, PA
Bake element broke
Extremely easy. I unscrewed two screws and pulled out old element and plugged in the new one. Pushed back in and screwed the screws back in. That's it Read more...
$50.38
In Stock
Door Shelf Retainer Bar
★★★★★
★★★★★
3 Reviews
Fix Number FIX734936
Manufacturer Part Number 240534701
This middle shelf retainer bar attaches to the inside of the refrigerator door and helps to contain items on the shelf inside your appliance, like condiments and small containers. Its approximate size is 26 inches long, 3.5 inches tall, and made of white durable plastic. This part can start to wear or break over time, in which case it should be replaced. This is a beginner repair, that will not take any time at all. Start by removing the old part by pulling the tabs to release it. To install your new shelf, line it up with the shelf indents over the tabs, and gently press it down to lock in place. This is an OEM replacement part that is sold individually.
Fixes these symptoms
Installation Instructions
Gerard from Bayville, NY
door shelf retainer bar cracked in half
lifted each side of retainer bar off, slid new bar over moulded nubs on door, 123 done Read more...
$17.19
In Stock
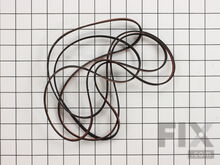
Multi Rib Belt - 92-1/4"
★★★★★
★★★★★
17 Reviews
Fix Number FIX346995
Manufacturer Part Number 341241
This multi rib belt is an OEM replacement part for a dryer. It attaches to the drum, idler pulley, and motor pulley, and is responsible for spinning the drum. Over time, the belt can become frayed, brittle, and inflexible. If you can hear the motor running, but the drum does not turn, it is likely that the belt is broken. Other symptoms of a broken multi rib belt include unusual noises, failing to start, no heat, a burning smell, and an unresponsive touchpad. Depending on the model, you will find the belt by looking behind the front panel or under the main top of the dryer. This belt is 1/4-inches wide, has a length of 92-1/4-inches, and has four ridges and three groves on the belt. Each belt is sold separately.
Fixes these symptoms
  • Drum Not Spinning
  • Heat stays on after drum has stopped
  • Noisy
  • See more...
Installation Instructions
carolyn from phila, PA
not spinning
follow the vidio Read more...
$111.16
In Stock
Refrigerator Crisper Pan
★★★★★
★★★★★
1 Review
Fix Number FIX429854
Manufacturer Part Number 240337103
This authentic replacement crisper pan, also known as a vegetable drawer, inserts into the refrigerator crisper area. It is used to hold produce and maintain an ideal temperature to help preserve them as long as possible. The pan is clear plastic and measures roughly 11 inches deep, 22 inches long, and is sold individually.
Fixes these symptoms
Installation Instructions
Rosemarie from Pioneer, CA
renter ruined the crisper drawers and the bottom shelf.
open refrigerator removed old cracked pieces, and cleaned glass self. installed new parts in place. Took less than 5 minutes and it is much better. Read more...
$157.25
In Stock
Refrigerator Ice Maker Assembly
★★★★★
★★★★★
5 Reviews
Fix Number FIX12364147
Manufacturer Part Number 241798231
This is a genuine OEM ice maker assembly for your refrigerator. The ice maker makes eight cubes at a time, by filling the mold with water from the inlet valve, freezing the water until the cubes are formed, and then ejecting them into the storage bucket. This process will repeat until the ice bucket is full. If your device is not making ice cubes, the ice maker assembly may need to be replaced. Please ensure that you disconnect the power and water supply to your fridge before beginning this repair. This kit includes the fill cup, a four-pin wire harness adapter, and tube.
Fixes these symptoms
  • Ice maker not making ice
  • Ice maker won’t dispense ice
  • Leaking
  • See more...
Installation Instructions
Benedict from Simsbury, CT
Ice maker stopped making ice
Loosened 2 screws on left side freezer wall. Disconnected wire harness. Took out ice maker. Made sure screws extended far enough out to fit the new ice maker over them. Connected the wire harness. Put ice maker onto the 2 screws. Tightened the screws. Within a few hours we had ice. NOTE: use a mirror or you will fish blindly trying to find and tighten the screws. With the mirror, it was easy. Read more...
$11.88
In Stock
Crisper Cover Support - Front
Fix Number FIX2358880
Manufacturer Part Number 241993101
If opening and closing your refrigerator is difficult, it could be due to a damaged or warped crisper cover front support. This part keeps the crisper shelf in place and mounts to the inside cabinet wall. Sold individually, this part is white in color, measures approximately 1 inch in diameter, and can be used for the front and rear support. The installation of this part is considered easy and should only take a few minutes. You will need a small flat blade screwdriver, putty knife, and soft hammer. Take the crisper and shelf out of the refrigerator first. To remove the old part, start by pushing the locking pin into the interior of the cabinet using the screwdriver, pull the support out with the putty knife. If taking out the pin is difficult, use a flat blade screwdriver to push it down and out of sight, this will not harm your refrigerator. Remove the pin and attach the new support, using a soft hammer to lock the new pin in place.
Fixes these symptoms
Installation Instructions
Michelle from Cypress, TX
Crisper cover support broke
I watched the video you had on your website---really easy-you guys ROCK! Read more...
$35.37
In Stock
Lower Spray Arm
★★★★★
★★★★★
4 Reviews
Fix Number FIX12585623
Manufacturer Part Number 5304517203
This is a single lower spray arm found in dishwashers to spray water and detergent vigorously over the dishes. This spray arm is made of plastic, so can warp or crack with time. The holes in the spray arm can get clogged with debris, so it should be cleaned every so often. If it is beyond cleaning or damaged, it will need to be replaced. If the holes are clogged, this can sometimes mean there is a problem with the filter system, so it is a good idea to inspect this as well. For this repair, start by turning off the water supply to the dishwasher. Pull the lower rack out of the dishwasher and out of the way. Remove the lower wash arm. Using a flathead screwdriver, push the small locking tabs located on each side at the bottom of the spray arm. You should now be able to easily pull the spray arm out of the dishwasher. Align the new lower wash arm and push it down to secure it in place. Make sure it can spin freely and is not making contact with the heating element. Place the lower dishrack back into the appliance and close the door.
Fixes these symptoms
  • Leaking
  • Noisy
  • Not cleaning dishes properly
  • See more...
Installation Instructions
Leesa from Clarksburg, WV
Took lower stray arm off because of draining issues, put back together and arm melted after starting.
The reviews before mine helped A LOT!! First of all, It has everything to do with making sure that when the arm is installed that it is turned until it clicks/locks in. This is why my arm melted when I put it back together the first time. I read the reviews before I purchased and that was really the only way I knew how to repair the piece. It does not come with instructions. Read more...

Appliance Type

Popular Crosley Models