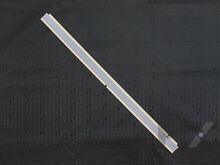
Crosley Dishwasher Parts

Crosley Appliance Parts

Popular Crosley Dishwasher Parts

Lower Spray Arm
$35.37
In Stock
★★★★★
★★★★★
4 Reviews
Fix Number
FIX12585623
Manufacturer Part Number
5304517203
This is a single lower spray arm found in dishwashers to spray water and detergent vigorously over the dishes. This spray arm is made of plastic, so can warp or crack with time. The holes in the spray arm can get clogged with debris, so it should be cleaned every so often. If it is beyond cleaning or damaged, it will need to be replaced. If the holes are clogged, this can sometimes mean there is a problem with the filter system, so it is a good idea to inspect this as well. For this repair, start by turning off the water supply to the dishwasher. Pull the lower rack out of the dishwasher and out of the way. Remove the lower wash arm. Using a flathead screwdriver, push the small locking tabs located on each side at the bottom of the spray arm. You should now be able to easily pull the spray arm out of the dishwasher. Align the new lower wash arm and push it down to secure it in place. Make sure it can spin freely and is not making contact with the heating element. Place the lower dishrack back into the appliance and close the door.
Fixes these symptoms
  • Leaking
  • Noisy
  • Not cleaning dishes properly
  • See more...

Installation Instructions

Leesa from Clarksburg, WV
Took lower stray arm off because of draining issues, put back together and arm melted after starting.
The reviews before mine helped A LOT!! First of all, It has everything to do with making sure that when the arm is installed that it is turned until it clicks/locks in. This is why my arm melted when I put it back together the first time. I read the reviews before I purchased and that was really the only way I knew how to repair the piece. It does not come with instructions. Read more...
★★★★★
★★★★★
3 Reviews
Fix Number
FIX9495545
Manufacturer Part Number
809006501
This dishwasher door gasket is attached to the bottom of the door, creating a strong seal between the tub and the outer edge of the door. This seal is prone to wear and tear due to its constant exposure to water, detergent, and food particles. If the gasket appears cracked, broken, or you notice a leak coming from the door, it will need to be replaced immediately. This gasket measures approximately 23 inches long. For this simple repair, no tools are necessary. Open the dishwasher door and remove the bottom rack. The gasket is located right along the bottom of the door, molded inside the channel. It is held in place in the groove across the bottom. Remove the old gasket by pulling it out with your hands. Take your new silicone gasket and line it up so the notch fits into the groove and slide it in place until it is secure. Reinstall the lower dishrack. We recommend leaving the door closed for a few hours to ensure the gasket is sealed tightly.
Fixes these symptoms
  • Door latch failure
  • Door won’t close
  • Leaking
  • See more...

Installation Instructions

Everette from Hardyville, VA
Dishwasher leaking around bottom of door
Watched the video, easy replacement. Read more...
Latch
$42.62
In Stock
Fix Number
FIX16218716
Manufacturer Part Number
5304525218
This is an authentic OEM door latch assembly for your dishwasher. The latch has a switch that uses an on-off mechanism which prevents the dishwasher from running when the door is opened. If your dishwasher will not start, the door will not close or latch properly, you may need to replace the latch assembly. Please be sure to disconnect the power supply to your dishwasher before beginning this repair.
Fixes these symptoms
  • Door latch failure
  • Door won’t close
  • Will Not Start
  • See more...

Installation Instructions

Sylvain from Eagan, MN
the latch broke , motor would run when door was open
I ordered the part Monday night at approximately 10 pm , the part arrived Thursday afternoon.Very fast service original Frigidaire electrolux part .Amazing service!!! Read more...
Fix Number
FIX8260227
Manufacturer Part Number
154827601
The door gasket provides a watertight seal between the tub and the door, to keep water from leaking out of your dishwasher. If your dishwasher is leaking you may need to replace the door gasket. This gray door gasket is made of rubber and measures approximately 73 inches. For this repair, open the dishwasher door and remove the lower dish tray. Use your hands to pull out the old gasket. Clean the channel with a rag. Press the new gasket in place so it sits inside the groove in the door. Keep the door closed tightly for a few hours to ensure a strong seal is made.
Fixes these symptoms
  • Door latch failure
  • Door won’t close
  • Leaking
  • See more...

Installation Instructions

Patrick from Pleasanton, CA
leak from door
I ordered the top 3 parts in terms of probability of solving the problem (water inlet valve, tub gasket, and bottom door gasket). I installed all 3 and it did not solve the door leak. Then I realized that the bottom door gasket had come out (in other words, I had not installed it properly). I reinstalled the bottom door gasket (a critical point is that it has to be *pressed in* firmly -- there should be some resistance), and it worked. Note that the bottom door gasket is a hybrid between a true seal and a splash guard. The notch in the middle is designed to drain water from the door back into the tub. Because of that notch opening, there is sputtering and splashing at various points of the wash cycle. This appears to be by design, and those splashes result in water being absorbed by the insulating foam. Thank you to the previous submission/posting authors, as this is what clued me in. Read more...
Rack Track Stop
$7.71
In Stock
★★★★★
★★★★★
2 Reviews
Fix Number
FIX11746591
Manufacturer Part Number
WP8565925
This is a single rack track stop clip used to prevent the upper dish rack from sliding all the way out of the dishwasher. It is made of gray plastic and can wear with time. This is an easy repair that should not take very long to complete. Start by opening the dishwasher door, depress the tabs to remove both the front stop clips and remove the upper dish rack from the appliance. Now, using your small flat head screwdriver, release the retaining tab to remove the rear stop track that you are replacing, and pull the clip up to remove it. Install the new clip by inserting it into the support rail from the top and press it down to secure it in place.
Fixes these symptoms
  • Door latch failure
  • Door won’t close
  • Not cleaning dishes properly
  • See more...

Installation Instructions

Richard from Austin, TX
Wheels on original upper rack adjust fell off and end stops would not stay on.
Removed old end stops. Pulled rack out of machine. Carefully removed old adjusters. Snapped in new adjusters. Slid rack back into the runners. Clipped in the new end stops. Done. Read more...
Fix Number
FIX16745479
Manufacturer Part Number
5304532229
This is a single rack roller kit for your dishwasher. This kit comes with one axel/clip, and one wheel/roller. The kit is used for the lower dishrack, and allows your rack to move freely. You will need two kits for your upper and lower rack. We recommend replacing this part in pairs for an even wear. Lower rack roller and bracket assembly, grey. Wheel has been updated. If wheel pictured is not like old one, you may need to replace all wheels.
Fixes these symptoms

Installation Instructions

Arch from Scottville, NC
wheel on lower rack broken
I found it easy to order parts from you. The part I ordered was just a clip-on wheel for the lower rack of a dishwasher and did not need instructions. Read more...
SPRAY ARM
$41.25
In Stock
★★★★★
★★★★★
2 Reviews
Fix Number
FIX12705424
Manufacturer Part Number
5304518927
If the Spray Arm in the bottom of your dishwasher becomes damaged or broken, it is important to replace it as soon as possible. Broken spray arms can result in your dishes not being cleaned properly, or cause water to leak onto your floors while running. Damage commonly occurs due to the spray arm melting; it can come loose during the wash cycle, and rests against the heating element. The plastic then melts, and the arm either does not fit back into place or the holes become distorted which causes water to spray in different directions. Replacing this part is easy, and tools should not be required. First remove the lower dish rack to access the spray arm, pull out the broken piece, and pop the new one into place. Once you put the dish rack back in, you will be ready to go! Spray arms for the upper rack are sold separately.
Fixes these symptoms
  • Leaking
  • Noisy
  • Not cleaning dishes properly
  • See more...

Installation Instructions

Didi from Grand Rapids, MI
The lower sprayer arm had been knocked off and had melted against the heating coil.
I entered the model number of my dishwasher and scrolled down until I found the picture that matched the damaged part. The video that accompanied the part listing showed me how to wriggle the arm until it snapped in place. I offered the part, followed the video instructions, and everything works again! Read more...
Dishwasher Door Bottom Seal
$32.30
In Stock
Fix Number
FIX11703834
Manufacturer Part Number
5304500204
If water is leaking from your dishwasher, there may be an issue with your door bottom seal. Also known as a gasket, this strip for the bottom of the door helps to seal the gap between the opening of the dishwasher tub and the outer edge of the door. Over time they can deteriorate, and the seal will no longer be watertight. To replace the gasket, you will need to remove the bottom rack from the dishwasher, and then use a pair of needle nose pliers to remove the old strip. Then use a flat blade screwdriver to clean any debris that may be lodged into the groove. The new gasket can now be inserted, ensuring that it is even across the bottom of the door. After the new part is installed, keep the dishwasher door shut for several hours to help set and form the new seal.
Fixes these symptoms
★★★★★
★★★★★
21 Reviews
Fix Number
FIX11748729
Manufacturer Part Number
WPW10130695
This kit includes the black plastic handle (white handle is no longer available from the manufacturer), the latch, and two switches. The door handle and latch assembly is a simple on/off mechanism that prohibits the dishwasher from operating when the door is open. Symptoms of a faulty door handle and latch assembly include the door not latching properly, being unable to close the door, leaking during operation, and the dishwasher not starting. It is common for the door latch to break down due to material fatigue and/or continually slamming or opening the door quickly. This part measure roughly 5.5 inches wide, 1.5 inches high and 2.5 inches deep. This OEM kit is sold as a single part.
Fixes these symptoms
  • Door latch failure
  • Door won’t close
  • Leaking
  • See more...

Installation Instructions

David from Martinsville, VA
Handle broke
Put new one in place and tightened screws. Very easy Read more...
★★★★★
★★★★★
2 Reviews
Fix Number
FIX8260087
Manufacturer Part Number
W10518394
This is a manufacturer-approved heating element and 2 washers. If the dishes in your dishwasher are not drying or the water in the dishwasher is not getting hot, it may be due to a failed heating element. The heating element is not intended to heat the water that enters the appliance but is designed to maintain the heat of the water that enters. This part is located on the bottom of the appliance. Be sure to disconnect the power to the appliance before you begin this repair. Start this repair by disconnecting the wires from the bottom of the element in the back, remove the plastic nuts holding it in place, remove the element, and repeat these steps in reverse order to install the new part. For this beginner repair, you will need a screwdriver, wrench set, and it should be completed in less than 30 minutes.
Fixes these symptoms
  • Leaking
  • Not cleaning dishes properly
  • Not draining
  • See more...

Installation Instructions

Jesse from Mandan, ND
not drying or cleaning dishes
Turned off breaker at power source. Turned off water supply valve. Disconnected water supply hose and drain hose. Removed base panel with 1/4'' nut driver. Removed power box cover screw with 1/4'' nut driver, turned off wire nuts connecting power cable and used phillips screw driver to remove ground. Removed 2 phillips screw under front of counter holding dishwasher in place. rolled dishwasher out of cabinet and layed face down on towels. Pulled two wires connected to the element marking position prior. Then removed two heater element nuts with adjustable wrench. Tipped dishwasher up, opened door and lifted out lower rack, underlower rack is heating element and lifted out. Reverse procedure to install. Read more...

Appliance Type

Related Pages

Popular Crosley Dishwasher Models