Amana Parts

Amana Appliance Parts

Popular Amana Parts

★★★★★
★★★★★
12 Reviews
Fix Number
FIX3406971
Manufacturer Part Number
W10195416
This OEM gray plastic lower dishrack wheel assembly allows the rack to slide in and out of the dishwasher with ease. It measures roughly 3 by 6 inches. If it breaks or becomes damaged it may make sliding in and out feel difficult. This is a normal wear and tear item and will need to be replaced when this happens. It attaches directly to the dishrack and is a quick and easy repair. There are 4 dishrack wheel assemblies in total on your appliance, so this is a good time to inspect all 4, as this part is sold individually. To repair, open the dishwasher door and pull out the lower dishrack. Next, push the tab from both sides and it should pop out. To install the new wheel assembly, place it on the rack and make sure the caps overlap the wire from the inside before you clip it in place by pushing the wheel.
Fixes these symptoms
  • Door latch failure
  • Door won’t close
  • Leaking
  • See more...

Installation Instructions

Anthony from Helena, MT
Wheels and hubs have melted and broken frequently
Easy to install. Snap right on to lower basket. Read more...
Rack Track Stop
$7.71
In Stock
★★★★★
★★★★★
2 Reviews
Fix Number
FIX11746591
Manufacturer Part Number
WP8565925
This is a single rack track stop clip used to prevent the upper dish rack from sliding all the way out of the dishwasher. It is made of gray plastic and can wear with time. This is an easy repair that should not take very long to complete. Start by opening the dishwasher door, depress the tabs to remove both the front stop clips and remove the upper dish rack from the appliance. Now, using your small flat head screwdriver, release the retaining tab to remove the rear stop track that you are replacing, and pull the clip up to remove it. Install the new clip by inserting it into the support rail from the top and press it down to secure it in place.
Fixes these symptoms
  • Door latch failure
  • Door won’t close
  • Not cleaning dishes properly
  • See more...

Installation Instructions

Richard from Austin, TX
Wheels on original upper rack adjust fell off and end stops would not stay on.
Removed old end stops. Pulled rack out of machine. Carefully removed old adjusters. Snapped in new adjusters. Slid rack back into the runners. Clipped in the new end stops. Done. Read more...
★★★★★
★★★★★
18 Reviews
Fix Number
FIX346995
Manufacturer Part Number
341241
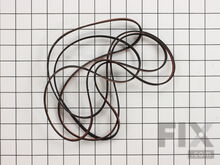
This multi rib belt is an OEM replacement part for a dryer. It attaches to the drum, idler pulley, and motor pulley, and is responsible for spinning the drum. Over time, the belt can become frayed, brittle, and inflexible. If you can hear the motor running, but the drum does not turn, it is likely that the belt is broken. Other symptoms of a broken multi rib belt include unusual noises, failing to start, no heat, a burning smell, and an unresponsive touchpad. Depending on the model, you will find the belt by looking behind the front panel or under the main top of the dryer. This belt is 1/4-inches wide, has a length of 92-1/4-inches, and has four ridges and three groves on the belt. Each belt is sold separately.
Fixes these symptoms
  • Drum Not Spinning
  • Heat stays on after drum has stopped
  • Noisy
  • See more...

Installation Instructions

carolyn from phila, PA
not spinning
follow the vidio Read more...
Dryer Thermal Fuse
$19.63
In Stock
★★★★★
★★★★★
15 Reviews
Fix Number
FIX11741460
Manufacturer Part Number
WP3392519
The dryer thermal fuse, also sometimes referred to as the thermal cut off or temperature fuse, is a 2 by 1/2-inch, white, plastic safety mechanism that halts the flow of electricity to the motor circuit when a dryer overheats. If the fuse is missing or broken, your dryer will not start. A thermal fuse fails when the exhaust temperature exceeds the fuse rating, that is when the temperature rises above the temperature that the fuse is intended to manage. This can be caused by the heating element shorting, a regulating thermostat or thermistor failure, or with a partially restricted exhaust vent. The fuse attaches to the blower wheel housing. It must be replaced when there is no longer continuity between the terminals. This is a one-time fuse, meaning it cannot be re-set. The replacement part features two 3/16-inch terminals. While performing this repair, we recommend checking to make sure all vents are cleared and vacuumed. This OEM part is sold individually.
Fixes these symptoms
  • Heat stays on after drum has stopped
  • Not Heating
  • Too hot
  • See more...

Installation Instructions

gary from apex, NC
dryer not heating
Checked the heating element and found a break in the heating coil. Decided to change the thermal fuse and the the cycling thermostat because of the age of the dryer. Read more...
Maintenance Kit
$37.48
In Stock
★★★★★
★★★★★
10 Reviews
Fix Number
FIX373087
Manufacturer Part Number
4392065
This is an authentic drum support roller kit for 29-inch-wide dryers. It includes 1 belt, 2 roller wheels and an idler pulley. The parts in this kit allow the dryer to tumble properly by supporting the drum cylinder. The idler pulley provides the tension needed for a multi-ribbed belt. The belt attaches to the drum, idler pulley, and motor pulley. If these parts are damaged, it could cause loud noises such as squeaking and squealing while the drum is turning. These are normal wear parts and are best replaced as a kit to ensure optimal performance.
Fixes these symptoms
  • Drum Not Spinning
  • Marks left on clothes
  • Noisy
  • See more...

Installation Instructions

Steve from South Lake Tahoe, CA
Defective heater element dryer still runs.
Expect to spend a lot of time on your knees. Unplug appliance. Remove dryer hose. remove back cover 4-6 7mm bolts. Unplug dryer heater element connections 2 blade or pin connectors. Unbolt element cover and remove old element. Label wires. Hopefully the replacement connections match if not go to hardware store. Crimp or better solder on new connectors. Install element in housing and reattach. Clean out all old dirt and lint. check old belt for wear and re-grease drum roller shafts. re-install back cover, hose and plug in. enjoy you just saved $600 Read more...
★★★★★
★★★★★
9 Reviews
Fix Number
FIX334313
Manufacturer Part Number
279838
Sourced directly from the manufacturer, this heating element is an OEM approved replacement part for a variety of dryers and is sold individually. It measures approximately 10.5 inches long, 7.5 inches wide and 2 inches deep. The heating element is the primary source of heat used to dry the clothes in your dryer. This heating element is strung with a coiled wire made of a nickel and chrome alloy. It may need to be replaced if your dryer does not produce heat, if it produces too much heat, or if it will not turn on. If your dryer does not heat, first check for a blown thermal fuse on the blower housing before replacing the heating element. In most cases, the heating element will have a break in the element, making it defective. For this repair you will need a quarter inch nut driver and a pair of needle nose pliers. Start this repair by disconnecting the power and then remove the dryer vent. This repair is done from the back of the appliance with the back panel removed. With the panel removed, this will give you access to the heater element. Your next step is to remove the high-limit thermostat from the housing and remove the two wires from the heater terminals. Now remove the screws securing the element to the housing and slide the element out. Installation of the new part is done in the reverse order.
Fixes these symptoms
  • Heat stays on after drum has stopped
  • Not Heating
  • Too hot
  • See more...

Installation Instructions

gary from apex, NC
dryer not heating
Checked the heating element and found a break in the heating coil. Decided to change the thermal fuse and the the cycling thermostat because of the age of the dryer. Read more...
Refrigerator Ice and Water Filter
$103.96
In Stock
★★★★★
★★★★★
1 Review
Fix Number
FIX11701542
Manufacturer Part Number
EDR1RXD1
Your refrigerator water and ice filter should be replaced at least every 6 months, to prevent water that has an undesirable taste and odor, or if left for too long, can cause leaks and ice maker malfunction. The location of this filter can vary depending on your model. Some common locations to check include the top right corner of the interior compartment, the bottom left grille, or the middle of the interior. This filter is an original manufacturer part and NSF-certified. It has a straightforward, quick-turn installation feature that does not require the use of tools.
Fixes these symptoms
  • Ice maker dispenses too little ice
  • Ice maker not making ice
  • Ice maker won’t dispense ice
  • See more...

Installation Instructions

Marilyn from Darrouzett, TX
Filter needed to be replaced
I opened the small door and observed how the arrows lined up on the bottom of the one in the slot. I pulled the cylinder our and placed the new one with the arrows pointing the same way and pushed it in and closed the small door. Then pushed the reset button until the green light came back. Be sure to take the coverings off the two openings! Read more...
★★★★★
★★★★★
1 Review
Fix Number
FIX11752778
Manufacturer Part Number
WPW10321304
This is a manufacturer-approved refrigerator door shelf bin, also sometimes referred to as the crisper bin. It is sold individually. It is made of clear plastic with a white plastic trim. It is used as a storage shelf for common refrigerator items, such as jars, bottles, cans, and condiments. When this part needs to be replaced it will be visually obvious. Over time, the plastic can sometimes crack or break due to the constant exposure to cold temperature and will need to be replaced. This is a very quick and easy repair that does not require any tools. You will simply lift up and out of place to remove, and slide the new bin onto the tabs, making sure it is level and secure before closing the refrigerator door.
Fixes these symptoms
  • Door won’t open or close
  • Ice maker won’t dispense ice
  • Leaking
  • See more...

Installation Instructions

Evelyn from Birmingham, AL
Changed water filter. No problem. It had never been changed. I had a cracked door bin that kept falling out.
Just turned off water supply. Popped the old filter out inserted the new one. Made sure it was secure. Turned the water supply back on. The self just snapped in place Read more...
Fix Number
FIX11752609
Manufacturer Part Number
WPW10314173
This drum support roller is sold individually. Most dryers require two. The tri-rings are included. This is a drum support roller for a dryer. It is a genuine replacement part. The part includes the drum roller only and does not include the tri-rings. This part is sold separately. Most dryers require two drum rollers. It is recommended to check and replace both drum support rollers at the same time to ensure proper drum rotation and because they often wear at the same rate. The drum support roller holds the drum in the proper position while it spins on the support wheels. If rollers are worn out, they will cause the dryer to be noisy.
Fixes these symptoms

Installation Instructions

JAMES from GREENSBURG, PA
Loud squeaking and squealing
Lint Filter - Removed old lint filter and inserted new lint filter. This is the first time I tried to fix a dryer. A handyman I am not. I found two very useful YouTube videos using basically my model of Kenmore (11067851600). Disassembly/Assembly - here is a difference between Kenmore 29" wide dryers and 27" wide dryers. Mine is 27". My effort was not a smooth as these videos. The bottom front panel's right most clip was quite troublesome. The moisture sensor wire required needle nose pliers to be disconnected and reconnected. The open door sensor was not easy to disconnect. Although with a few special magic words it came apart. The upper front panel was held in place with two T20 Torx screws. I had only had a T15 driver, therefore a trip to Home Depot was required. The first two tri rings were not easily removed, however, on third tri ring it became easier and not damaged. Replacement of tri rings was not troublesome. Support rollers snapped in place easily. However, I did thoroughly clean the housing. It was quite grimy. Actually, while I had the dryer open I cleaned everything including the heating element and electric motor. It now operates quietly. It took me a little over two hours because I am not handy and must take care not to make matters worse plus I thoroughly cleaned everything include scuff marks where the drum rubs. Anyone else probably should have it completed 30-60 minutes easily. Read more...
Light Bulb - 40W
$8.87
In Stock
★★★★★
★★★★★
3 Reviews
Fix Number
FIX2376034
Manufacturer Part Number
8206232A
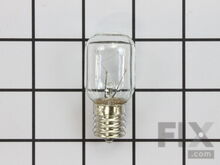
To access the exterior lightbulb, the bottom panel of the microwave will need to be removed. It is secured in place with screws, so will require a Philips screwdriver to remove it. Screw the new light bulb directly into the light socket. If this is the first time you have replaced this light bulb, the old light bulb might be held in place with silicone. This silicone will need to be cut off using either a utility knife or dental floss before removing the light bulb. Once this silicone and old bulb has been removed, the replacement bulb can be screwed in its place.

Installation Instructions

Mark from North East, PA
Bulb burnt out
Removed the screw holding the bulb cover replaced the bulb. Reinstalled the cover and screw. Remove dirty grease filter replaced with new grease filter. Read more...

Appliance Type

Popular Amana Models