Magic Chef Parts

Magic Chef Appliance Parts

Popular Magic Chef Parts

Rack Track Stop
$7.71
In Stock
★★★★★
★★★★★
2 Reviews
Fix Number
FIX11746591
Manufacturer Part Number
WP8565925
This is a single rack track stop clip used to prevent the upper dish rack from sliding all the way out of the dishwasher. It is made of gray plastic and can wear with time. This is an easy repair that should not take very long to complete. Start by opening the dishwasher door, depress the tabs to remove both the front stop clips and remove the upper dish rack from the appliance. Now, using your small flat head screwdriver, release the retaining tab to remove the rear stop track that you are replacing, and pull the clip up to remove it. Install the new clip by inserting it into the support rail from the top and press it down to secure it in place.
Fixes these symptoms
  • Door latch failure
  • Door won’t close
  • Not cleaning dishes properly
  • See more...

Installation Instructions

Richard from Austin, TX
Wheels on original upper rack adjust fell off and end stops would not stay on.
Removed old end stops. Pulled rack out of machine. Carefully removed old adjusters. Snapped in new adjusters. Slid rack back into the runners. Clipped in the new end stops. Done. Read more...
★★★★★
★★★★★
18 Reviews
Fix Number
FIX346995
Manufacturer Part Number
341241
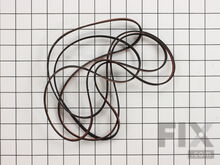
This multi rib belt is an OEM replacement part for a dryer. It attaches to the drum, idler pulley, and motor pulley, and is responsible for spinning the drum. Over time, the belt can become frayed, brittle, and inflexible. If you can hear the motor running, but the drum does not turn, it is likely that the belt is broken. Other symptoms of a broken multi rib belt include unusual noises, failing to start, no heat, a burning smell, and an unresponsive touchpad. Depending on the model, you will find the belt by looking behind the front panel or under the main top of the dryer. This belt is 1/4-inches wide, has a length of 92-1/4-inches, and has four ridges and three groves on the belt. Each belt is sold separately.
Fixes these symptoms
  • Drum Not Spinning
  • Heat stays on after drum has stopped
  • Noisy
  • See more...

Installation Instructions

carolyn from phila, PA
not spinning
follow the vidio Read more...
Dryer Thermal Fuse
$19.63
In Stock
★★★★★
★★★★★
15 Reviews
Fix Number
FIX11741460
Manufacturer Part Number
WP3392519
The dryer thermal fuse, also sometimes referred to as the thermal cut off or temperature fuse, is a 2 by 1/2-inch, white, plastic safety mechanism that halts the flow of electricity to the motor circuit when a dryer overheats. If the fuse is missing or broken, your dryer will not start. A thermal fuse fails when the exhaust temperature exceeds the fuse rating, that is when the temperature rises above the temperature that the fuse is intended to manage. This can be caused by the heating element shorting, a regulating thermostat or thermistor failure, or with a partially restricted exhaust vent. The fuse attaches to the blower wheel housing. It must be replaced when there is no longer continuity between the terminals. This is a one-time fuse, meaning it cannot be re-set. The replacement part features two 3/16-inch terminals. While performing this repair, we recommend checking to make sure all vents are cleared and vacuumed. This OEM part is sold individually.
Fixes these symptoms
  • Heat stays on after drum has stopped
  • Not Heating
  • Too hot
  • See more...

Installation Instructions

gary from apex, NC
dryer not heating
Checked the heating element and found a break in the heating coil. Decided to change the thermal fuse and the the cycling thermostat because of the age of the dryer. Read more...
Maintenance Kit
$37.48
In Stock
★★★★★
★★★★★
10 Reviews
Fix Number
FIX373087
Manufacturer Part Number
4392065
This is an authentic drum support roller kit for 29-inch-wide dryers. It includes 1 belt, 2 roller wheels and an idler pulley. The parts in this kit allow the dryer to tumble properly by supporting the drum cylinder. The idler pulley provides the tension needed for a multi-ribbed belt. The belt attaches to the drum, idler pulley, and motor pulley. If these parts are damaged, it could cause loud noises such as squeaking and squealing while the drum is turning. These are normal wear parts and are best replaced as a kit to ensure optimal performance.
Fixes these symptoms
  • Drum Not Spinning
  • Marks left on clothes
  • Noisy
  • See more...

Installation Instructions

Steve from South Lake Tahoe, CA
Defective heater element dryer still runs.
Expect to spend a lot of time on your knees. Unplug appliance. Remove dryer hose. remove back cover 4-6 7mm bolts. Unplug dryer heater element connections 2 blade or pin connectors. Unbolt element cover and remove old element. Label wires. Hopefully the replacement connections match if not go to hardware store. Crimp or better solder on new connectors. Install element in housing and reattach. Clean out all old dirt and lint. check old belt for wear and re-grease drum roller shafts. re-install back cover, hose and plug in. enjoy you just saved $600 Read more...
★★★★★
★★★★★
9 Reviews
Fix Number
FIX334313
Manufacturer Part Number
279838
Sourced directly from the manufacturer, this heating element is an OEM approved replacement part for a variety of dryers and is sold individually. It measures approximately 10.5 inches long, 7.5 inches wide and 2 inches deep. The heating element is the primary source of heat used to dry the clothes in your dryer. This heating element is strung with a coiled wire made of a nickel and chrome alloy. It may need to be replaced if your dryer does not produce heat, if it produces too much heat, or if it will not turn on. If your dryer does not heat, first check for a blown thermal fuse on the blower housing before replacing the heating element. In most cases, the heating element will have a break in the element, making it defective. For this repair you will need a quarter inch nut driver and a pair of needle nose pliers. Start this repair by disconnecting the power and then remove the dryer vent. This repair is done from the back of the appliance with the back panel removed. With the panel removed, this will give you access to the heater element. Your next step is to remove the high-limit thermostat from the housing and remove the two wires from the heater terminals. Now remove the screws securing the element to the housing and slide the element out. Installation of the new part is done in the reverse order.
Fixes these symptoms
  • Heat stays on after drum has stopped
  • Not Heating
  • Too hot
  • See more...

Installation Instructions

gary from apex, NC
dryer not heating
Checked the heating element and found a break in the heating coil. Decided to change the thermal fuse and the the cycling thermostat because of the age of the dryer. Read more...
Light Bulb - 40W
$8.87
In Stock
★★★★★
★★★★★
3 Reviews
Fix Number
FIX2376034
Manufacturer Part Number
8206232A
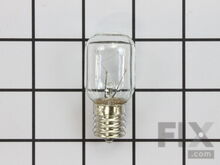
To access the exterior lightbulb, the bottom panel of the microwave will need to be removed. It is secured in place with screws, so will require a Philips screwdriver to remove it. Screw the new light bulb directly into the light socket. If this is the first time you have replaced this light bulb, the old light bulb might be held in place with silicone. This silicone will need to be cut off using either a utility knife or dental floss before removing the light bulb. Once this silicone and old bulb has been removed, the replacement bulb can be screwed in its place.

Installation Instructions

Mark from North East, PA
Bulb burnt out
Removed the screw holding the bulb cover replaced the bulb. Reinstalled the cover and screw. Remove dirty grease filter replaced with new grease filter. Read more...
★★★★★
★★★★★
4 Reviews
Fix Number
FIX11722130
Manufacturer Part Number
EDR4RXD1
This package contains one individual water filter that is NSF-certified, and OEM approved. To ensure that the filter is successfully removing contaminants, it will need to be replaced at least every 6 months or 200 gallons of water. This will ensure tasteless and odor-free water. It has approximate measurements of 2-1/2 inches deep, 1-1/2 inches wide, and 8 inches high. This is a simple installation. This filter is found on the interior of the refrigerator in a drop-down style housing. Pop out the old filter, slide the new filter in place and turn it until it clicks. Be careful not to over-tighten. Close the cover. Run your dispenser to activate the filter and clear out air bubbles. A loud air pressure sound is completely normal. Reset your water filter indicator if applicable.
Fixes these symptoms
  • Fridge too cold
  • Ice maker dispenses too little ice
  • Ice maker not making ice
  • See more...

Installation Instructions

Blaine from Huntley, IL
Needed new h2o filter
Used my hands only...no tools necessary Read more...
★★★★★
★★★★★
8 Reviews
Fix Number
FIX11741405
Manufacturer Part Number
WP3387134
This thermostat is an OEM replacement part for a dryer. It is sold individually. It measures approximately 2-inches by 1.5-inches, is black and silver, and constructed of plastic and metal material. You will find this part attached to the blower wheel housing. Cycling thermostats continually cycle the heating element off and on to maintain a constant inner temperature inside the dryer. This particular cycling thermostat will turn the heating element off once the temperature reaches 155F and cycles back on once the internal temperature drops by 25F. Do not forget to unplug the power to the dryer before you begin this repair. Keep in mind that you will need to pull the dryer out from the wall because this repair will need to be done from the back of the appliance with the back panel removed.
Fixes these symptoms
  • Heat stays on after drum has stopped
  • Not Heating
  • Too hot
  • See more...

Installation Instructions

gary from apex, NC
dryer not heating
Checked the heating element and found a break in the heating coil. Decided to change the thermal fuse and the the cycling thermostat because of the age of the dryer. Read more...
★★★★★
★★★★★
3 Reviews
Fix Number
FIX347627
Manufacturer Part Number
349241T
This is a rear drum support roller kit for your dryer. The 2 rollers come with 4 tri-rings, and 1 palnut. We recommend that you replace both rollers at once. This kit stabilizes the drum cylinder, while letting the drum rotate on the support rollers. If you are having problems with your appliance during tumble mode, or if it is too noisy, you will need this kit. To complete this repair you will need a putty knife, Philips screwdriver and a 5/16 nut driver.
Fixes these symptoms
  • Drum Not Spinning
  • Marks left on clothes
  • Noisy
  • See more...

Installation Instructions

Tyrik from KENNESAW, GA
The roller support wheels were worn down and needed replacing.
Step 1: removed power source.
Step 2: removed screws from lent catcher.
Step 3: removed top lid.
Step 4: removed front panel.
Step 5: removed drum.
Step 6: removed plastic washers.
Step 7: removed old wheels.
Step 8: installed new wheels.
Reversed steps to put everything back.
Read more...
Light Bulb - 40W
$11.73
In Stock
★★★★★
★★★★★
2 Reviews
Fix Number
FIX884734
Manufacturer Part Number
8009
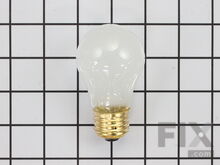
This is a genuine OEM 40-Watt replacement light bulb that is compatible with various types of appliances. It has a frosted glass bulb with a standard metal socket base, making it easy to screw and unscrew by hand to replace. It is designed to tolerate extreme temperatures, which is why it is commonly used to light the inside of refrigerators and ovens. Depending on the appliance and location of the bulb, disconnecting the power is recommended. This bulb is sold individually.

Installation Instructions

Helen from Quincy, MA
lightbulb in refrigerator went out
Removed plastic shield on top of refrigerator. Removed old bulb.. Replaced new bulb. Reinstalled plastic shield. Voila! Read more...

Appliance Type

Popular Magic Chef Models