KitchenAid Range Parts
Find Parts Fast
Guaranteed Fit
Repair Videos


Popular KitchenAid Range Parts
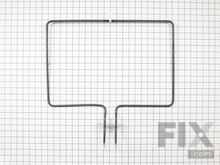
- Fix Number
- FIX11703285
- Manufacturer Part Number
- W10779716
Fixes these symptoms
- Element will not heat
- Little to no heat when baking
- Oven is too hot
- See more...
Installation Instructions
Jefffrey from EATON, OH
Element stopped working
Disconnected power, removed oven pan that covered element, took off back panel of stove that covered the wiring, disconnected the wires, unscrewed bracket in oven. Removed element then did everything in reverse order.
Read more...
- Fix Number
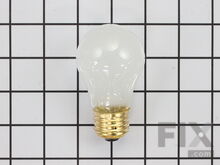
- FIX884734
- Manufacturer Part Number
- 8009
Installation Instructions
Helen from Quincy, MA
lightbulb in refrigerator went out
Removed plastic shield on top of refrigerator. Removed old bulb.. Replaced new bulb. Reinstalled plastic shield. Voila!
Read more...
- Fix Number
- FIX16744717
- Manufacturer Part Number
- W11596211
Fixes these symptoms
- Element will not heat
- Gas igniter glows, but will not light
- Little to no heat when baking
- See more...
Installation Instructions
David T from Salem, OR
bottom oven would not heat up.
ordered the bake igniter and installed it now the oven works fine. all done from the inside of the oven no problem whatsoever.
Read more...
- Fix Number
- FIX11740783
- Manufacturer Part Number
- WP3149400
Fixes these symptoms
- Element will not heat
- Oven is too hot
- Oven not heating evenly
- See more...
Installation Instructions
chris from ABERDEEN, SD
Burner would not heat up and the cook top on light would not turn off.
First turn off breaker. Pull out stove and unplug. There was about 8 screws on the panel on the back side of the control panel. Remove panel. Remove knob on the bad control and there is 2 screws behind knob. Remove those 2 screws and take the new control and remove 1 wire at a time from old switch to new one then put back together.
Read more...
- Fix Number
- FIX11752501
- Manufacturer Part Number
- WPW10308477
Fixes these symptoms
- Element will not heat
- Little to no heat when baking
- Oven is too hot
- See more...
Installation Instructions
john from midland, NC
THE OVEN WAS 10 DEGREES OFF,NOT REACHING PROPER TEMPRETURE.
THE PROBLEM I HAD COULD HAVE BEEN TWO THINGS.SO AT THE PRICE OF THE TWO THINGS WAS A GREAT PRICE.SO I INSTALLED THE TWO PARTS. PULL THE STOVE AWAY FROM THE WALL.MAKE SURE TO UNPLUG THE CORD FROM THE WALL OUTLET.ONLY TOOL YOU NEED IS A PHILLIPS SCREW DRIVER.UNCREW THE TWO SCREW.MAKE SURE TO HOLD THE WIRE LEADS BECAUSE THEY CAN FALL INTO THE INSTULATION.PULL THE TWO LEADS OFF AND THEN REPLACE THE NEW LEADS OF THE NEW ELEMENT.PUT THE TWO SCREWS BACK IN AND THATS IT FOR THE ELEMENT.WITH THE SENSOR IS EASY.THE BACK OF THE STOVE HAS ABOUT 10 SCREWS ON THE BACK OF THE STOVE.UNSCREW ALL THE SCREWS,REMOVE THE BACK COVER AND UNSCREW THE TWO SCREW,THEN UNPLUG THE SENSOR CONNECTING LEAD.REPLACE THE NEW SENSOR,AN THEN REPLACE THE SCREWS,REPLACE THE BACK COVER,REPLACE THE SCREWS.PLUG THE STOVE INTO THE WALL SOCKET.TURN THE STOVE ON,THEN SET THE TEMPRETURE AND YOU REPAIRED YOUR STOVE WITH THE PROPER OVEN TEMPRETURE. THANK YOU.
Read more...
- Fix Number
- FIX11740695
- Manufacturer Part Number
- WP308180
Fixes these symptoms
- Element will not heat
- Little to no heat when baking
- Oven is too hot
- See more...
Installation Instructions
peter from potomac, MD
Bake element burnt out
1 Turned off power to stove at distribution box. 2 Removed oven racks to make room to work. 3 Illuminated oven interior. 4 Selected screw driver with largest grip, and correct phillips bit. 5 Undid two screws holding element to back wall of oven. 6 Gently pulled element towards front of oven to expose spade connectors to internal wiring. 7 Separated connectors and removed element. 8 Replaced with new element by retracing steps 7 through 1. 9 Success! Two difficulties: A. The retaining screws were stuck with age, and required a large torque to release. B. Similarly the spade connectors were stuck and required care to separate without damaging the wiring.
Read more...
- Fix Number
- FIX11749737
- Manufacturer Part Number
- WPW10181986
Fixes these symptoms
- Element will not heat
- Little to no heat when baking
- Little to no heat when broiling
- See more...
Installation Instructions
john from midland, NC
THE OVEN WAS 10 DEGREES OFF,NOT REACHING PROPER TEMPRETURE.
THE PROBLEM I HAD COULD HAVE BEEN TWO THINGS.SO AT THE PRICE OF THE TWO THINGS WAS A GREAT PRICE.SO I INSTALLED THE TWO PARTS. PULL THE STOVE AWAY FROM THE WALL.MAKE SURE TO UNPLUG THE CORD FROM THE WALL OUTLET.ONLY TOOL YOU NEED IS A PHILLIPS SCREW DRIVER.UNCREW THE TWO SCREW.MAKE SURE TO HOLD THE WIRE LEADS BECAUSE THEY CAN FALL INTO THE INSTULATION.PULL THE TWO LEADS OFF AND THEN REPLACE THE NEW LEADS OF THE NEW ELEMENT.PUT THE TWO SCREWS BACK IN AND THATS IT FOR THE ELEMENT.WITH THE SENSOR IS EASY.THE BACK OF THE STOVE HAS ABOUT 10 SCREWS ON THE BACK OF THE STOVE.UNSCREW ALL THE SCREWS,REMOVE THE BACK COVER AND UNSCREW THE TWO SCREW,THEN UNPLUG THE SENSOR CONNECTING LEAD.REPLACE THE NEW SENSOR,AN THEN REPLACE THE SCREWS,REPLACE THE BACK COVER,REPLACE THE SCREWS.PLUG THE STOVE INTO THE WALL SOCKET.TURN THE STOVE ON,THEN SET THE TEMPRETURE AND YOU REPAIRED YOUR STOVE WITH THE PROPER OVEN TEMPRETURE. THANK YOU.
Read more...
- Fix Number
- FIX1570174
- Manufacturer Part Number
- 12001656
Fixes these symptoms
- Door won’t open after self cleaning cycle
- Element will not heat
- Little to no heat when baking
- See more...
Installation Instructions
Michael from Pearl River, NY
Oven did not heat up
Removed the oven door, removed existing screws. Pulled wire carefully out of opening, unclip connection. Reattached connection screwed back new sensor attached oven door finished.
Read more...
- Fix Number
- FIX11754687
- Manufacturer Part Number
- WPW10434452
Fixes these symptoms
- Element will not heat
- Oven is too hot
- See more...
- Fix Number
- FIX2366563
- Manufacturer Part Number
- W10196405RW
Fixes these symptoms
- Element will not heat
- See more...
Installation Instructions
chris from ABERDEEN, SD
Burner would not heat up and the cook top on light would not turn off.
First turn off breaker. Pull out stove and unplug. There was about 8 screws on the panel on the back side of the control panel. Remove panel. Remove knob on the bad control and there is 2 screws behind knob. Remove those 2 screws and take the new control and remove 1 wire at a time from old switch to new one then put back together.
Read more...
Appliance Type
Related Pages
- KitchenAid Range Brackets and Flanges
- KitchenAid Range Circuit Boards and Touch Pads
- KitchenAid Range Cooktops
- KitchenAid Range Doors
- KitchenAid Range Elements and Burners
- KitchenAid Range Hardware
- KitchenAid Range Hinges
- KitchenAid Range Igniters
- KitchenAid Range Insulation
- KitchenAid Range Knobs
- KitchenAid Range Lights and Bulbs
- KitchenAid Range Panels
- KitchenAid Range Racks
- KitchenAid Range Seals and Gaskets
- KitchenAid Range Sensors
- KitchenAid Range Switches
- KitchenAid Range Trim
- KitchenAid Range Valves
- KitchenAid Range Wire Plugs and Connectors
Popular KitchenAid Range Models
- KGSS907SSS00
- KGSS907SSS02
- YKESS907SS03
- KESS907SSS04
- KESS907SSS00
- KGRS807SSS00
- YKESS907SS01
- KGSS907SSS01
- KEBC107KSS0
- KSGG700ESS1 GAS RANGE
- YKESS907SS05
- YKESS907SS00
- KGSS907SSS03
- KSDG950ESS1 DUAL FUEL RANGE
- YKERS807SS00
- KSGG700ESS0 GAS RANGE
- KESS907SSS06
- KESS907SSS02
- KSEG950ESS1 ELECTRIC SLIDE IN RANGE
- KGRS807SSS01


