Hoover Parts
Start With Your Model Number

Popular Hoover Parts
$7.44

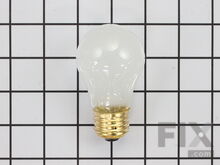
Light Bulb - 40W
Fix Number FIX884734
Manufacturer Part Number 8009
This is a genuine OEM 40-Watt replacement light bulb that is compatible with various types of appliances. It has a frosted glass bulb with a standard metal socket base, making it easy to screw and unscrew by hand to replace. It is designed to tolerate extreme temperatures, which is why it is commonly used to light the inside of refrigerators and ovens. Depending on the appliance and location of the bulb, disconnecting the power is recommended. This bulb is sold individually.
Installation Instructions
Helen from Quincy, MA
lightbulb in refrigerator went out
Removed plastic shield on top of refrigerator. Removed old bulb.. Replaced new bulb. Reinstalled plastic shield. Voila!
Read more...
$134.42

Replacement Ice Maker
Fix Number FIX2121513
Manufacturer Part Number D7824706Q
If your freezer has stopped making ice cubes, it may be time to replace your ice maker. Normal wear and tear, or accidental damage may be the cause of this. This model includes the control device and ice mold, which are made of plastic and metal, and measure approximately 11 inches long by 5 inches wide. Please note that this kit does not include the cover, ice level arm, or the wire harness. These parts can be ordered separately, or you can use the existing parts from the original ice maker. This Replacement Ice Maker is a genuine OEM part and is also known as an Ice Maker Assembly or a Refrigerator Ice Maker. Installation will require a quarter inch nut driver, and make sure that you disconnect your power and water supply before beginning this repair. Once the new part is in place, your fridge will begin making ice again within a few hours.
Fixes these symptoms
- Clicking sound
- Doesn’t stop running
- Ice maker dispenses too little ice
- See more...
Installation Instructions
Edward from Casa Grande, AZ
Unit quit working. Wouldn't cycle any more. Made sounds like gears were maybe stripped..
Followed installation video on this web site. Works like a new one !
Read more...
$30.55

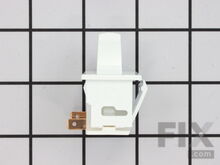
Refrigerator Door Switch
Fix Number FIX12728638
Manufacturer Part Number W11384469
Door switch turns the light off when you close the door.
Fixes these symptoms
- Light not working
- See more...
Installation Instructions
Marilyn from Dublin, OH
Light switch no longer worked
Turn off and unplug your refrigerator. I used the screwdriver on the left side of the part (where the plug is) and used the putty knife at the same time on the right side to push the spring lock portion of the part in. The part snapped out. I unplugged the left contact from the plug and put it on the new part, then I unplugged the right contact and put it on the new part. I did this so the wires would not go up into the refrigerator and be hard to find. I put the left side of the new part where the plug and contacts are in first then I snapped the right side in place. I plugged the refrigerator back in and it worked perfectly. Just take your time and gently remove and reconnect the new part. The store where I bought my refrigerator wanted $69.95 for a service call plus an hourly charge and part charge. Count on this site for your parts and do it yourself. I ordered the part on Monday, it was delivered on Tuesday around noon and I made the repair that afternoon.
Read more...
$2.72

Chrome Drip Bowl - 8 inch
Fix Number FIX11750107
Manufacturer Part Number WPW10196405
This chrome drip bowl is an OEM approved replacement part sourced directly from the manufacturer. Drip bowls are a part for your cooktop, positioned underneath the burner to catch spills. This drip bowl fits under 8-inch burner elements and has a diameter of approximately 10-inches. It is common for the manufacturer to switch up designs, so it may not match your current part, however searching using the correct model number will ensure proper fit and function. Drips bowls are prone to wear and tear and can be a fire hazard if not replaced when needed. It is also a quick, easy, and cheap way to give your appliance a fresh new look. Each drip bowl is sold individually, so if you are interested in replacing your other drips bowls, they need to be ordered separately. This is also an opportune time to inspect the terminals for corrosion or damage, and the condition of the burner. No tools are required for installation, simply line up the hole on the bowl with the terminal block and drop it into place. Give your new drip bowl a regular cleaning with warm water and soap to help it last as long as possible.
Fixes these symptoms
- Element will not heat
- See more...
Installation Instructions
Henry from St Louis, MO
Replace old drip Bowls
Remove heating elements, remove old drip bowl, install new drip bowls replace heating elements.
Read more...
$16.60

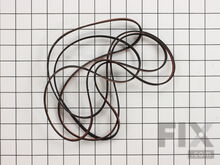
Multi Rib Belt - 92-1/4"
Fix Number FIX346995
Manufacturer Part Number 341241
This multi rib belt is an OEM replacement part for a dryer. It attaches to the drum, idler pulley, and motor pulley, and is responsible for spinning the drum. Over time, the belt can become frayed, brittle, and inflexible. If you can hear the motor running, but the drum does not turn, it is likely that the belt is broken. Other symptoms of a broken multi rib belt include unusual noises, failing to start, no heat, a burning smell, and an unresponsive touchpad. Depending on the model, you will find the belt by looking behind the front panel or under the main top of the dryer. This belt is 1/4-inches wide, has a length of 92-1/4-inches, and has four ridges and three groves on the belt. Each belt is sold separately.
Fixes these symptoms
- Heat stays on after drum has stopped
- No heat or not enough heat
- Noisy
- See more...
$12.08

Snubber Ring
I began by unplugging the unit first, securing the lid with duct tape and laying the washer on its front face. I removed the belt and transmission pulley per instructions contained in the replacement kit. Mainly consists of popping the "E" ring off with a screwdriver. Once the pulley was off, I stood the washer upright and to access and remove tub. Having the tub out made it easier to compress the brake spring when re-attaching the brake stator. Removing the tub is easy, I just popped off the tub cover and tilted the tub around to ease the tension and remove the bottom springs with pliers (this may require an assistant). With the tub removed, I turned it over to remove the brake stator. USE CAUTION WHEN REMOVING THE BRAKE STATOR. A 200 LB BRAKE SPRING IS UNDER IT AND IS UNDER TENSION. With the new brake rotor and brake stator secured, I replaced the snubber ring and motor pivot spring. I put it all back together in reverse order and it spun like a top, is quieter and stops on a dime! Read more...
Fix Number FIX11738845
Manufacturer Part Number WP21002026
This snubber ring fits washers and is located between the leg and dome assembly. The ring has a diameter of 9 inches. It is used to reduce noise and vibration for stability when the washer is operating. If your washer shakes a lot and makes loud noises, then it is best to replace this part to solve your problem. The tools required for this repair are: short flathead screwdriver, flathead screwdriver, Philips screwdriver, 1/4 inch nut driver, 5/16 inch nut driver, 3/8 nut driver, ratchet with extension, putty knife, locking pliers, slip joint pliers, and 3/8 inch socket.
Fixes these symptoms
- Spins slowly
- Will not agitate
- See more...
Installation Instructions
Brandon from Keller, TX
Washer would run and agitate but would not spin.
Prior to the spin cycle not working, the washer would make a loud screeching noise when the spin cycle would stop. I wasn't sure if there was a problem with the break rotor or some bearing was out. Due to the washer's age, I decided to go ahead and replace the pulley, brake rotor, motor pivot spring and snubber ring components. I began by unplugging the unit first, securing the lid with duct tape and laying the washer on its front face. I removed the belt and transmission pulley per instructions contained in the replacement kit. Mainly consists of popping the "E" ring off with a screwdriver. Once the pulley was off, I stood the washer upright and to access and remove tub. Having the tub out made it easier to compress the brake spring when re-attaching the brake stator. Removing the tub is easy, I just popped off the tub cover and tilted the tub around to ease the tension and remove the bottom springs with pliers (this may require an assistant). With the tub removed, I turned it over to remove the brake stator. USE CAUTION WHEN REMOVING THE BRAKE STATOR. A 200 LB BRAKE SPRING IS UNDER IT AND IS UNDER TENSION. With the new brake rotor and brake stator secured, I replaced the snubber ring and motor pivot spring. I put it all back together in reverse order and it spun like a top, is quieter and stops on a dime! Read more...
$5.16

Drip Bowl - 6 Inch
Fix Number FIX11750108
Manufacturer Part Number WPW10196406
This chrome drip bowl is an OEM approved replacement part designed for use with various models of electric ranges and cooktops. This drip bowl fits under 6-inch burner elements and has a diameter of approximately 8 inches. It sits under the burner, keeping any drips and spill contained. It is common for this part to become discolored, corroded, or otherwise damaged with time, and will need to be replaced. Each drip bowl is sold individually, so this is a good time to check the other drip bowls on the appliance in case you would like to replace those as well (sold separately). No tools are required for installation, simply line up the hole on the bowl with the terminal block and drop it into place. By routinely cleaning this part, it will help to prolong its life.
Fixes these symptoms
- Element will not heat
- See more...
Installation Instructions
Henry from St Louis, MO
Replace old drip Bowls
Remove heating elements, remove old drip bowl, install new drip bowls replace heating elements.
Read more...
$67.46

Transmission Pulley and Bearing Kit
Fix Number FIX2003651
Manufacturer Part Number 12002213
Also known as Thrust Bearing Kit. This kit includes the pulley, washer, thrust bearing, 2 upper race washers and 1 lower race washer. These parts are NOT available separately - they are ONLY available in this kit.
A worn bearing causes slow or no spin.
Fixes these symptoms
- Burning smell
- Spins slowly
- Will not agitate
- See more...
Installation Instructions
Ralph from Oakland, CA
Pump had stop displacing water at spin cycle
Facing washer placed it on right side exposing underneath. Pump and transmission bearing items are accessible from this position. Followed step by step instructions contained with each part. Placed unit upright,supplied power and ran smallest allowed cycle to test. Unit works like new. Actually spin drys better,dryer clothes which works our older dryer less. Great tune-up and should give us several more years of service.
Read more...
$54.68

Capacitor
Fix Number FIX11757023
Manufacturer Part Number WPW10662129
The capacitor, also known as a run capacitor, is a component in your fridge that allows the compressor to cycle on and off to maintain a constant temperature. If your fridge and freezer are too warm it may be necessary to replace the capacitor. Other symptoms include an unusually noisy and overheated compressor. You can check the capacitor for continuity using a multimeter. This is a genuine OEM replacement part made of black plastic that measures 1 inch by 1.5 inches. When replacing this part, be sure to check the electrical contacts on the old capacitor. If they are corroded or burnt, you will need to replace the overload relay assembly as well. Be sure to disconnect the power supply to your refrigerator before beginning this repair.
Fixes these symptoms
- Clicking sound
- Freezer section too warm
- Fridge and Freezer are too warm
- See more...
Installation Instructions
Lisa from Yulee, FL
Both comparments very warm but fan working and lights on
Bought Capacitor, but I had to purchase Combo Start Up Kit that Cap goes into. The site said that 78% of the time my problem of both compartments being warm were resolved/repair by replacing Capacitor, but when the item was replaced it did not and my son looked further and found that it would then be the Combination Start Up Kit (Part# PS11740412), which starts the compressor. Thanks to this site the video used to install both parts. I was able to use the old Capacitor and I am returning the new one first purchased.
Read more...
$10.59

Upper Hose Assembly-8 ft.
Fix Number FIX12065481
Manufacturer Part Number H-303239003
Installation Instructions
Fred from Danville, IL
Appliance Type
- Hoover Cooktop Parts
- Hoover Dryer Parts
- Hoover Food Waste Disposer Parts
- Hoover Freezer Parts
- Hoover Microwave Parts
- Hoover Range Parts
- Hoover Range Hood Parts
- Hoover Refrigerator Parts
- Hoover Wall Oven Parts
- Hoover Washer Parts
- Hoover Smoker Parts
- Hoover Air Conditioner Parts
- Hoover Steamer Parts
- Hoover Upright Vacuum Parts