Hoover Cooktop Parts
Find Parts Fast
Guaranteed Fit
Repair Videos


Popular Hoover Cooktop Parts
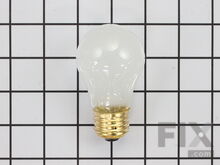
- Fix Number
- FIX884734
- Manufacturer Part Number
- 8009
Installation Instructions
Helen from Quincy, MA
lightbulb in refrigerator went out
Removed plastic shield on top of refrigerator. Removed old bulb.. Replaced new bulb. Reinstalled plastic shield. Voila!
Read more...
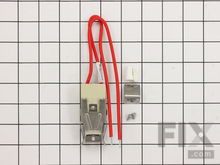
- Fix Number
- FIX11750107
- Manufacturer Part Number
- WPW10196405
Fixes these symptoms
- Element will not heat
- See more...
Installation Instructions
Henry from St Louis, MO
Replace old drip Bowls
Remove heating elements, remove old drip bowl, install new drip bowls replace heating elements.
Read more...
- Fix Number
- FIX11750108
- Manufacturer Part Number
- WPW10196406
Fixes these symptoms
- Element will not heat
- See more...
Installation Instructions
Henry from St Louis, MO
Replace old drip Bowls
Remove heating elements, remove old drip bowl, install new drip bowls replace heating elements.
Read more...
- Fix Number
- FIX2366565
- Manufacturer Part Number
- W10196406RW
Fixes these symptoms
- Element will not heat
- See more...
Installation Instructions
chris from ABERDEEN, SD
Burner would not heat up and the cook top on light would not turn off.
First turn off breaker. Pull out stove and unplug. There was about 8 screws on the panel on the back side of the control panel. Remove panel. Remove knob on the bad control and there is 2 screws behind knob. Remove those 2 screws and take the new control and remove 1 wire at a time from old switch to new one then put back together.
Read more...
- Fix Number
- FIX340571
- Manufacturer Part Number
- 330031
Fixes these symptoms
- Element will not heat
- See more...
Installation Instructions
Doris from Skoke, IL
Elements heat sporatically
I followed the steps in the instructions which were very easy, once the electric power was turned off to the range. I replaced 2 burner plug in blocks in less than 30 minutes. I am embarrassed to say that these burners have not been functional for almost 3 years. I thought that I could not work with electric. Just make sure you have the tools on hand and read the instructions first. I am a mid-50's female, if I can do this so can anyone else!
Read more...
- Fix Number
- FIX1570190
- Manufacturer Part Number
- 12001676
Fixes these symptoms
- Element will not heat
- Will Not Start
- See more...
Installation Instructions
Steven from Westerly, RI
Burner Receptacle replacement
unplugged stove, removed old burner, lift top (mine did not have retaining screws), cut old wires, unscrewed Receptacle, screwed in new Burner Receptacle, used the wire strippers to strip back the old wire, then used the wire tie to connect (very very easy). done! plugged back in the new burner element (old one was burnt up) and plugged the stove back in, complete! works great! My wife loves me again! :)
Read more...
- Fix Number
- FIX2079053
- Manufacturer Part Number
- 715878
Fixes these symptoms
- Touchpad does not respond
- See more...
Installation Instructions
Curtis from Jackson, MS
I needed new burners and drip bowls and I wanted a flat radiant cartridge
Very easy! I just replaced the drip bowls, took out old burners and put in new ones. I took out my grill, and replaced with the radiant flat cartridge. I just plugged it right in, and I was done!
Read more...
- Fix Number
- FIX1854703
- Manufacturer Part Number
- 715877
Fixes these symptoms
- Touchpad does not respond
- See more...
Installation Instructions
Carole G from Hampton, GA
My husband cooks but does not clean grease right away
I replace my drip pans when I am not able to clean them completely. These fit perfectly every time.
Read more...
- Fix Number
- FIX11743366
- Manufacturer Part Number
- WP660532
Fixes these symptoms
- Element will not heat
- See more...
Installation Instructions
Diana from Iola, KS
- Fix Number
- FIX11743846
- Manufacturer Part Number
- WP707929
Fixes these symptoms
- Touchpad does not respond
- See more...
Installation Instructions
ron from lebanon, TN


