Some of the parts we sell are eligible for mail-in rebates since we can recycle them. We will display any applicable rebates in your shopping cart. To redeem your rebate, contact Customer Service after you have received your part.
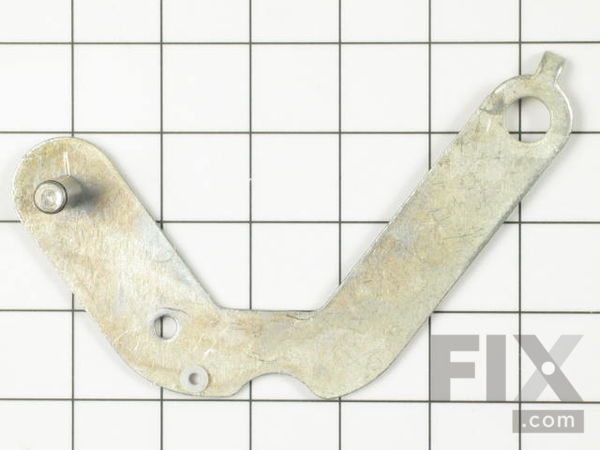
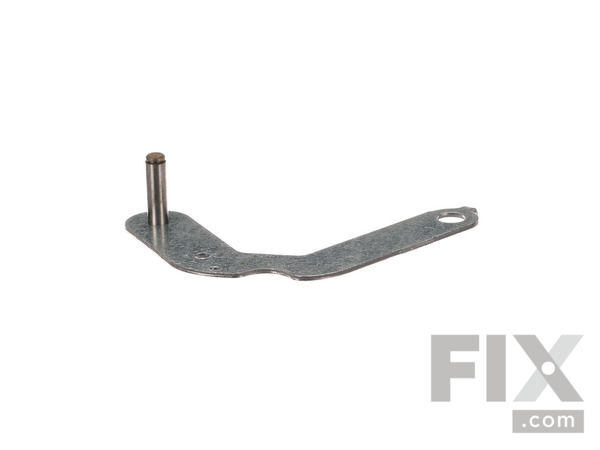
Idler Arm and Shaft
$59.37
In Stock
- Fix Number:
- FIX11743033
- Manufacturer #:
- WP6-3705180
- Manufactured by:
- Whirlpool
- Product Description
- This arm is what attaches to the idler pulley wheel. The grommet no longer comes with the part as it has been updated by the manufacturer.
- Works with the following brands:
- Maytag, International, Crosley
- Works with the following products
- Dryer, Washer Dryer Combo
- Fixes the following symptoms
- Noisy
- Part# WP6-3705180 replaces these:
- AP6009860, 33001782, 33001840, 6-3705180
Part Number Cross Reference
Product Description
This arm is what attaches to the idler pulley wheel. The grommet no longer comes with the part as it has been updated by the manufacturer.
-
Works with the following brands:Maytag, International, Crosley
-
Works with the following products:Dryer, Washer Dryer Combo
-
Fixes the following symptoms:Noisy
-
Part# WP6-3705180 replaces these:AP6009860, 33001782, 33001840, 6-3705180
Videos For installing this part.
Replacing your Idler Arm and Shaft

Questions and Answers
We're sorry, but our Q&A experts are temporarily unavailable.
Please check back later if you still haven't found the answer you need.
Related Parts Additional or alternate parts to consider.
Installation Instructions Provided by Fix customers like you.
- < Prev
- 1
- Next >
Sort by:
Search filter:
Clear Filter
Your search term must have 3 or more characters.
Keep searches simple. Use keywords, e.g. "leaking", "pump", "broken" or "fit".
Sorry, we couldn't find any existing installation instruction that matched.
- Customer:
- JOE from HIGHLAND, IN
- Parts Used:
- WP6-3705180, WP6-3700340, WP33002535, 306508, 12001541
- Difficulty Level:
- Easy
- Total Repair Time:
- 1- 2 hours
- Tools:
- Nutdriver, Pliers, Screw drivers, Wrench set
Hella Loud
1st off, watch all the video's they supply even before you buy the parts. A lot of knowledge in them. It helped to ensure I bought the right parts to begin with. I removed the front of the machine, removed the brackets holding the lid down. Raised the lid, and did an inspection of everything. Removed the front so I could remove the drum.
... Read more
Once that was down, piece of cake. I got out the vacuum, vacuumed out everything, then moved to removing the rollers. Because my tool broke to remove the retaining clip from the front, I had to use a 1/2" wrench to removed the roller studs. Rebuilt the drum support rollers, and put them back on. Next was the idler pulley wheel and bearing and idler arm and shaft. Another piece of cake. I decided to not replace the front glide as it looked fine. NOW THE TRICKY PART. Putting the new belt on and putting the drum back in. Watched that video 4 times. Finally got it. Of the little over two hours, 30 minutes was spent on this part. Put everything back together from there a cake walk. YOU DO NOT NEED TO REMOVE ANY WIRES FROM ANYTHING EITHER. Hope this helps.
Read less
3 of 3 people
found this instruction helpful.
Was this instruction helpful to you?
Thank you for voting!
- Customer:
- Gregg from Haddonfield, NJ
- Parts Used:
- WP6-3705180, WP6-3700340, WPY312527, 33002459, WP315772
- Difficulty Level:
- Really Easy
- Total Repair Time:
- 1- 2 hours
- Tools:
- Screw drivers, Socket set
When the dryer was running, it would make a loud thumping noise.
Once the dryer was apart, it was fairly easy to see the problem was the idler pulley wheel. The pulley wheel itself is plastic with a metal sleeve that rides on the metal shaft of the idler arm. The metal sleeve of the pulley seized on the metal shaft, and the plastic of the pulley separated and tore itself apart. I actually watched the v
... Read more
ideo instructions on replacing the belt for my specific model to see how the dryer came apart. Once apart I watched the video for replacing the idler pulley. Repair was a breeze after watching the instructions. I ordered everything new that was involved in the idler pulley, and was very glad I did. I didn't realize that the metal sleeve was fused onto the shaft at first, but ordered a new idler arm anyway. I also ordered a new idler spring. Once I received the parts, I realized that the old idler arm would not have worked, and the old spring had no where near the tension the new one had. I made sure to lightly grease the idler arm shaft so the pulley could revolve on it without trouble. I used a flashlight to see the idler arm screw when removing and replacing the idler arm. The dryer was assembled and runs smooth and quiet now. Watch the videos, I don't believe it would have been so easy to disassemble, diagnose, and repair the problem without watching the videos first.
Read less
1 of 2 people
found this instruction helpful.
Was this instruction helpful to you?
Thank you for voting!
- Customer:
- jim from BLANCHESTER, OH
- Parts Used:
- WP6-3705180, WPY312527
- Difficulty Level:
- A Bit Difficult
- Total Repair Time:
- 30 - 60 mins
- Tools:
- Screw drivers, Socket set
The dryer was making a squealing noise and then the dryer quit tumbling.
I took off the dryer door,(2 screws) took off the front panel and the bulkhead and raised the dryer lid. I took out the drum after removing the belt. I then removed white idler wheel and bearing and removed and replaced the idler arm and shaft on the motor. I put on a new white idler wheel and bearing. Also, to make sure that the drum
... Read more
turned correctly, I removed and replace the blue front glides on the bulkhead which was the cause of the white idler wheel and idler arm and shaft going bad. This is the second time I have had to repair this dryer in so few years. The first repair was the heater coil.
Read less
0 of 1 people
found this instruction helpful.
Was this instruction helpful to you?
Thank you for voting!
- Customer:
- David from Meridian, OK
- Parts Used:
- WP6-3705180, WP6-3700340, WP33002535, 33002459, 306508, 12001541
- Difficulty Level:
- Easy
- Total Repair Time:
- 1- 2 hours
- Tools:
- Screw drivers, Wrench set
Dryer made squeeking noise when running.
I had repaired this dryer before so taking it apart/repairing it was fairly simple. The toughest part of the repair is getting the belt on the drum and the pulleys st the same time.........
0 of 1 people
found this instruction helpful.
Was this instruction helpful to you?
Thank you for voting!
- Customer:
- hamin from aurora, IL
- Parts Used:
- WP6-3705180, WP6-3700340
- Difficulty Level:
- Easy
- Total Repair Time:
- 15 - 30 mins
- Tools:
- Screw drivers, Socket set
loud squeaking during operation
removed door with screwdriver. removed front face with screwdriver. removed front drum holder with screwdriver and socket set. untensioned belt. removed drum. released spring from tensioner. removed idler arm with socket set. removed plastic bushing for spring with screwdriver. put plastic bushing on new idler arm. put pulley on shaft. r
... Read more
eversed order to put back together.
Read less
0 of 1 people
found this instruction helpful.
Was this instruction helpful to you?
Thank you for voting!
- Customer:
- Mary from Harleysville, PA
- Parts Used:
- WP6-3705180, WP6-3700340, WPY312527, WP33002535
- Difficulty Level:
- Easy
- Total Repair Time:
- 1- 2 hours
- Tools:
- Pliers, Screw drivers, Socket set
Dryer not rotating and was squeeking prior to belt failure.
Replaced : Idler Arm and Shaft, Lubricated shaft and arm base with lithium grease. Installed Idler Pulley Wheel and Bearing. Replaced belt. I also vacuumed the bottom of the dryer to remove the lint build-up. Assembly of the dryer was the reverse of taking the unit apart. The repair was straight forward, but took some time.
0 of 1 people
found this instruction helpful.
Was this instruction helpful to you?
Thank you for voting!
- Customer:
- Thanh from Annandale, VA
- Parts Used:
- WP6-3705180, WP6-3700340
- Difficulty Level:
- Really Easy
- Total Repair Time:
- 30 - 60 mins
- Tools:
- Nutdriver, Screw drivers
unusual noise
Rusting and drying idle wheel and arm caused by moisture from clothes over the years. Dont need to replace parts just add oil/grease, but i replaced the new parts to make sure. First, i replaced the barrel supporting wheels and shafts including front gliders but the noise did not stop.
0 of 1 people
found this instruction helpful.
Was this instruction helpful to you?
Thank you for voting!
- < Prev
- 1
- Next >
Model Compatibility
This part works with the following models:
Fix Number: FIX11743033
Manufacturer Part Number: WP6-3705180
Manufacturer Part Number: WP6-3705180
Brand
Model Number
Description
✖
Mail-In Recycling Rebate


