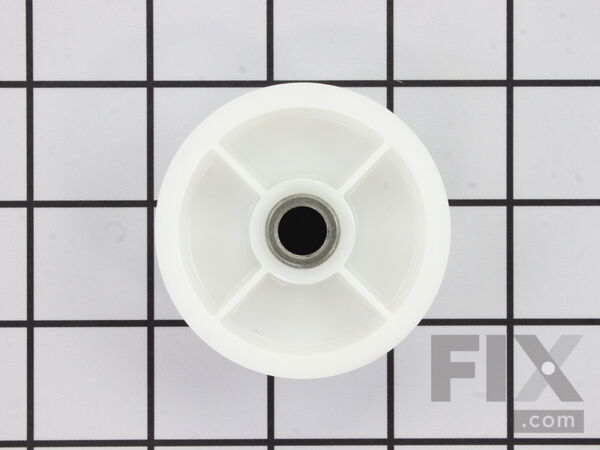
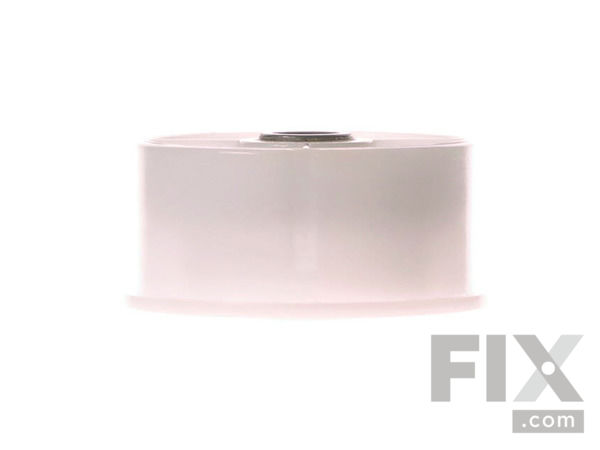
Part Location Diagram of WP6-3700340 Whirlpool Idler Pulley Wheel and Bearing
See part 8 in the diagram
Replacing your Maytag Dryer Idler Pulley Wheel and Bearing
( Grid squares measure 1x1 inch )

Idler Pulley Wheel and Bearing WP6-3700340

★★★★★
★★★★★
1 Review

Rated by 20 customers 

?

Easy 

1- 2 hours 

Ratings submitted by customers like you who bought this part.

?
$17.89
In Stock
Fix Number:
FIX11743032
Manufacturer #:
WP6-3700340
Manufactured by:
Whirlpool

Product Description

If your dryer is making excessive noise, or it will not tumble, there may be an issue with the idler pulley wheel. The idler pulley wheel is attached to the idler bracket and is used to secure the dryer drum belt, which helps the drum to rotate. This genuine OEM part is made of white plastic with a metal center bearing. Over time this part can become worn, which will result in your drum not rotating or screeching noises when it spins. If this happens the idler pulley wheel should be replaced. Before beginning this repair, please be sure to disconnect the power supply to your dryer. To complete this job, you will need a Philips screwdriver, a 5/16 nut driver, a pair of Channellock pliers, and a small flat blade screwdriver.

Videos For installing this part.

Replacing your Idler Pulley Wheel and Bearing

Replacing your Idler Pulley Wheel and Bearing

Questions and Answers

We're sorry, but our Q&A experts are temporarily unavailable.
Please check back later if you still haven't found the answer you need.

View More View Less
Drum Support Roller Kit
$13.49
In Stock
Front Glide Kit
$14.69
In Stock
Roller Shaft
$9.80
In Stock
Multi Rib Belt - 91-5/8 Inches
$22.89
In Stock
Idler Pulley Shaft Washer
$13.44
In Stock
Idler Arm and Shaft
$59.31
In Stock
Affresh Washing Machine Cleaner - 3 pack
$12.58
In Stock
Produce Preserver Filter
$21.50
In Stock
Affresh Dishwasher Cleaner Tablets - 6
$19.09
In Stock
Cooktop Cleaning Cream
$15.57
In Stock
Cooktop Cleaner
$17.74
In Stock
Affresh Cleaner
$19.09
In Stock

Installation Instructions Provided by Fix customers like you.

Average Repair Rating: 2.9 / 5.0, 20 reviews.
  • 1
  • 2
Sort by:
Sorry, we couldn't find any existing installation instruction that matched.
Customer:
Tim from PORTLAND, OR
Parts Used:
WP6-3700340, WP6-3129480, WP33002535, 306508, 12001541, WP9703438
Difficulty Level:
Easy
Total Repair Time:
1- 2 hours
Tools:
Nutdriver, Pliers, Screw drivers
Dryer was a bit noisy with a full load of wet clothes
As per the repair videos on the site, I searched the internet for a couple of supplementary videos just to make sure I was doing it correctly. It was was all pretty easy. Expect to vacuum out and clean out the interior of the dryer. Also, to make things easier, disconnect the bulkhead and exterior like in the video, but also keep the top flipped up until reassembling, it'll make it much easier. When reinstalling the belt, remember how the belt is going to go around the pulley, you'll have to do this without sight as the barrel will the way and you won't be able to see what you're doing. It's really not hard but just keep this in mind. Also, as you disassembling, it would help to snap some pictures of where each screw goes and how; reassembly was a tiny bit tricky as I didn't do this.
8 of 9 people found this instruction helpful.
Was this instruction helpful to you?
Thank you for voting!
Customer:
Shawn from Plano, TX
Parts Used:
WP6-3700340, WP33002535, 12001541
Difficulty Level:
Really Easy
Total Repair Time:
1- 2 hours
Tools:
Pliers, Screw drivers, Socket set
Squeaky
Followed youtube tutorials, pretty straightforward. Take pictures of where wires connect for door switch, light, et al. Have a shop-vac handy to vacuum all the dust, lint, dog hair, etc that's accumulated over the years inside the unit.My spreader c-clip pliers were not small enough to fit in the holes of those tiny c-clips,had to improvi se.Used steel wool to polish all roller shafts, Before re-installing drum and belt, orient yourself to this procedure by practicing threading belt properly before positioning the drum in your way!
5 of 8 people found this instruction helpful.
Was this instruction helpful to you?
Thank you for voting!
Customer:
JOE from HIGHLAND, IN
Parts Used:
WP6-3705180, WP6-3700340, WP33002535, 306508, 12001541
Difficulty Level:
Easy
Total Repair Time:
1- 2 hours
Tools:
Nutdriver, Pliers, Screw drivers, Wrench set
Hella Loud
1st off, watch all the video's they supply even before you buy the parts. A lot of knowledge in them. It helped to ensure I bought the right parts to begin with. I removed the front of the machine, removed the brackets holding the lid down. Raised the lid, and did an inspection of everything. Removed the front so I could remove the drum. Once that was down, piece of cake. I got out the vacuum, vacuumed out everything, then moved to removing the rollers. Because my tool broke to remove the retaining clip from the front, I had to use a 1/2" wrench to removed the roller studs. Rebuilt the drum support rollers, and put them back on. Next was the idler pulley wheel and bearing and idler arm and shaft. Another piece of cake. I decided to not replace the front glide as it looked fine. NOW THE TRICKY PART. Putting the new belt on and putting the drum back in. Watched that video 4 times. Finally got it. Of the little over two hours, 30 minutes was spent on this part. Put everything back together from there a cake walk. YOU DO NOT NEED TO REMOVE ANY WIRES FROM ANYTHING EITHER. Hope this helps.
3 of 3 people found this instruction helpful.
Was this instruction helpful to you?
Thank you for voting!
Customer:
Tammy from Fremont, OH
Parts Used:
WP6-3700340, WP6-3129480, WP33002535, 12001541
Difficulty Level:
Easy
Total Repair Time:
30 - 60 mins
Tools:
Pliers, Screw drivers, Socket set
Very loud rubbing/squeaking noise
Watched 2 YouTube videos. 1. How to take apart a dependable care dryer. 2. How to replace a belt on a maytag dryer. We replaced all the parts. It was eeasy. When putting dryer back together make sure felt is straight. We did have to take it apart again there was felt sticking out inside the dryer and it caused the drum to not spin. Every thing works great. And Thank you parts select. I received the right parts in 2 days without paying extra. I will use you again.
3 of 5 people found this instruction helpful.
Was this instruction helpful to you?
Thank you for voting!
Customer:
michael from muncie, IN
Parts Used:
WP6-3700340, WP33002535, 12001541
Difficulty Level:
Very Easy
Total Repair Time:
1- 2 hours
Tools:
Nutdriver, Screw drivers
squeeky
removed dryer, set up on roll around work bench, watched your repair video, took my time and cleaned with air compressor and shop vac. did it all in standing position.
2 of 3 people found this instruction helpful.
Was this instruction helpful to you?
Thank you for voting!
Customer:
Gregg from Haddonfield, NJ
Parts Used:
WP6-3705180, WP6-3700340, WPY312527, 33002459, WP315772
Difficulty Level:
Really Easy
Total Repair Time:
1- 2 hours
Tools:
Screw drivers, Socket set
When the dryer was running, it would make a loud thumping noise.
Once the dryer was apart, it was fairly easy to see the problem was the idler pulley wheel. The pulley wheel itself is plastic with a metal sleeve that rides on the metal shaft of the idler arm. The metal sleeve of the pulley seized on the metal shaft, and the plastic of the pulley separated and tore itself apart. I actually watched the v ideo instructions on replacing the belt for my specific model to see how the dryer came apart. Once apart I watched the video for replacing the idler pulley. Repair was a breeze after watching the instructions. I ordered everything new that was involved in the idler pulley, and was very glad I did. I didn't realize that the metal sleeve was fused onto the shaft at first, but ordered a new idler arm anyway. I also ordered a new idler spring. Once I received the parts, I realized that the old idler arm would not have worked, and the old spring had no where near the tension the new one had. I made sure to lightly grease the idler arm shaft so the pulley could revolve on it without trouble. I used a flashlight to see the idler arm screw when removing and replacing the idler arm. The dryer was assembled and runs smooth and quiet now. Watch the videos, I don't believe it would have been so easy to disassemble, diagnose, and repair the problem without watching the videos first.
1 of 2 people found this instruction helpful.
Was this instruction helpful to you?
Thank you for voting!
Customer:
RICHARD from TOWSON, MD
Parts Used:
WP6-3700340, 33002560, WP33002535, 306508, 12001541
Difficulty Level:
Easy
Total Repair Time:
1- 2 hours
Tools:
Nutdriver, Screw drivers
Loud screeching noise, intermittant but with increasing regularity when running dryer.
Took off the door, and then front panel and shroud/bulkhead according to video instructions. Removed the belt, and then the tumbler. Found that the roller assembly bearing was rubbing against the shaft support on lower right side. I replaced both rollers, they come as a pair, the idler wheel, the front glides, the blower seal, and the belt. I purchased all these based on suggestions in reviews, but would suggest taking apart to make sure of part needed, in this case it was obvious when I spun the drum support wheels, one was less giving and literally screeched. I did not need a new idler wheel or belt, but used them anyway. The glides looked a little worn, so was good to replace them and the blower seal seemed a little worse for wear. I cleaned the blower wheel ribs as best as possible and vacuumed everything I could. For the glides, you will need a 1/8" drill bit to drill out old rivets and a rivet gun to replace. For the drum support wheels you will need a pair of C-Ring pliers. It was all very straight forward having reviewed the videos. I did raise the cover when working on all of this, which provided much better access and space, and used a bungee cord to help hold the tumbler in place when doing reassemble. Fantastic website, instruction with videos, couldn't be easier. Good luck.
1 of 2 people found this instruction helpful.
Was this instruction helpful to you?
Thank you for voting!
Customer:
Cosme from Seguin, TX
Parts Used:
WP6-3700340
Difficulty Level:
Easy
Total Repair Time:
1- 2 hours
Tools:
Nutdriver, Screw drivers
The Idler pulley wheel and bearing seized up.
You take out the screws from the bottom of the frame of the dryer. It takes a Philips screwdriver. Take out the screws that hold the door and the sides from the front of the dryer. pull all of those pieces away and separate the base from the frame. Locate the white roller in the middle of the base. There is a snap ring you must pull. Use a screw driver to pull that out. Inspect the belt and the two other rollers to make sure their snap rings are on and good working order. Replace the pulley.
0 of 1 people found this instruction helpful.
Was this instruction helpful to you?
Thank you for voting!
Customer:
John from McAllister, MT
Parts Used:
WP6-3700340, WP6-3129480, WP33002535, WP303396, 12001541
Difficulty Level:
Easy
Total Repair Time:
More than 2 hours
Tools:
Nutdriver, Screw drivers, Socket set, Wrench set
Dryer was extremely noisy squeeling and sqeaking
Followed installation videos and removed entire front of cabinet including door, loosened belt and removed drum. Only problem was the snap ring pliers I had were too large to fit in the holes of the drum roller snap ring. Ended up taking two 3 inch deck screws with sharp points, putting them in the snap ring holes and removing the ring by that method. Did the same when replacing it although this time, had to have my wife put a flat screwdriver against it while I pulled it apart with the screws. Rest of the repair was quite easy and dryer works great.
0 of 1 people found this instruction helpful.
Was this instruction helpful to you?
Thank you for voting!
Customer:
Stephen from Chula Vista, CA
Parts Used:
WP6-3700340, WP33002535
Difficulty Level:
Easy
Total Repair Time:
30 - 60 mins
Tools:
Nutdriver, Screw drivers
Very noisy dryer
Replaced pulley and belt
0 of 1 people found this instruction helpful.
Was this instruction helpful to you?
Thank you for voting!
  • 1
  • 2
Customer Reviews
Average Rating: (1 Review)
3.0
★★★★★
★★★★★
Filter By Rating:
  • 5
    0
  • 4
    0
  • 3
    1
  • 2
    0
  • 1
    0
  • 1
Sort by:
Sorry, we couldn't find any existing reviews that matched. Try using some different or simpler keywords.

Model Compatibility

This part works with the following models:
Fix Number: FIX11743032
Manufacturer Part Number: WP6-3700340
Brand
Model Number
Description
Crosley
CDE4205AYJ
Dryer - Residential
Crosley
CDE4205AYW
Dryer - Residential
Crosley
CDE4205AZJ
Dryer - Residential
Crosley
CDE4205AZW
Dryer - Residential
Crosley
CDG4205AWJ
Dryer - Residential
Crosley
CDG4205AWW
Dryer - Residential
Maytag
MDB9206AWW
Dryer - Maytag Dryer Model MDB9206AWW Parts
Maytag
MDE14PDACL
Dryer - Electric
Maytag
MDE14PDACQ
Dryer - Electric
Maytag
MDE14PDACW
Dryer - Electric
Maytag
MDE14PDADL
Dryer - Electric
Maytag
MDE14PDADW
Dryer - Electric
Maytag
MDE14PDAGW
Dryer - Electric
Maytag
MDE14PNAGW
Dryer - Gas
Maytag
MDE14PNAYW
Dryer - Gas
Maytag
MDE14PNAZW
Dryer - Gas
Maytag
MDE14PRAYW
Dryer - Gas
Maytag
MDE16CSAGW
Dryer - Electric
Maytag
MDE16CSAKA
Dryer - Electric
Maytag
MDE16CSAKQ
Dryer - Electric
Maytag
MDE16CSAYA
Dryer - Electric
Maytag
MDE16CSAYQ
Dryer - Commercial
Maytag
MDE16CSAYW
Dryer - Electric
Maytag
MDE16CSAZA
Dryer - Electric
Maytag
MDE16CSAZQ
Dryer - Commercial
Maytag
MDE16CSAZW
Dryer - Commercial
Maytag
MDE16CSDGW
Dryer - Electric
Maytag
MDE16CSDYW
Dryer - Electric
Maytag
MDE16CSDZW
Dryer - Electric
Maytag
MDE16MNAGW
Dryer - Electric