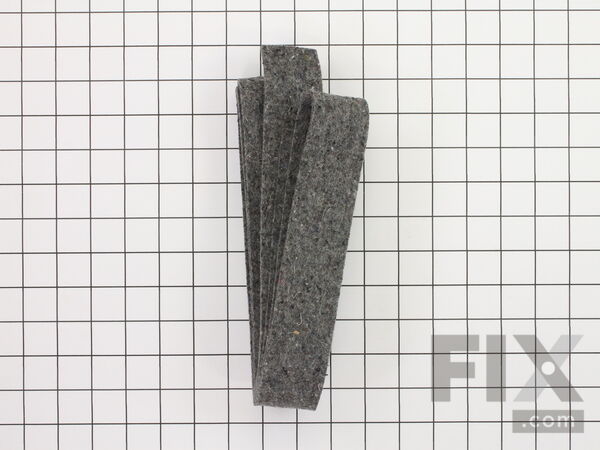
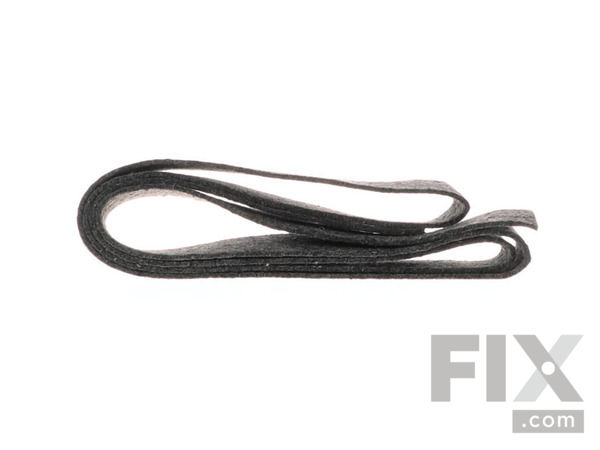
Part Location Diagram of WP33001807 Whirlpool Dryer Drum Felt Seal
See part 10 in the diagram
Replacing your Maytag Dryer Dryer Drum Felt Seal
( Grid squares measure 1x1 inch )

Dryer Drum Felt Seal WP33001807

Rated by 5 customers 

?

Easy 

1- 2 hours 

Ratings submitted by customers like you who bought this part.

?
$15.92
In Stock
Fix Number:
FIX11741074
Manufacturer #:
WP33001807
Manufactured by:
Whirlpool

Product Description

This seal can be used for the front or rear drum. Adhesive is NOT included. For adhesive search: WPY055980

Videos For installing this part.

Replacing your Dryer Drum Felt Seal

Replacing your Dryer Drum Felt Seal

Questions and Answers

We're sorry, but our Q&A experts are temporarily unavailable.
Please check back later if you still haven't found the answer you need.

View More View Less
Drum Support Roller Kit
$13.49
In Stock
Front Glide Kit
$14.69
In Stock
Roller Shaft
$9.80
In Stock
Multi Rib Belt - 91-5/8 Inches
$28.34
In Stock
Idler Pulley Wheel and Bearing
$22.09
In Stock
Affresh Washing Machine Cleaner - 3 pack
$12.58
In Stock
Produce Preserver Filter
$21.50
In Stock
Affresh Dishwasher Cleaner Tablets - 6
$19.09
In Stock
Cooktop Cleaning Cream
$15.57
In Stock
Cooktop Cleaner
$17.74
In Stock
Affresh Cleaner
$19.09
In Stock

Installation Instructions Provided by Fix customers like you.

Average Repair Rating: 2.4 / 5.0, 5 reviews.
  • 1
Sort by:
Sorry, we couldn't find any existing installation instruction that matched.
Customer:
James from EASTON, PA
Parts Used:
WP33001807, WP33001764
Difficulty Level:
Easy
Total Repair Time:
30 - 60 mins
Tools:
Screw drivers, Socket set
The dryer was making a loud noise.
The felt around the front of the drum was coming off. This caused the drum to grind against the front end of the dryer. Had to remove the front and the drum. Replaced it and reintalled. All is good again. I could not have done this without the assistance of your "How To" videos. After watching it was very clear the steps needed to accompl ish this repair. The hinge hole cover was cracked that was "Very Easy" to replace. All parts puchased at this site.
2 of 2 people found this instruction helpful.
Was this instruction helpful to you?
Thank you for voting!
Customer:
Jeff G from Loomis, CA
Parts Used:
WP33001807, WP22002263, 306508
Difficulty Level:
Easy
Total Repair Time:
1- 2 hours
Tools:
Nutdriver, Screw drivers
Dryer was not drying cloths very well and hot air was leaking within the unit instead of venting out through the vent.
Follow the easy video instructions on the website! I pulled off the front cover and door, then the front cover of the drum while propping-up the top cover to get more room to work. Take the drive belt off by compressing the tension roller then slip the entire drum out the front. I drilled out the old rivets on the drum front cover and installed new pads as per the video. I then used a flat blade screw driver to open the metal tabs that hold the felt pads in place and removed the pads (on the front cover and inside the unit on the back cover). Pay attention to how they overlap on the ends because you want it correct so the drum does not rub the wrong way on the overlap as it spins. It spins clockwise as you look at the front of the machine. I used the screw driver to push the tabs back down as I held the felt in place and worked around each one to install it. A large flat blade works really well. When you put the drum back inside, you need to work your fingers (or use the screw driver) to make sure the felt pad is folded over on itself and the drum is seated. I found it helpful to have someone hold the drum up in position so the back pad stays well seated while I was putting the front support cover on and doing the same thing with the front felt pad. I also put the 2 screws in place (finger tight) to help hold the drum while I was making sure the felt pad was seated all the way around the front of the drum. Then I finished putting no the rest of the front cover (not the front panel yet) and then reinstalled the drive belt on the motor and tension roller. This take both hands because you have to reach around on both sides of the hot air vet to do this. Then reinstall the top cover, the front cover and door and your all set. The dryer now drys cloths very quickly like it did when we first bought it over 20 years ago. I had also replaced the drum rollers and the tension roller earlier but if you haven;t done this, i would do them at the same time when you have the drum out of the machine. They are inexpensive and easy to do when it's all apart anyway. It helps to reduce any noisy squeaks and makes it run nice and quiet like it did when new!
1 person found this instruction helpful.
Was this instruction helpful to you?
Thank you for voting!
Customer:
RONALD from PHILIPSBURG, PA
Parts Used:
WP33002535, WP33001807, 33001790, WP33001789, WP9703438
Difficulty Level:
Easy
Total Repair Time:
More than 2 hours
Tools:
Nutdriver, Pliers, Screw drivers
Broken fan blade destroyed housing
I found an instruction video that explained the steps.It did not explain how to replace the rear seal or felt.After i replace the front felt following the video it was simple.Getting the felt to form or fit the drum was not shown .I put the drum next to the felt and used the cotter key puller to flip the seal to the correct position.
0 of 1 people found this instruction helpful.
Was this instruction helpful to you?
Thank you for voting!
Customer:
Ken from Middletown, PA
Parts Used:
WP33002535, WP33001807, 306508, 12001541, WP9703438
Difficulty Level:
Really Easy
Total Repair Time:
1- 2 hours
Tools:
Nutdriver, Screw drivers, Socket set
dryer runs noisy
The only additional step I incorporated was to place a block of wood under the tension pulley arm to hold it in the full off position while installing the drive belt. This was very helpful especially since you are working by feel while threading the drive belt onto the motor pulley and tension pulley. Once they are in place the wood block can be removed to engage the tension pulley. The instruction videos brought out a couple of helpful tips that made the repair successful.
0 of 1 people found this instruction helpful.
Was this instruction helpful to you?
Thank you for voting!
Customer:
Manuel from Safford, AZ
Parts Used:
WP6-3700340, WP33002535, WP33001807
Difficulty Level:
Very Difficult
Total Repair Time:
More than 2 hours
Tools:
Nutdriver, Screw drivers
Have not been able to finish the repair. Have not been able to install the felt seals to enable us to reinstall the drum.
Followed the video to remove the drum to the point of installing the felt seals. No instructions given to install the back seal. Removed the part where the back seal goes and placed the back seal in place. Have not been able to reinstall the drum because front felt seals are in the way. Can not determine how to keep them out of the way while trying to install the front part of the drum in place. Any help you can give me will be greatly appreciated.
0 of 1 people found this instruction helpful.
Was this instruction helpful to you?
Thank you for voting!
  • 1

Model Compatibility

This part works with the following models:
Fix Number: FIX11741074
Manufacturer Part Number: WP33001807
Brand
Model Number
Description
Crosley
CDE4205AYJ
Dryer - Residential
Crosley
CDE4205AYW
Dryer - Residential
Crosley
CDE4205AZJ
Dryer - Residential
Crosley
CDE4205AZW
Dryer - Residential
Crosley
CDG4205AWJ
Dryer - Residential
Crosley
CDG4205AWW
Dryer - Residential
Maytag
MDE14PDACL
Dryer - Electric
Maytag
MDE14PDACQ
Dryer - Electric
Maytag
MDE14PDACW
Dryer - Electric
Maytag
MDE14PDADL
Dryer - Electric
Maytag
MDE14PDADW
Dryer - Electric
Maytag
MDE14PDAGW
Dryer - Electric
Maytag
MDE14PNAGW
Dryer - Gas
Maytag
MDE14PNAYW
Dryer - Gas
Maytag
MDE14PNAZW
Dryer - Gas
Maytag
MDE14PRAYW
Dryer - Gas
Maytag
MDE14PRAZW
Dryer - Gas
Maytag
MDE14PSADW
Dryer - Electric
Maytag
MDE16CSAGW
Dryer - Electric
Maytag
MDE16CSAKA
Dryer - Electric
Maytag
MDE16CSAKQ
Dryer - Electric
Maytag
MDE16CSAYA
Dryer - Electric
Maytag
MDE16CSAYQ
Dryer - Commercial
Maytag
MDE16CSAYW
Dryer - Electric
Maytag
MDE16CSAZA
Dryer - Electric
Maytag
MDE16CSAZQ
Dryer - Commercial
Maytag
MDE16CSAZW
Dryer - Commercial
Maytag
MDE16CSDGW
Dryer - Electric
Maytag
MDE16CSDYW
Dryer - Electric
Maytag
MDE16CSDZW
Dryer - Electric