Grill Parts
Find Parts Fast
Guaranteed Fit
Repair Videos

Popular Grill Parts
- Fix Number
- FIX10241778
- Manufacturer Part Number
- 9942A5251
Installation Instructions
Gary from WESTPHALIA, KS
Gas restriction too great to allow grill to light.
Close propane bottle valve. Unscrew old regulator from back of grill and from hose to propane bottle. Attached new regulator in reverse order of removal. Open bottle valve and test operation. Channel lock pliers may be needed for removal if connections are too tight.
Read more...
- Fix Number
- FIX11748374
- Manufacturer Part Number
- WPW10112253
Fixes these symptoms
- Touchpad does not respond
- See more...
Installation Instructions
Melody from Silverton, CO
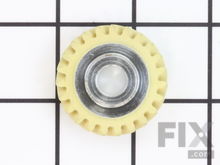
stripped the worm gear, fixed bushings
I opened the mixer and determined that the worm gear had failed, as designed, to save the other gears. There was also oil separated from the grease and it needed replaced. The Transmission case gasket was damaged and must have been from the time it was built. I removed the grease with putty knife and kept I on a plastic plate until the parts came in (to determine the amount needed when I replaced it.) I used the punch to remove the two pins needed with light tap from hammer. I left the mixer in pieces on the counter until the parts arrived. I replaced the gear and all other parts and placed fresh grease in the mixer. I had to adjust the beater, too. I had removed one of the bushings by mistake. When mixer was back together it would not start. IT TOOK SOME TIME BUT I FOUND ANOTHER WEB SITE THAT EXPLAINED HOW TO REPLACE THE BUSHING. TAKE A FLASHLIGHT AND LOOK INTO THE SQUARE BRUSH HOLDER. THERE IS A DETANT IN THE HOLDER. THE SHAVED SIDE OF THE BRUSH NEEDS TO SLIP PAST THE DETENT TO BE ABLE TO TOUCH THE AMATURE. Once that was done, it worked great. Very smooth with new gear and grease.
Read more...
- Fix Number
- FIX17016893
- Manufacturer Part Number
- 80029717
Installation Instructions
Ryan from CATONSVILLE, MD
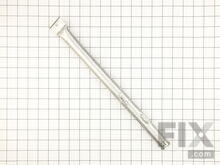
Rusted burners, flame tamers, grease tray, and grease tray rails
Verified propane tank was off, then disconnected.Opened grill and removed grill grates.
Disposed of rusted heat tents / flame tamers.
Used pliers to help remove cotter pins for carryover tubes and end of burner tubes.
Removed and disposed of rusted carryover tubes.
Used small, thin flat head screwdriver to remove electrode clips from front of burner tubes.
With gentle force, lifted rusted flat end of burner tubes to clear posts then gently moved burner tube away from the front of the grill until no longer inside the holes with the gas feeder tube.
Cleaned up all debris from inside the fire box.
Installed new burner tubes: clipped electrode onto the tube at same location as original burner tubes, ensure threaded cotter pin post hole faces up, insert round end with three rows of small holes on the burner into the fire box hole aligned with a control knob at the front of the fire box and onto the gas feeder inside, crimped end of the burner installed onto the post at the back of the fire box & secured with new cotter pin, installed cotter pin post into threaded hole on top of burner tube - finger tight only.
Installed new carryover tubes: with carryover tube flange facing towards the control knobs, install carryover tubes into adjoining burner tubes' cotter pin posts starting with the leftmost carryover tube. Secure left side of carryover tube with a new cotter pin, install the next carryover tube, then secure its left side with a new cotter pin. Repeat until all carryover tubes are installed and install the final cotter pin. Leave the cotter pin post a little loose when starting to ensure its hole is up high enough to install the cotter pin. Once the pin is installed, tighten cotter pin post to secure.
Removed rusted grease tray and disposed.
Removed rusted grease tray rails: removed single screw securing grease tray rail from inside cart below the control knobs & retain, slide far tab of grease tray rail out of slot at the back of the cart
Installed new grease tray rails: inserted tabbed end of grease tray rail into slot at the back of the cart, secured with retained screw into hole inside cart below the control knobs
Installed new grease tray into slot from behind the grill
Tested new burner tubes: reconnected propane tank, turned on, held igniter switch in to hear spark, and turned on each control knob in turn until each burner lit
After successful test and let them burn for a couple minutes, turned off control knobs and turned off propane tank.
Installed new flame tamers over each burner tube, each rested on their spots in the fire box.
Reinstalled grill grates after cleaning them. Read more...
- Fix Number
- FIX12011759
- Manufacturer Part Number
- G515-0017-W7
Installation Instructions
John from HUDSON, NY
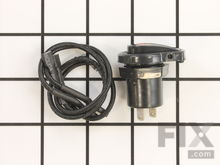
no ignition spark
Remove battery cover and battery.Removed the nut behind the battery cover and remove the module. This allows room to reach the switch.
Remove the igniter switch nut and switch.
Replace switch and switch wiring.
Reassemble all and test operation. Read more...
- Fix Number
- FIX10291063
- Manufacturer Part Number
- 3488898
Installation Instructions
Keith from W JEFFERSON, OH
Both housings where burnt up after years of use.
Just pulled out old units, cleaned up every thing. Put back together. Works like new.
Read more...
- Fix Number
- FIX10294952
- Manufacturer Part Number
- G437-0037-W1
Installation Instructions
Michael from NEOSHO, MO
Wheels were cracked and falling off grill
Removed but on end of axle rod removed wheel one on side pulled axle out removed other wheel installed new wheel on axle slide axle back through grill frame installed other tire on axle rod then put nut and washer back on and tightened nut! Rolls like a charm now!!!
Read more...
- Fix Number
- FIX16502971
- Manufacturer Part Number
- G470-0004-W1A
Brands
- Alfresco Grill Parts
- Arkla Grill Parts
- Aussie Grill Parts
- Black and Decker Grill Parts
- Blue Ember Grill Parts
- Breville Grill Parts
- Broil King Grill Parts
- Broil-Mate Grill Parts
- Broilmaster Grill Parts
- Centro Grill Parts
- Char-Broil Grill Parts
- Chargriller Grill Parts
- Charmglow Grill Parts
- Coleman Grill Parts
- Cuisinart Grill Parts
- Dacor Grill Parts
- DeLonghi Grill Parts
- Ducane Grill Parts
- Ellipse Grill Parts
- Falcon Grill Parts
- Fiesta Grill Parts
- General Electric Grill Parts
- Grill Master Grill Parts
- Huntington Grill Parts
- Kalorik Grill Parts
- Kenmore Grill Parts
- KitchenAid Grill Parts
- Krups Grill Parts
- Lynx Grill Parts
- MHP Grill Parts
- Napoleon Grill Parts
- Nexgrill Grill Parts
- Olympia Grill Parts
- PGS Grill Grill Parts
- Presto Grill Parts
- Sterling Grill Parts
- T-Fal Grill Parts
- Turbo Grill Parts
- Turco Grill Parts
- Twin Eagles Grill Parts
- Uniflame Grill Parts
- Vermont Grill Parts
- Viking Grill Parts
- Waring Grill Parts
- Weber Grill Parts
- Whirlpool Grill Parts
Related Pages
- Grill Brackets and Flanges
- Grill Caps and Lids
- Grill Doors
- Grill Drawers and Glides
- Grill Elements and Burners
- Grill Grates
- Grill Handles
- Grill Hardware
- Grill Knobs
- Grill Legs and Feet
- Grill Panels
- Grill Springs and Shock Absorbers
- Grill Thermostats
- Grill Trays and Shelves
- Grill Wheels and Rollers
Popular Grill Models
- ZGG36N31CSS Gas
- ZGG420NBP1SS
- ZGG36L31CSS Gas
- KBNS361TSS00
- KBNU367TSS00
- KBNU361VSS00
- ZGG48N31CSS Gas
- ZGG300NBP1SS
- FD27LKEC Gas
- ZGG420LBP1SS
- KFRU368TSS00
- KBSU367TSS00
- KFRS365TSS00
- KBNU367VSS00
- 2000005493 Road Trip LXE Portable Grill
- ZGG48N42CSS Gas
- ZGG27L21CSS Gas
- KBNU487TSS00
- KBNU271VSS00
- ZGG540NBP1SS


