General Electric Refrigerator Parts

General Electric Appliance Parts

Popular General Electric Refrigerator Parts

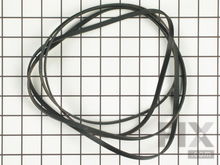
Drive Belt
$36.13
In Stock
★★★★★
★★★★★
1 Review
Fix Number
FIX16542496
Manufacturer Part Number
WE03X29897
This 89.5-inch drive belt is for dryers. It has a 4-rib design on the inside for a better grip. If comparing the size of your current belt to the new one, keep in mind that a small amount of stretching and contortion will occur over time, and this belt will fit despite small inaccuracies. You will find this part wrapped all the way around the dryer drum, around a tension pulley, and around the drive motor pulley. This allows the parts to work together to spin the drum as the motor rotates. A common symptom of a broken drive belt is a drum that will not turn. This part is prone to wear and tear over time and will likely stretch or become brittle, leading to complete breakage of the part. The drum cannot spin without a drive belt, so it needs to be replaced immediately. For this repair, we recommend wearing work gloves to protect your hands from sharp edges, disconnect the power, remove the main panel, and access the motor drive to secure the new belt in place.
Fixes these symptoms

Installation Instructions

Nae from BRENTWOOD, TN
The dry was making a whining sound. Very loud.
I followed all the video on the website with all the parts I had purchased. Very easy. Just make sure you unplug the dryer first. Thank you, Read more...
★★★★★
★★★★★
2 Reviews
Fix Number
FIX6447706
Manufacturer Part Number
WE1M1067
This single drum bearing slide is an OEM approved replacement part for dryers. It can also be known as a bearing drum slide, pad, or glide. The slides attach to the inner most slots on the front bearing. As the dryer rotates, the drum bearing slides help to support the front of the drum. If your appliance becomes noisy, is not drying properly, or leaves marks on clothes, it may be time to replace it. If you are replacing one slide, we recommend replacing the other slide at the same time, as they deteriorate at a similar rate. You will need to order 2 of these parts as there are 2 in each dryer. It is approximately 2.6-inches deep, 0.06-inches in height, and 0.5-inches wide. This part is denoted as being green in the title, however users and technicians have noted it is actually gray in color.
Fixes these symptoms

Installation Instructions

Donald L. from Belmont, MA
Dark marks on clothing; clothing sticking between drum and front panel
Others with the same problem of dark marks on clothing suggested replacing the white and the grey drum slides that slip into the front drum bearing unit. When I open up the dryer, I did find that both the white and grey drum slides on one side of the front drum bearing piece had completely worn away, and some of the drum bearing piece was also worn away. I had decided in advance to order both white slides, both grey slides, a new felt seal, and the front drum bearing piece. Possibly I could have reused the old front drum bearing, but the replacement was cheap enough. Three bits of advice: 1) if you replace the felt seal, make sure you get it tucked behind the clips on the door panel; 2) if you replace the front drum bearing piece, once you have the dryer put back together, reach up and pull the plastic drum bearing toward you to be sure it is fully snapped into place; 3) after you replace the slides or felt, the drum will make mild rubbing noises as it turns, so run the dryer with no heat for about 30 minutes to seat the parts. Read more...
★★★★★
★★★★★
1 Review
Fix Number
FIX755842
Manufacturer Part Number
WE1M504
This single drum bearing slide attaches to the outer-most side of the bearing. This part is also sometimes referred to as a drum slide, drum glide, or drum pad. It provides support to the front of the drum as it rotates. They are approximately 3-inches long, 1 inch wide and made from a durable white plastic. If your appliance starts making unusual sounds, is not drying clothes properly, or leaves marks on clothes, it may be time to replace this part. The dryer has 2 slides, which we recommend replacing at the same time, as they tend to wear out at the same rate. You will need to order 2 of this part to replace both drum bearing slides, since it is sold individually. Before you begin this repair, be sure to disconnect the power to the dryer.
Fixes these symptoms

Installation Instructions

Donald L. from Belmont, MA
Dark marks on clothing; clothing sticking between drum and front panel
Others with the same problem of dark marks on clothing suggested replacing the white and the grey drum slides that slip into the front drum bearing unit. When I open up the dryer, I did find that both the white and grey drum slides on one side of the front drum bearing piece had completely worn away, and some of the drum bearing piece was also worn away. I had decided in advance to order both white slides, both grey slides, a new felt seal, and the front drum bearing piece. Possibly I could have reused the old front drum bearing, but the replacement was cheap enough. Three bits of advice: 1) if you replace the felt seal, make sure you get it tucked behind the clips on the door panel; 2) if you replace the front drum bearing piece, once you have the dryer put back together, reach up and pull the plastic drum bearing toward you to be sure it is fully snapped into place; 3) after you replace the slides or felt, the drum will make mild rubbing noises as it turns, so run the dryer with no heat for about 30 minutes to seat the parts. Read more...
Lint Filter
$41.07
In Stock
★★★★★
★★★★★
7 Reviews
Fix Number
FIX11763056
Manufacturer Part Number
WE03X23881
This Lint Filter is a genuine OEM part for your clothes dryer. The Lint Filter can be used with both electric and gas models. Proper air flow is essential to the operation of the dryer, and the lint filter helps prevent debris from getting into your ducts and causing obstructions. Regular cleaning of this part is essential to prevent fires and can help your laundry dry more quickly. It may be time to replace the filter if the casing is cracked or the screen is ripped, or it is taking a long time for your laundry to dry. Installation is very easy and no tools are required; simply remove the old filter (just like you would to clean it) and insert the new one in its place.
Fixes these symptoms

Installation Instructions

Georgia from HOT SPRINGS, VA
Replacement
Just popped it in the opening. Read more...
LOWER RACK ROLLER
$13.13
In Stock
Fix Number
FIX16217024
Manufacturer Part Number
WD12X26146
The roller helps the lower rack of your dishwasher to smoothly slide in and out of your appliance. A broken or worn roller wheel can make it clunky or difficult to get the rack in and out of the dishwasher, and the part should be replaced. The rollers are sold individually, however there are four in total in your dishwasher. You may want to replace all at the same time to ensure they have even wear. Replacing a broken roller is a simple job and may require the use of a flat blade screwdriver. Remove the entire lower rack from your dishwasher and place it on a suitable work surface. Release the tabs to open the cover on the roller assembly, using the screwdriver if necessary to pry them open. Pull the damaged wheel off the assembly and push the new one into place. Reattached the cover and place the rack back into the bottom of your dishwasher. The lower rack should now easily glide in and out. These rollers are genuine OEM parts that measure approximately 1.5 inches in diameter and are charcoal in color.
★★★★★
★★★★★
3 Reviews
Fix Number
FIX11757048
Manufacturer Part Number
WPW10671238
This part is the center crisper drawer slide rail which helps to support the crisper drawers in your refrigerator. If you have difficulty opening or closing your crispers, the center slide rail may be broken and needs to be replaced. Too much weight on the shelf above or in the crisper drawers may cause the center slide rail to break. Replacing this part is easy and does not require any tools. First remove any items off the crisper shelf along with the crisper drawers, then carefully remove the glass shelf. Once you can access the broken center slide rail, gently pull forward on the crisper shelf frame and pull the rail out. Take your new part and line up the locator tab at the rear of the rail, pull the crisper shelf forward, and drop the new rail into place. You can then replace the glass shelf and the crisper drawers, which should now easily slide in with the new rail installed. This is a genuine OEM part, made of white plastic and approximately 13.5 inches in length.
Fixes these symptoms
  • Clicking sound
  • Door won’t open or close
  • Fridge and Freezer are too warm
  • See more...

Installation Instructions

Ruthann from CHEVY CHASE, MD
center bracket broke
Just took the glass out of the shelf above the crisper drawers, snapped the new bracket in place, and replaced the drawers. Nothing to it. Read more...
Light Bulb - 40W
$11.73
In Stock
★★★★★
★★★★★
2 Reviews
Fix Number
FIX884734
Manufacturer Part Number
8009
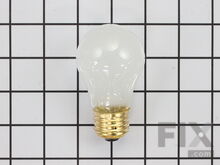
This is a genuine OEM 40-Watt replacement light bulb that is compatible with various types of appliances. It has a frosted glass bulb with a standard metal socket base, making it easy to screw and unscrew by hand to replace. It is designed to tolerate extreme temperatures, which is why it is commonly used to light the inside of refrigerators and ovens. Depending on the appliance and location of the bulb, disconnecting the power is recommended. This bulb is sold individually.

Installation Instructions

Helen from Quincy, MA
lightbulb in refrigerator went out
Removed plastic shield on top of refrigerator. Removed old bulb.. Replaced new bulb. Reinstalled plastic shield. Voila! Read more...
Fix Number
FIX2358879
Manufacturer Part Number
241993001
This rear crisper support mounts on the inside of the refrigerator wall to support the rear crisper cover. It is made of white plastic and is sold as an individual part. The support is secured in place by a locking pin. It usually becomes evident that this part needs to be replaced when the shelf is no longer level or the drawer is not opening and closing as it should. For this repair, you will need to remove all the shelves above the crisper to provide space to complete this easy repair. You will need a small putty knife, short flat blade screwdriver, and a small hammer.
Fixes these symptoms

Installation Instructions

Charles from Candler, NC
Crisper support broke causing the crisper to chip on back left corner and the plastic cover broke.
Took hammer and punch pushed the cover pin through, using a putty knife and tape to protect the paint pried the cover support out. pushed the new support in and tapped the pin flush with outside edge of support placed cover back on supports replacing glass. had to order pan-crisper. Every thing came in securely packed and was shipped very quickly. Thank you for the video information on how to remove the broken support. Read more...
Refrigerator Water Filter
$88.89
In Stock
Fix Number
FIX16217433
Manufacturer Part Number
XWFE
This water filter is found in the rear upper-right corner of the interior of the refrigerator. If your model has a replacement indicator light it will turn red to signal the need for a replacement. If your model does not have an indicator light, the filter cartridge should be replaced every six months or earlier if you notice a decrease in the flow of water from the dispenser. The filter media is carbon black and reduces leads, some pharmaceuticals, and fifty other contaminates. It is 2 inches deep, 6 inches high, 2.25 inches wide and weighs approximately 1 lbs. When it comes time to replace the filter, first discard the old one by turning it to the left to remove. It will release itself when it has been turned far enough. Installation instructions are quick and simple but can vary slightly depending on if it is a bottom-freezer, side-by-side or multi-door bottom-freezer model. Refer to the user instructions for you filter. Do not forget to reset the filter change indicator if applicable. In bottom-freezer and side-by-side models this is done by pressing and holding the RESET WATER FILTER bottom for three seconds. On a multi-door bottom-freezer model, press the button underneath the Confirm Filter Change message while the water is dispensing. On select models this reset is done automatically once a new filter is installed.
Refrigerator Water Filter
$92.40
In Stock
Fix Number
FIX10063209
Manufacturer Part Number
RPWFE
This NSF-certified water filter helps to improve the taste, quality, and health of your water by removing a number of contaminants including mercury, lead, and trace pharmaceuticals. The filter should be replaced every six month or after 300 gallons of water have been filtered. If you are unsure if your filter is due for replacement, another indicator is if the water flow from the dispenser has slowed down considerably. Replacing this part is a simple task that does not require any tools or shutting off the water or power supply to your fridge. Once the new filter has been installed, be sure to run at least two gallons of water through before consuming.
Fixes these symptoms
  • Ice maker not making ice
  • Not dispensing water
  • See more...

Appliance Type

Related Pages

Popular General Electric Refrigerator Models