Whirlpool Dishwasher Parts
Find Parts Fast
Guaranteed Fit
Repair Videos


Popular Whirlpool Dishwasher Parts
- Fix Number
- FIX10065979
- Manufacturer Part Number
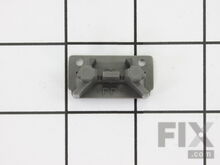
- W10712395
Fixes these symptoms
- Door latch failure
- Door won’t close
- Leaking
- See more...
Installation Instructions
gregory from cooperstown, NY
New parts are not identical to original
I was expecting original equipment parts, so initially opening the box I was surprised and thought that I would be sending them back. The new parts were, however, correct, and actually of better quality than the original. More steel and less plastic. Dimensions were the same but connections were very different. Instructions were included with photos instead of diagrams. I do prefer well drawn "exploded" diagrams, based on years of experience putting tools and machinery together. The first rack adjuster took 10 minutes and a little head scratching, but the second one took about two minutes. Add about three minutes to remove the old adjusters and the entire job took 15 minutes. I would advise the manufacturer to provide a detailed diagram instead of photos.
Read more...
- Fix Number
- FIX11756150
- Manufacturer Part Number
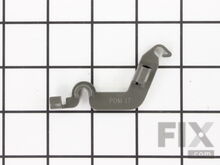
- WPW10546503
Fixes these symptoms
- Door latch failure
- Door won’t close
- Leaking
- See more...
- Fix Number
- FIX11746591
- Manufacturer Part Number
- WP8565925
Fixes these symptoms
- Door latch failure
- Door won’t close
- Not cleaning dishes properly
- See more...
Installation Instructions
Richard from Austin, TX
Wheels on original upper rack adjust fell off and end stops would not stay on.
Removed old end stops. Pulled rack out of machine. Carefully removed old adjusters. Snapped in new adjusters. Slid rack back into the runners. Clipped in the new end stops. Done.
Read more...
- Fix Number
- FIX11750057
- Manufacturer Part Number
- WPW10195417
Fixes these symptoms
- Door latch failure
- Door won’t close
- See more...
Installation Instructions
JEROME from MAPLE GROVE, MN
Wheel fell off the wheel assembly.
Step 1: Snapped the old wheel assembly off.Step 2: Snapped the new wheel assembly on. Read more...
- Fix Number
- FIX11750071
- Manufacturer Part Number
- WPW10195622
Fixes these symptoms
- Door latch failure
- Door won’t close
- Not cleaning dishes properly
- See more...
Installation Instructions
JAMES from Waterloo, IA
The plastic clips were broken and old
I took out the old clips with a flat screwdriver and popped the new ones in. It took a min to see how to put them together and YOU HAVE TO PUT THE RAIL IN THE DISHWASHER FIRST! It is very tempting to just put the new part in but then you will have a hard time straddling the wheels inside the rail. Once you see how they fit and position them it is pretty easy to put them in once the rail is inside the washer and in place. These are the only ones I have ever had to replace. I suggest that you keep idiots that pull the top rack out too hard away from it so you do not have to spend 17 plus dollars on some plastic pieces to make your stuff work again. In my case I have co-workers that use it so I just put the part number on the magnet they gave me and the name of what it is called so that next time I will not have to be the one doing it. I could have went to the local parts place but they insisted I needed the exact model number and I had the one from the door but they said it was wrong. I was able somehow to use that number to pull pictures and this part from Google search so the hell with the local people I shopped here instead! The actual model # was in fact on the dishwasher where the door closes by the seal on the left side facing the front of it. It is only on there once while there are at least 2 stickers with the other number I pulled from the door in at least 2 languages. You tell me which is more needed..... yeah I did not need the model number as long as I had the sticker one. Ha Ha local losers at Dey Appliance can suck it! They always act like customers are interrupting them when you call or go in. Not anymore!
Read more...
- Fix Number
- FIX382824
- Manufacturer Part Number
- 675808
Fixes these symptoms
- Door won’t close
- Leaking
- Noisy
- See more...
Installation Instructions
Christina from REDDING, CA
Replacing upper shower arm
I followed the instruction in the video you provided on product sale page ... was clear and very helpful.
Read more...
- Fix Number
- FIX8260087
- Manufacturer Part Number
- W10518394
Fixes these symptoms
- Leaking
- Not cleaning dishes properly
- Not draining
- See more...
Installation Instructions
Jesse from Mandan, ND
not drying or cleaning dishes
Turned off breaker at power source. Turned off water supply valve. Disconnected water supply hose and drain hose. Removed base panel with 1/4'' nut driver. Removed power box cover screw with 1/4'' nut driver, turned off wire nuts connecting power cable and used phillips screw driver to remove ground. Removed 2 phillips screw under front of counter holding dishwasher in place. rolled dishwasher out of cabinet and layed face down on towels. Pulled two wires connected to the element marking position prior. Then removed two heater element nuts with adjustable wrench. Tipped dishwasher up, opened door and lifted out lower rack, underlower rack is heating element and lifted out. Reverse procedure to install.
Read more...
- Fix Number
- FIX12348515
- Manufacturer Part Number
- W11177741
Fixes these symptoms
- Leaking
- See more...
Installation Instructions
A W from MENDOTA, IL
Started leaking under the door. The rubber door gasket appeared to be breaking down, very soft.
I soaked the new door gasket in warm soapy water while I removed the old gasket. This is the rubber seal inside the washer that closes off the sides and top of the door. Gently pulling on the old gasket removed it, then the new one slide right into place. Took about 5 minutes or less.
Read more...
- Fix Number
- FIX11748190
- Manufacturer Part Number
- WPW10082853
Fixes these symptoms
- Not cleaning dishes properly
- See more...
Installation Instructions
Susan from Paola, KS
Tine Pivot broke off, fell in bottom of dishwasher & part of it melted from heat of dishwasher; could not be used, had to be replaced
Snapped new one in place
Read more...
- Fix Number
- FIX972325
- Manufacturer Part Number
- 8194001
Fixes these symptoms
- Door latch failure
- Door won’t close
- Leaking
- See more...
Installation Instructions
Rex from Fuquay-Varina, NC
Broken balance link nylon cord (cable) due to improper installation. Too much tension.
Looked at video and followed instructions. Be sure to set the link assembly at correct angle - follow what you see in video. The assembly should be straight up & down, not at an angle. Setting at angle causes too much tension on the nylon cord (cable) and makes the door hard to open and keeping in one position.
Read more...
Appliance Type
Related Pages
- Whirlpool Dishwasher Brackets and Flanges
- Whirlpool Dishwasher Caps and Lids
- Whirlpool Dishwasher Circuit Boards and Touch Pads
- Whirlpool Dishwasher Dishracks
- Whirlpool Dishwasher Dispensers
- Whirlpool Dishwasher Doors
- Whirlpool Dishwasher Ducts and Vents
- Whirlpool Dishwasher Filters
- Whirlpool Dishwasher Handles
- Whirlpool Dishwasher Hardware
- Whirlpool Dishwasher Hoses and Tubes
- Whirlpool Dishwasher Latches
- Whirlpool Dishwasher Motors
- Whirlpool Dishwasher Panels
- Whirlpool Dishwasher Pumps
- Whirlpool Dishwasher Racks
- Whirlpool Dishwasher Seals and Gaskets
- Whirlpool Dishwasher Spray Arms
- Whirlpool Dishwasher Springs and Shock Absorbers
- Whirlpool Dishwasher Switches
- Whirlpool Dishwasher Wheels and Rollers
- Whirlpool Dishwasher Wire Plugs and Connectors
Popular Whirlpool Dishwasher Models
- WDT750SAHZ0 DISHWASHER
- WDTA50SAHZ0 DISHWASHER
- WDT970SAHZ0 DISHWASHER
- WDF520PADM7 DISHWASHER
- WDT720PADM2 DISHWASHER
- WDT780SAEM1 DISHWASHER
- WDT970SAHV0 DISHWASHER
- WDT710PAYM3
- WDT710PAYM6 DISHWASHER
- WDT720PADM1 DISHWASHER
- GU2275XTVY0 Undercounter
- KDTM404KPS0 Dishwasher
- WDF590SAJM0
- GU2275XTVY1 Undercounter
- WDT780SAEM2 DISHWASHER
- WDT710PAYM5 UNDERCOUNTER DISHWASHER
- WDT790SLYM1
- WDF750SAYM3 DISHWASHER
- WDF510PAYS6
- DU1055XTSS3


