


How To Repair Cutting Line On A Tiller
- Rated as REALLY EASY
- 3 step by step videos
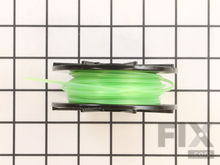
Line
If your string trimmer will not feed any more line out of the head assembly, the line may be tangled inside and unable to feed out and it normally would. Before inspecting the head, make sure to disconnect the spark plug boot to ensure that the trimmer does not power on while you are handling the head assembly. Once this is done, remove the spool from its housing. If the line is knotted or tangled, remove it from the spool and rewind it to ensure that it can release without getting stuck. Refer to your user manual for more information on how to properly wind line around the spool to prevent it from tangling and getting stuck inside of the assembly.

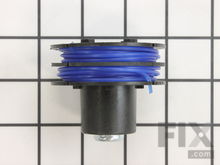
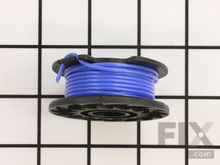
Spool
If the trimmer spool becomes worn or damaged, it may not feed line out of it when the trimmer is bumped and prompted to release more line. The spool contains a ratcheting system that uses centrifugal force to allow more line out of the head when the spring on the head is engaged. If the head is bumped too hard on the ground, or the ratchet system gets clogged with dirt and debris, the line will become stuck and will no longer feed out of the head. If this is happening, remove the spool and inspect it for damage. If it is not noticeably damaged, try wiping it down and rewinding the line before reinstalling and trying it again. If this does not work, the spring may be damaged. Refer to your user manual for the proper replacement part number if a new spool is required.


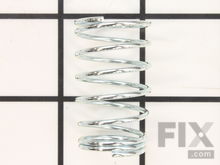
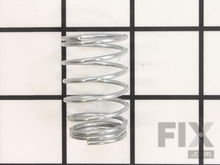
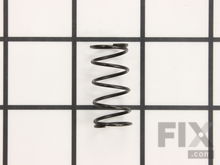
Spring
The spring at the end of the head assembly engages the ratchet system to allow more line to be fed out when the user taps the head assembly on the ground. If this spring becomes damaged or clogged with debris, the bump feed system that most string trimmers employ will not work. To inspect the spring, remove the top of the head assembly. The spring is usually attached to the inside of the head. If the spring is broken or worn to the point where it has lost most of its tension, it will need to be replaced. A new spring can be installed with relative ease. Refer to your user manual for more information on how to repair this mechanism for your particular model, and for the proper replacement part number if a new spring is required.
More Repair Parts
Still not sure which part is broken? We can offer you custom troubleshooting help if you search with your model number.