


How To Fix a Water Heater With An Inconsistent Temperature
- Rated as EASY
- 9 repair stories
- 2 step by step videos
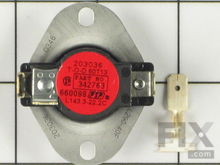
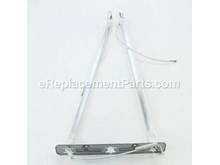
Control Thermostat
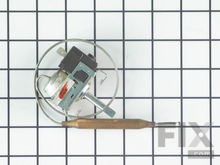
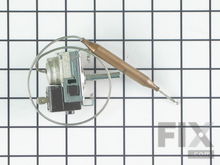
If your hot water heater does not keep a constant temperature, you may have a defective thermostat. On most residential electric hot water heaters there will be both upper and lower heaters and thermostats. If only the upper heater circuit is functioning, you may experience large temperature changes and a short supply of hot water. The upper control thermostat controls power to the upper element, and as well, is used to divert power to the lower thermostat and heating element when the correct temperature at the top of the tank is reached. If the upper thermostat does not divert power to the lower thermostat, no heating at the bottom of the tank will occur and a shortage of hot water will be experienced. Likewise, if either the lower thermostat or lower heating element is defective, then you will also experience the same symptom. The most logical way to troubleshoot this symptom is to eliminate the lower thermostat and heater element first. Start by turning off the power to the water heater and then open a hot water faucet until the temperature drops to below 90 degrees Fahrenheit. Next, remove the lower access cover on the side of the tank, pull the insulation aside and remove the wires from the lower thermostat. With a multi-meter set to the R 1 ohms scale, you should measure continuity across the terminals of the thermostat. If there is no continuity, then the thermostat is defective and will need to be replaced. Lift up on the spring mounting bracket to remove the thermostat, and make sure that when installing the new thermostat that the mounting bracket maintains a firm contact between the thermostat and the tank. If the thermostat passed the continuity test, then you should next check the lower element for continuity. If the lower element is ok, then you should suspect that the upper thermostat has failed and does not divert power to the lower heater circuit. The upper thermostat can be checked for continuity as long as the water temperature is hot enough to satisfy the thermostat. This test will require that the power be on long enough to heat the water until the upper thermostat turns the element off. At this point, the upper thermostat should divert power to the lower heater circuit. Turn off the power again and remove the upper access cover. Pull back the insulation and then remove the wires from the terminals marked L1 and T4 on the upper thermostat. There should be continuity between these two terminals when the water has reached the set temperature. No continuity would indicate a defective thermostat. On gas-fired water heaters the temperature is controlled by the gas valve. The thermostatic controlled gas valve assembly will have a dial that will allow for temperature adjustment and will also have a probe that monitors the water temperature. If the pilot light stays lit, but the water temperature is not consistent, then the valve assembly is likely defective. This repair should only be performed by a trained professional.
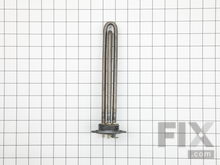
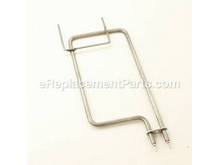
Lower Heater Element
If your hot water heater does not keep a constant temperature, you may have a defective lower heater element. On most residential electric hot water heaters there will be both upper and lower heaters and thermostats. If only the upper heater circuit is functioning, you may experience large temperature changes and a short supply of hot water. The upper control thermostat provides power to the upper element, and as well, is used to divert power to the lower thermostat and heating element when the correct temperature at the top of the tank is reached. If the lower heating element is defective, then you will experience a symptom of insufficient hot water and temperature drops. To check the lower heating element, start by turning off the power to the heater and then remove the lower access cover on the side of the tank. Pull the insulation aside and remove the wires from the lower element. With a multi-meter set to the R 1 ohms scale, you should measure continuity of approximately 10 to 20 ohms across the two terminals. If the continuity test on the element passed, then you should next check the lower thermostat for continuity. If there is no continuity, then the element is defective and will need to be replaced. You will have to drain the tank before replacing an element. Turn off the inlet water valve and connect a hose to the drain valve to expel the water. Open the drain valve and a hot water faucet until the water level is below the opening for the element. Use the proper size socket or an element wrench to remove the old element. Make sure that the gasket on the new element is intact and that you tighten the element securely. Reattach the wires to the terminals and then close the drain valve tightly and allow the tank to fill completely. Check for leaks before turning on the power.
More Repair Parts
Still not sure which part is broken? We can offer you custom troubleshooting help if you search with your model number.