


How to Fix a Noise Filter for a Washer That Will Not Start
If your washer’s touchpad is not responding or your washer simply will not start, this may be due to an issue with your washer’s noise filter. A noise filter can ultimately stop your washer from working properly since power has to run through the filter on its way to the control board, which runs the machine. If the filter itself is bad, you can sometimes hear an abnormal sound coming from them. Diagnosing and replacing the noise filter in your washer is a simple repair and our guide below will step you through how to determine your noise filter is at fault, and how to access and replace it.
What is a Noise Filter?
Noise filters on washing machines are used to absorb any electrical signals produced by the appliance, to prevent them from interfering with any other electronics in your home or with the rest of the washer’s internals. Noise filters vary in size and complexity; they can look like a small C-cell battery or be as big as an entire circuit-board mounted in a plastic case.
Where is the Noise Filter Located?
Normally the noise filter is housed within the same area as the washer’s control board, but you may need to access the inside of the control panel to identify its location. Refer to the user manual for any assistance in finding your model's noise filter.
General Location of the Noise Filter in a Top Load Washer
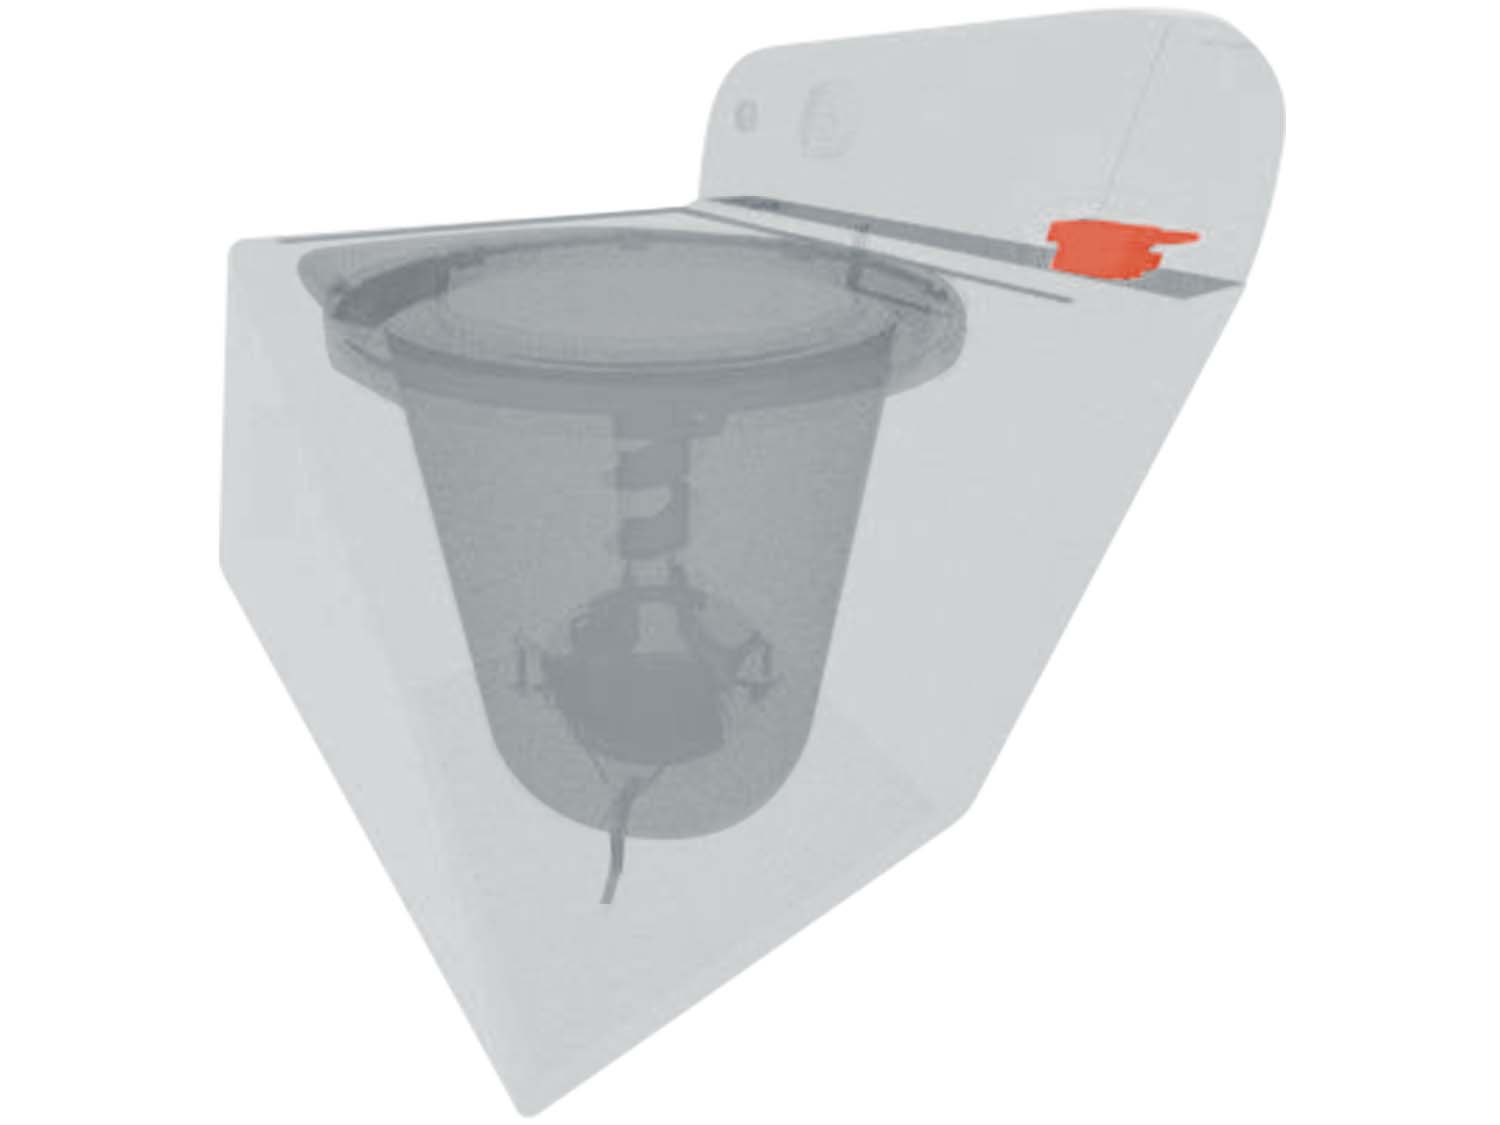
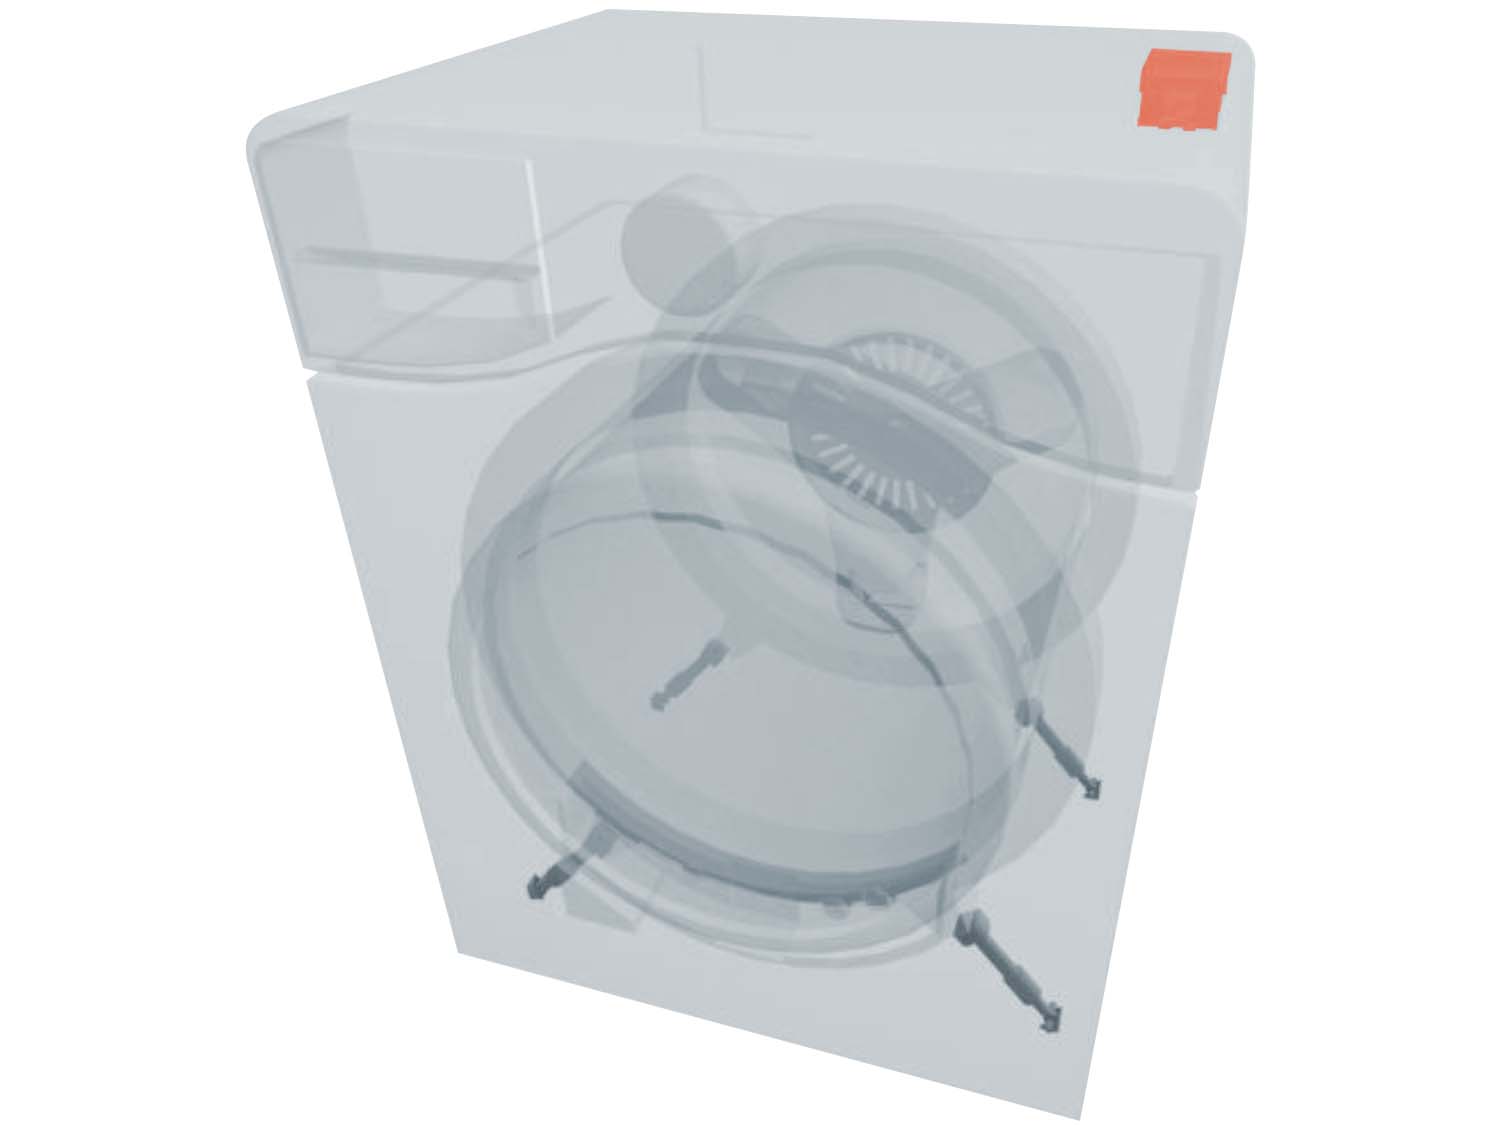
General Location of the Noise Filter in a Front Load Washer
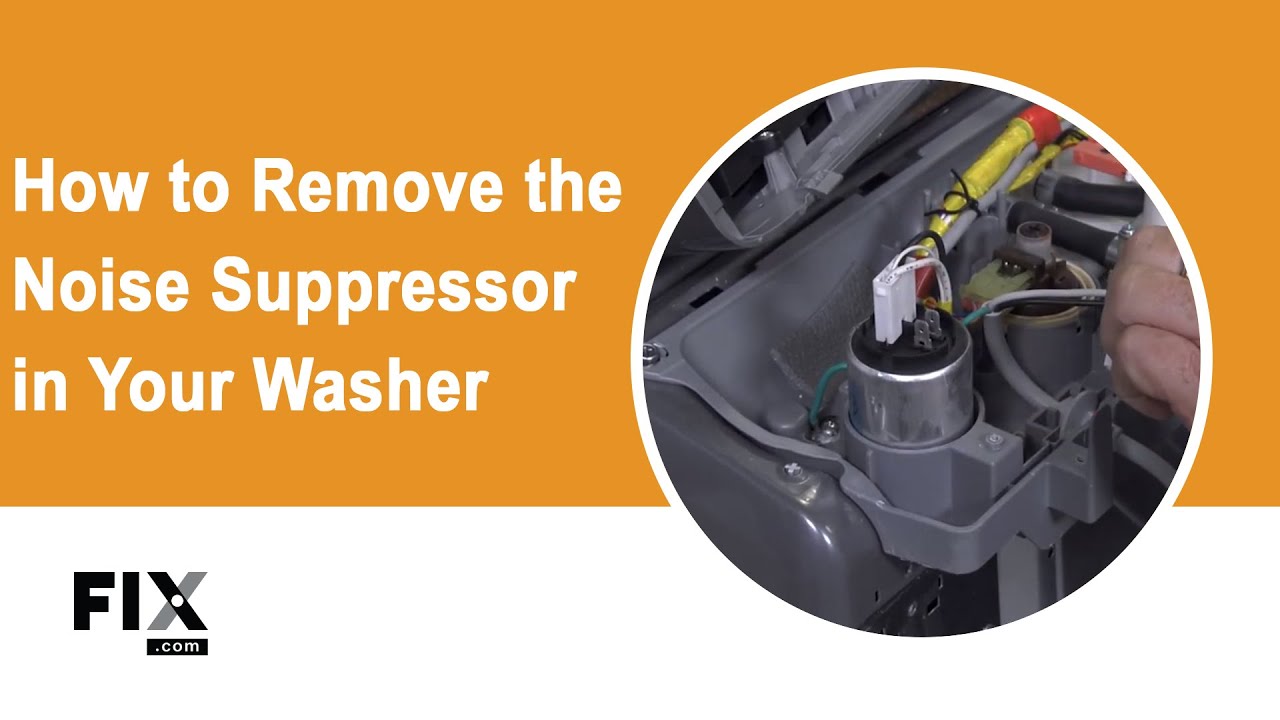
How to Access, Remove, and Inspect the Noise Filter
- Disconnect your appliance from any electric current and from its water source.
- Disconnect any screws that are securing your control board or top panel to your washer.
- Refer to your user manual or the image below to locate your noise filter assembly. This might be on the side of the washer or mounted upright in the back.
- Disconnect any wire harnesses, but make sure to take a picture of the wire setup for future reference.
- Remove the noise filter by unscrewing it from the frame of the washer.
How to Test a Noise Filter
Typically, the easiest telltale sign that your noise filter has malfunctioned is that the washer is completely unresponsive, but it’s also common for a bad or faulty filter to start making a distinctly abnormal sound. We recommend using a multimeter to check the conductivity within the noise filter itself.
How to Install a New Noise Filter
When troubleshooting any washer symptom, it’s important to unplug your washer and disconnect it from any source of electricity, as well as to close off any water lines. For more information on repair safety, check out this safety repair guide. And make sure to find out exactly where your noise filter is before you start. Refer to the 3D diagram below if necessary.
- Install your new noise filter by screwing it into the frame of your washer.
- Reconnect any wire harnesses and cables that were previously disconnected.
- Reconnect the top panel you previously removed and reattach any screws securing it.
- Connect your appliance to its outlet, and your repair is now complete.

Next: Troubleshooting the User Interface
Go To Main Page: Will Not Start