


How To Repair A Trash Compactor That Won't Stop Running
- Rated as REALLY EASY
- 10 repair stories
- 2 step by step videos
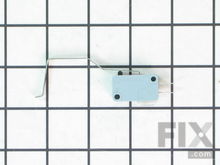
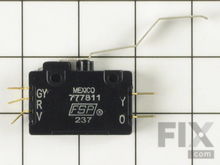
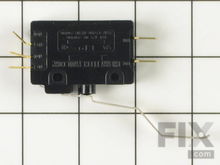
Top Limit or Directional Switch
If your trash compactor keeps running after the cycle is complete, the problem may be with the top limit/directional switch assembly. The top limit/directional switch is a multifunction switch located at the top of the unit, and is activated by a metal tab on top of the ram. The directional switch is used to reverse the motor rotation and the travel direction of the ram. The top limit switch is often part of the directional switch and is used to automatically stop the motor when the ram reaches the top. If the top limit/directional switch contacts fail the motor may not stop at the completion of the cycle and will continue to run. To check for a defective switch, remove the unit from the cabinets and disconnect the power. Remove the mounting brackets and then the top panel. Inspect the switch actuating lever to ensure that the tab on the ram makes contact at the top of the ram’s travel. Remove the ram using caution not to damage the directional switch lever. Remove the switch and the wires from the switch terminals and check for continuity with a multi-meter. The top limit switch should have terminals marked C for “common” and NC for “normally closed”. You should see continuity between these two terminals without depressing the switch lever. With the lever depressed, there should be no continuity. You may require the electrical schematic for your model to determine the proper switch terminals to check. If you checks indicate otherwise, then you will need to replace the switch and verify the proper adjustment for the activating lever.
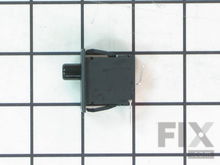
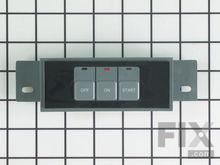
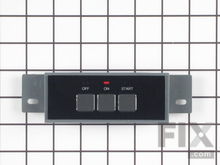
Start Switch
If your trash compactor keeps running after the cycle is complete, you may have a defective start switch. The start switch is used to supply power to the motor to initiate the compaction cycle. The switch may be a rotary, pushbutton, or rocker style, and is located on the control panel or inside the drawer opening on foot pedal operated models. The switch uses momentary contacts that close to start the motor and then spring back to open the contacts. If the contacts weld or stick closed, the motor may continue to run after the cycle is complete. Check the start switch for continuity with a multi-meter. To determine if you have a defective switch, first locate the fuse or breaker and turn off the power. If your model uses a control panel mounted start or run switch, remove or lower the panel to expose the rear of the switches. You may have to pull the compactor partially out of the cabinets to do this. If your model uses a foot pedal operated switch, you will need to remove the unit from the cabinets to access the start switch and actuator. Using the wiring diagram for your model, determine the switch terminals to test and remove the wires from the terminals, usually marked C and NO. In the normal or resting position the switch should show no continuity. Only when rotated or depressed to the start or run position, should the switch then show continuity. If the switch shows continuity at all times, then it needs to be replaced. On foot pedal operated models, make sure that the actuator is not stuck and holding the switch closed.
More Repair Parts
Still not sure which part is broken? We can offer you custom troubleshooting help if you search with your model number.