Breville Toaster Oven Parts
Find Parts Fast
Guaranteed Fit
Repair Videos


Popular Breville Toaster Oven Parts
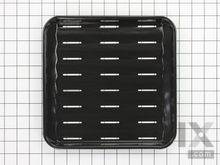
- Fix Number
- FIX12008409
- Manufacturer Part Number
- SP0002652
Installation Instructions
muriel from NORTH BERGEN, NJ
Crumb tray uncleanable
The hardest part was unwrapping the package :) I was really pleased to see that this was a real quality product replacement and it fit perfectly.My only issue was the size of the packing box which would have fit 12 crumb trays when I only needed one. Too much waste! Read more...
- Fix Number
- FIX12008408
- Manufacturer Part Number
- SP0002651
- Fix Number
- FIX12008682
- Manufacturer Part Number
- SP0010504
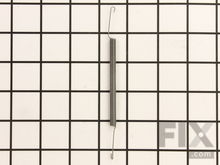
Installation Instructions
Joyce from CRESTWOOD, KY
Door spring broke allowing door to drop down when opened, and not completely closing during operation
Step 1: Unplug unitStep 2: Remove feet
Step 3: Remove rear panel (lot of phillips screws)
Step 4: Pull side panel away far enough to remove old spring pieces and install new (I used needle nose pliers to connect spring to door, then stretch other end to hole on back of unit).
Step 5: Reapply rear panel, ensuring top goes behind lip of top cover
Step 6: Reapply feet
Step 7: Note - I believe I removed 32 screws total in order to remove rear panel and side panel to complete job. Read more...
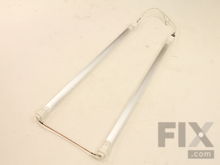
- Fix Number
- FIX12008676
- Manufacturer Part Number
- SP0010494
Installation Instructions
Michael from BOTHELL, WA
Glass on the bottom heating element broke and needed replacement.
First step was to remove the outer housing. I flipped the unit over and removed the screws on the feet and bottom panel. This was about 20 screws (note the front feet have a screw to secure a cover strip that covers the screws attaching the feet to the unit). Specifically note that there is a long screw on one of these feet that you need to keep track of and realign into a plate when reassembling. After that, remove all the screws from the back (again, there are a lot of screws to remove, but you will want to remove both those for the outside casing as well as for those securing the back panel). Now you should be able to lift the housing in order to get the back panel off of the unit. The housing will not come off yet because on the side near the front panel controls are a 5 or 6 black screws that secure the housing to the control panel. You need a long screwdriver as the metal housing can be sharp in order to remove these screws. Once undone, you should be able to lift the housing by raising the back first as it has a metal lip on the front. With the tilt, you should be able to remove the housing from the lip. With the housing off, unplug the heater element connector from the circuit panel. You might need a pair of pliers to do this. The other side of the heater element goes into a wire connector that you will need to cut off. I advise cutting off the wire connector versus cutting the wires as there is not a lot of extra wire if you need to re-strip the wire to go into a new connector. You will need to cut at least one of the tie straps to get the wire free. After that, remove the circuit board, should be 4 screws to get access to the heating element. From inside the toaster, remove 2 screws on the other side that fasten a bracket that holds the heating element in place. Removing the heating element was the most difficult challenge as there are two tabs on the side with the circuit board that holds the bulbs in place. I used a really small screwdriver to bend the tabs out so that I could remove the bulbs. Even with this, it took a lot of maneuvering with pliers to get the heads of the heater element free. I suggest goggles and gloves for this piece as I was worried the glass exteriors would break trying to release them. Once you slide the element out, the bracket should be able to slide off the end. Reassembly was more straightforward, but getting the heating element to seat correctly with the tabs was still a chore. Otherwise, the only other challenge was lining up the screws that held the housing to the front panel. A long magnetized screwdriver would be a good recommendation to do that piece. Finally, the one front fit does have a metal bracket that slides and so you need to align that piece before those screws will go in.
Read more...
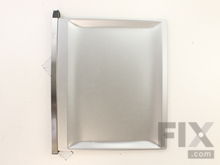
- Fix Number
- FIX12008407
- Manufacturer Part Number
- SP0002650


