Inglis Range Parts
Find Parts Fast
Guaranteed Fit
Repair Videos


Popular Inglis Range Parts
- Fix Number
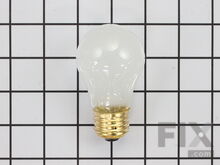
- FIX884734
- Manufacturer Part Number
- 8009
Installation Instructions
Helen from Quincy, MA
lightbulb in refrigerator went out
Removed plastic shield on top of refrigerator. Removed old bulb.. Replaced new bulb. Reinstalled plastic shield. Voila!
Read more...
- Fix Number
- FIX11750107
- Manufacturer Part Number
- WPW10196405
Fixes these symptoms
- Element will not heat
- See more...
Installation Instructions
Henry from St Louis, MO
Replace old drip Bowls
Remove heating elements, remove old drip bowl, install new drip bowls replace heating elements.
Read more...
- Fix Number
- FIX11750108
- Manufacturer Part Number
- WPW10196406
Fixes these symptoms
- Element will not heat
- See more...
Installation Instructions
Henry from St Louis, MO
Replace old drip Bowls
Remove heating elements, remove old drip bowl, install new drip bowls replace heating elements.
Read more...
- Fix Number
- FIX11740783
- Manufacturer Part Number
- WP3149400
Fixes these symptoms
- Element will not heat
- Oven is too hot
- Oven not heating evenly
- See more...
Installation Instructions
chris from ABERDEEN, SD
Burner would not heat up and the cook top on light would not turn off.
First turn off breaker. Pull out stove and unplug. There was about 8 screws on the panel on the back side of the control panel. Remove panel. Remove knob on the bad control and there is 2 screws behind knob. Remove those 2 screws and take the new control and remove 1 wire at a time from old switch to new one then put back together.
Read more...
- Fix Number
- FIX11752501
- Manufacturer Part Number
- WPW10308477
Fixes these symptoms
- Element will not heat
- Little to no heat when baking
- Oven is too hot
- See more...
Installation Instructions
john from midland, NC
THE OVEN WAS 10 DEGREES OFF,NOT REACHING PROPER TEMPRETURE.
THE PROBLEM I HAD COULD HAVE BEEN TWO THINGS.SO AT THE PRICE OF THE TWO THINGS WAS A GREAT PRICE.SO I INSTALLED THE TWO PARTS. PULL THE STOVE AWAY FROM THE WALL.MAKE SURE TO UNPLUG THE CORD FROM THE WALL OUTLET.ONLY TOOL YOU NEED IS A PHILLIPS SCREW DRIVER.UNCREW THE TWO SCREW.MAKE SURE TO HOLD THE WIRE LEADS BECAUSE THEY CAN FALL INTO THE INSTULATION.PULL THE TWO LEADS OFF AND THEN REPLACE THE NEW LEADS OF THE NEW ELEMENT.PUT THE TWO SCREWS BACK IN AND THATS IT FOR THE ELEMENT.WITH THE SENSOR IS EASY.THE BACK OF THE STOVE HAS ABOUT 10 SCREWS ON THE BACK OF THE STOVE.UNSCREW ALL THE SCREWS,REMOVE THE BACK COVER AND UNSCREW THE TWO SCREW,THEN UNPLUG THE SENSOR CONNECTING LEAD.REPLACE THE NEW SENSOR,AN THEN REPLACE THE SCREWS,REPLACE THE BACK COVER,REPLACE THE SCREWS.PLUG THE STOVE INTO THE WALL SOCKET.TURN THE STOVE ON,THEN SET THE TEMPRETURE AND YOU REPAIRED YOUR STOVE WITH THE PROPER OVEN TEMPRETURE. THANK YOU.
Read more...
- Fix Number
- FIX11749737
- Manufacturer Part Number
- WPW10181986
Fixes these symptoms
- Element will not heat
- Little to no heat when baking
- Little to no heat when broiling
- See more...
Installation Instructions
john from midland, NC
THE OVEN WAS 10 DEGREES OFF,NOT REACHING PROPER TEMPRETURE.
THE PROBLEM I HAD COULD HAVE BEEN TWO THINGS.SO AT THE PRICE OF THE TWO THINGS WAS A GREAT PRICE.SO I INSTALLED THE TWO PARTS. PULL THE STOVE AWAY FROM THE WALL.MAKE SURE TO UNPLUG THE CORD FROM THE WALL OUTLET.ONLY TOOL YOU NEED IS A PHILLIPS SCREW DRIVER.UNCREW THE TWO SCREW.MAKE SURE TO HOLD THE WIRE LEADS BECAUSE THEY CAN FALL INTO THE INSTULATION.PULL THE TWO LEADS OFF AND THEN REPLACE THE NEW LEADS OF THE NEW ELEMENT.PUT THE TWO SCREWS BACK IN AND THATS IT FOR THE ELEMENT.WITH THE SENSOR IS EASY.THE BACK OF THE STOVE HAS ABOUT 10 SCREWS ON THE BACK OF THE STOVE.UNSCREW ALL THE SCREWS,REMOVE THE BACK COVER AND UNSCREW THE TWO SCREW,THEN UNPLUG THE SENSOR CONNECTING LEAD.REPLACE THE NEW SENSOR,AN THEN REPLACE THE SCREWS,REPLACE THE BACK COVER,REPLACE THE SCREWS.PLUG THE STOVE INTO THE WALL SOCKET.TURN THE STOVE ON,THEN SET THE TEMPRETURE AND YOU REPAIRED YOUR STOVE WITH THE PROPER OVEN TEMPRETURE. THANK YOU.
Read more...
- Fix Number
- FIX2366565
- Manufacturer Part Number
- W10196406RW
Fixes these symptoms
- Element will not heat
- See more...
Installation Instructions
chris from ABERDEEN, SD
Burner would not heat up and the cook top on light would not turn off.
First turn off breaker. Pull out stove and unplug. There was about 8 screws on the panel on the back side of the control panel. Remove panel. Remove knob on the bad control and there is 2 screws behind knob. Remove those 2 screws and take the new control and remove 1 wire at a time from old switch to new one then put back together.
Read more...
- Fix Number
- FIX11754687
- Manufacturer Part Number
- WPW10434452
Fixes these symptoms
- Element will not heat
- Oven is too hot
- See more...
- Fix Number
- FIX2366563
- Manufacturer Part Number
- W10196405RW
Fixes these symptoms
- Element will not heat
- See more...
Installation Instructions
chris from ABERDEEN, SD
Burner would not heat up and the cook top on light would not turn off.
First turn off breaker. Pull out stove and unplug. There was about 8 screws on the panel on the back side of the control panel. Remove panel. Remove knob on the bad control and there is 2 screws behind knob. Remove those 2 screws and take the new control and remove 1 wire at a time from old switch to new one then put back together.
Read more...
- Fix Number
- FIX16543561
- Manufacturer Part Number
- W11520287
Appliance Type
Related Pages
- Inglis Range Elements and Burners
- Inglis Range Hardware
- Inglis Range Knobs
- Inglis Range Switches
- Inglis Range Valves
Popular Inglis Range Models
- IVE32300 Freestanding, Electric
- IRP85802 Freestanding, Electric
- IHP33801 Freestanding, Electric
- IRE32302 Freestanding, Electric
- IRP85800 Freestanding, Electric
- IJP85801 Freestanding, Electric
- IMP85801 Freestanding, Electric
- IRE32300 Freestanding, Electric
- IHE31302 Freestanding, Electric
- IRP33800 Freestanding, Electric
- IVP33800 Freestanding, Electric
- IRE82302 Freestanding, Electric
- IMP85800 Freestanding, Electric
- IVE32301
- IRP33802 Freestanding, Electric
- IME31301 Freestanding, Electric
- IES366RS2 Electric, 30", Ceran, Freestanding, Self-Clean
- IES355RQ0 Freestanding, Electric
- IES426AS0
- IKE32300 Freestanding, Electric


