


How to Fix a Lid Switch for a Washer That Will Not Dispense
When your washing machine is not dispensing detergent, it might be due to an issue with the lid switch on your washer. A broken or faulty lid switch can spell a few different problems for your washer, and your washer not dispensing detergent can be one of them. Lid switches are very prone to breaking or needing replacement due to their weak design, but they are inexpensive and easy to replace. To get started, we have a simple guide to help you through the entire process, which we provide you here!
What is a Lid Switch?
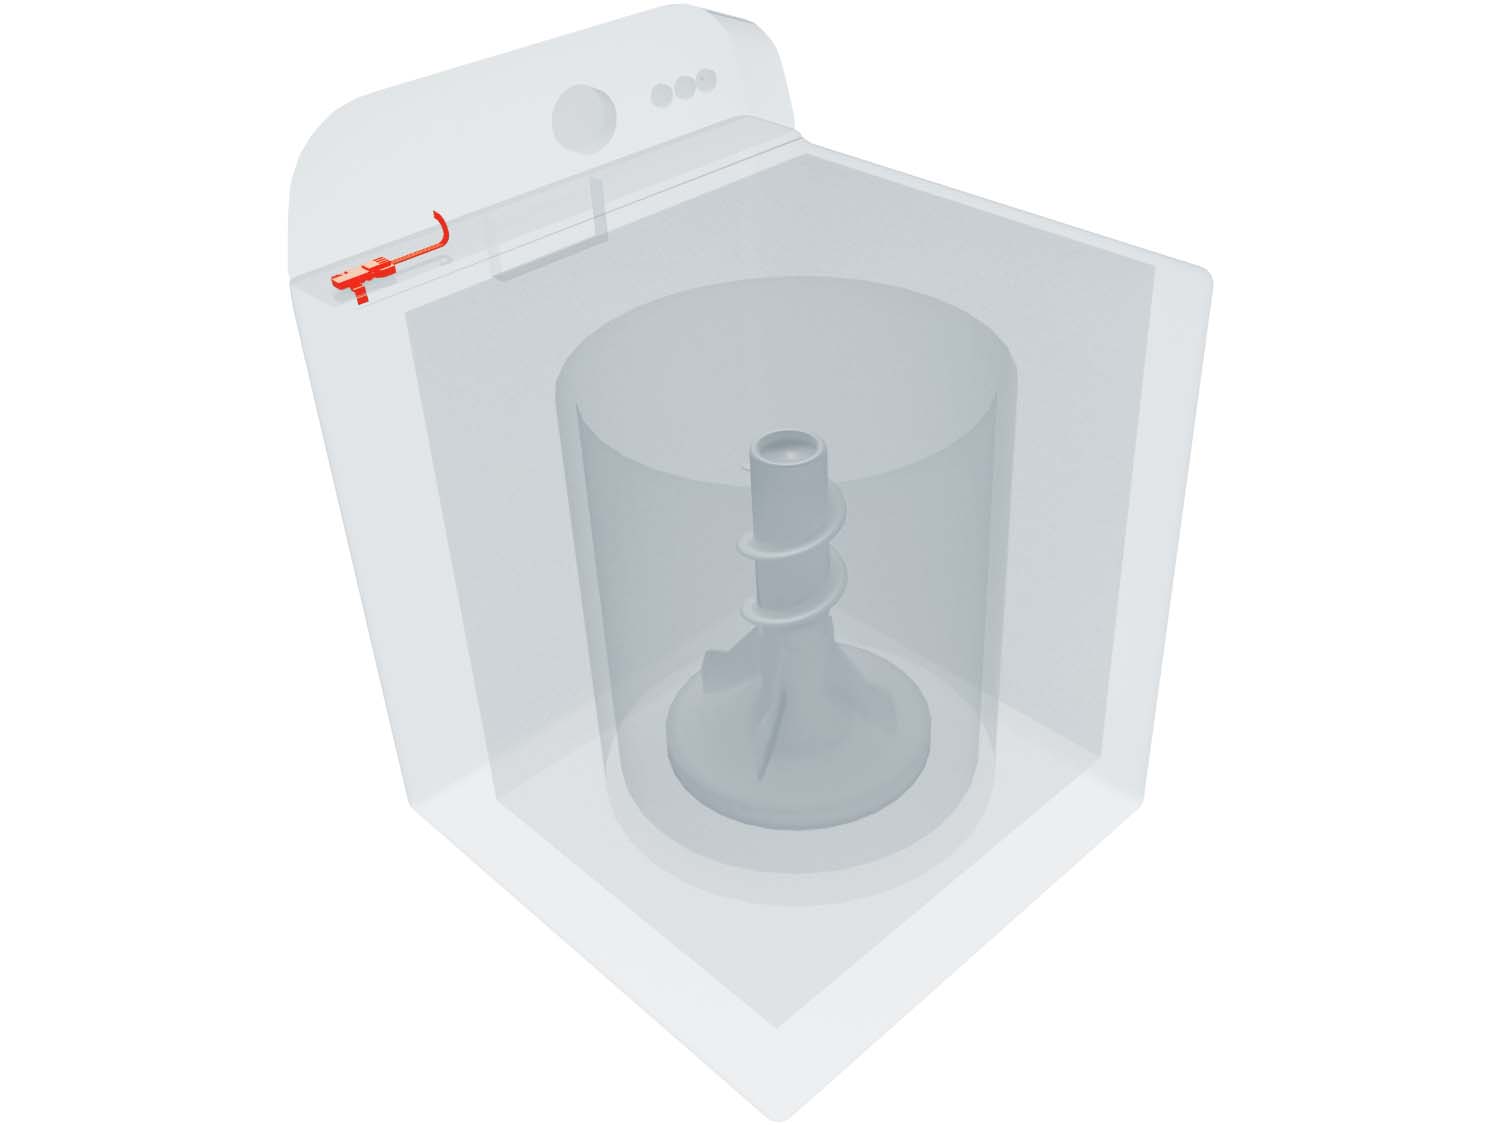
A lid switch is a mechanism located under the lid that communicates to the washer that the lid is shut and safe to operate. Lid switches can vary in size and structure, but are usually comprised of a plastic and metal device with a long wire following it.
Where is the Lid Switch Located?
We recommend that you explore around the top portion of the washer, but more specifically just underneath the lid itself to observe how the switch is mounted and to take note of the securing mechanism used. The switch will be located within the top of the washer and the cabinet itself will have to be raised or removed to gain access, depending on the machine. As seen below, it is shown at the upper left corner but may be found at either of the other corners.
How to Access, Remove, and Inspect a Washer's Lid Switch
Replacing your lid switch is not difficult but may require a few basic tools, such as a screwdriver with an appropriate tip for your machine, a thin-blade putty knife, possibly a ¼" or 5/16” socket or nut driver, and a set of needlenose pliers.
- First, you’ll want to locate your switch location, and then determine how it is mounted to the washer and how to access it.
- Most switches are removed from under the top which you can either lift upwards to gain access, or you can separate the cabinet from the back panel. You can then remove the switch by disconnecting any screws or clips holding it in place.
- It’s important that you now disconnect the switch wiring from where it connects to the washer itself – often this can be quite close to the switch. Otherwise, follow the wires to where they connect to the machine, and disconnect any clips or retainers along the way.
- Once you have disconnected the switch from the machine, you can begin the installation process.
How to Test the Lid Switch
Your lid switch will likely need to be replaced if your washing machine won’t start or won’t shut/lock completely and creates knocking noises, usually followed by an error/fault code.
How to Install a New Washer Lid Switch
- Insert the new lid switch harness connector and switch itself and screw both into place, securing any wires that were originally clipped into place.
- If you had to remove the front housing of the washer, be sure to connect it again.
- Reattach the back portion of the washer where it connects to the rest of the washer if you removed it during the installation process.
- If the console area had to be accessed to make connections or to help replace the lid switch, be sure that when you’re assembling, all wires are in place. Make sure that the panel is reconnected and that any securing screws that were removed are reinstalled and tightened. Your repair is now complete!
Next: Troubleshooting the Water Valves
Go To Main Page: Will Not Dispense