


How to Fix an Inlet Valve for a Leaking Washer
A damaged or defective inlet valve can cause water to leak out from the back of your washer. It may be that the inlet valve is damaged or is experiencing an electrical failure. If this is the case, water may leak out from the water pipes that pump water into your washer. Inspect the valve for any damage then equip yourself with a multimeter to test the valve and ensure that there are no electrical issues.
This simple guide will help you figure out if the inlet valve is responsible for the leak and how you can fix it. If you need a new inlet valve, we will show you how to install a replacement part and restore your washer to full working condition.
What is an Inlet Valve?
The inlet valve is the part that is responsible for connecting the two water hoses to your washer. It has two attachments that supply hot and cold water to the machine. It is controlled by a timer or by the control board, also known as the electronic control. If your washer is leaking, the inlet valve may have a broken seal, a crack in its body, or may not be receiving any power. You will need to locate and examine the inlet valve to determine if it is the cause of your washer leaking.
Where is the Inlet Valve Located?
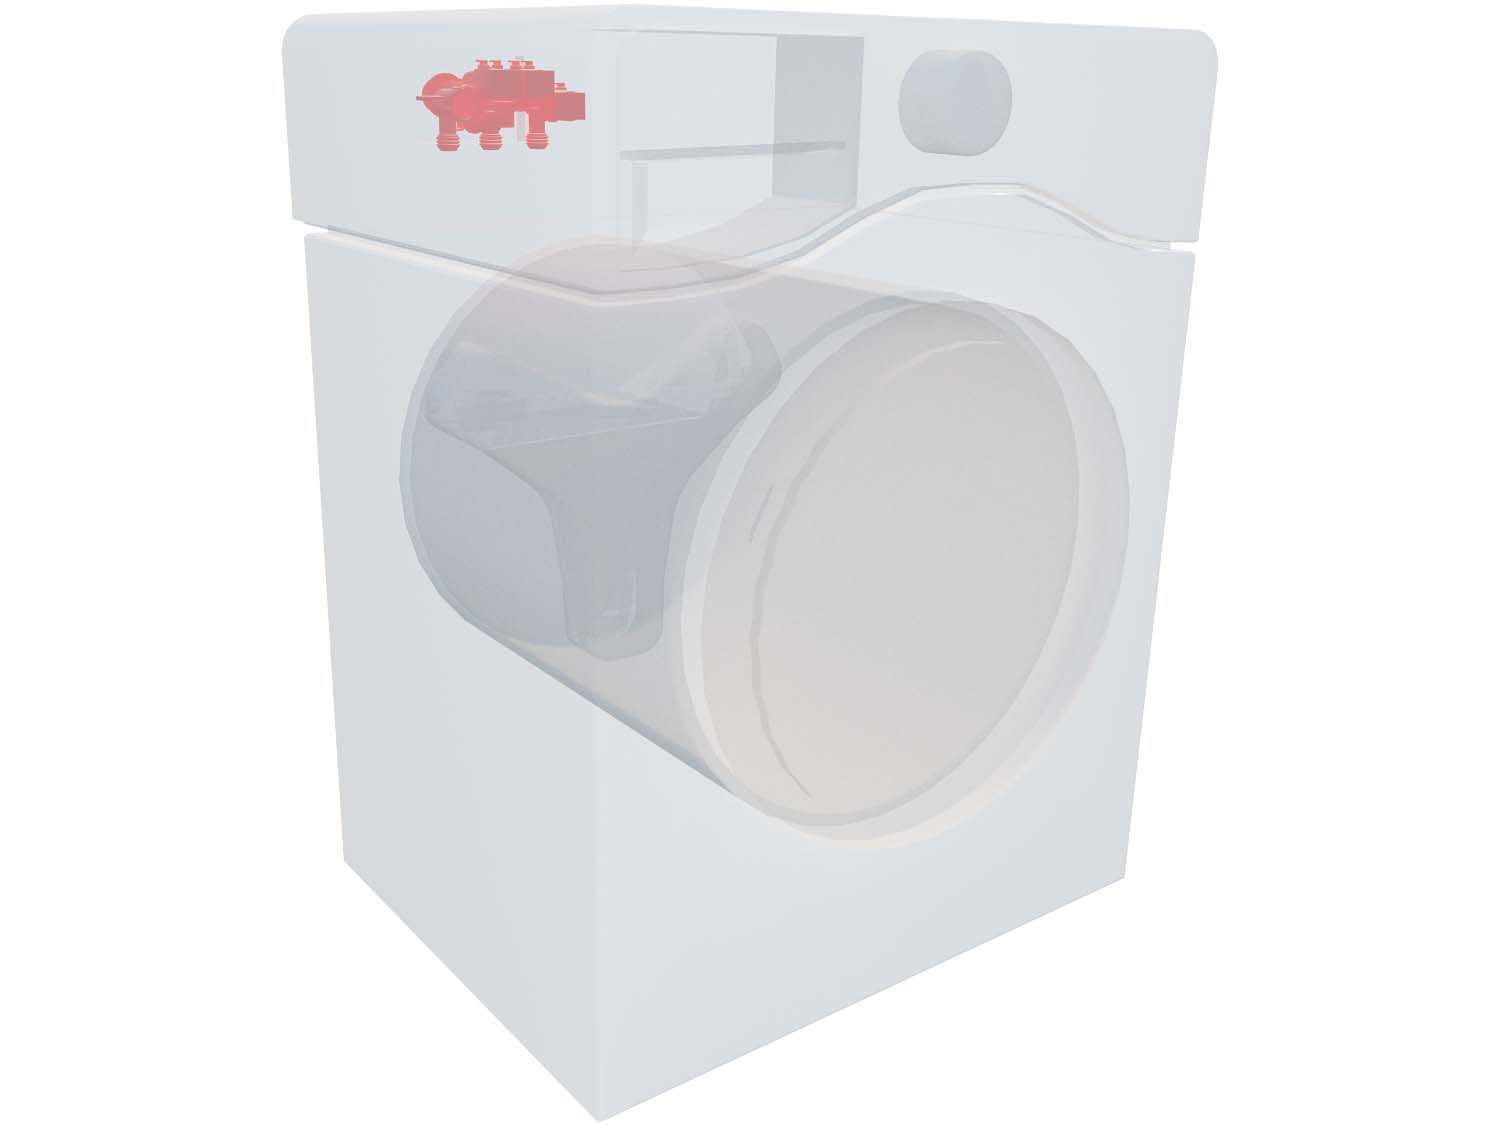
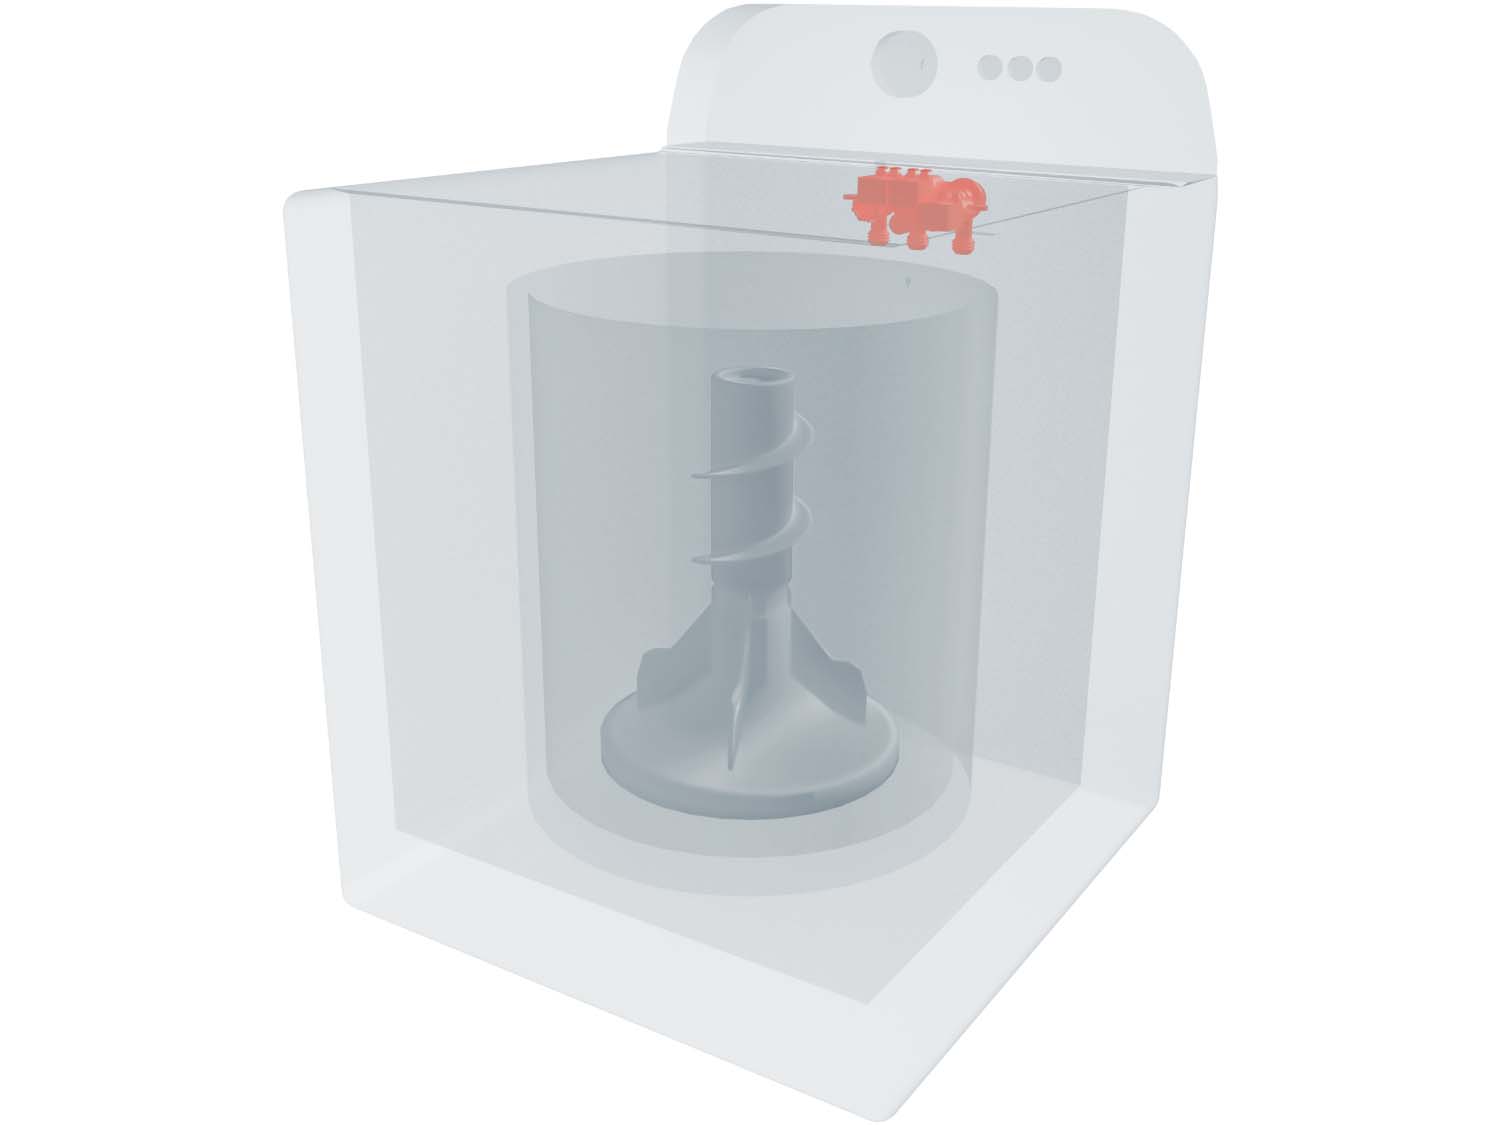
You will find the inlet valve at the back of your machine.
General Location of the Inlet Valves in a Front Load Washer
General Location of the Inlet Valves in a Top Load Washer
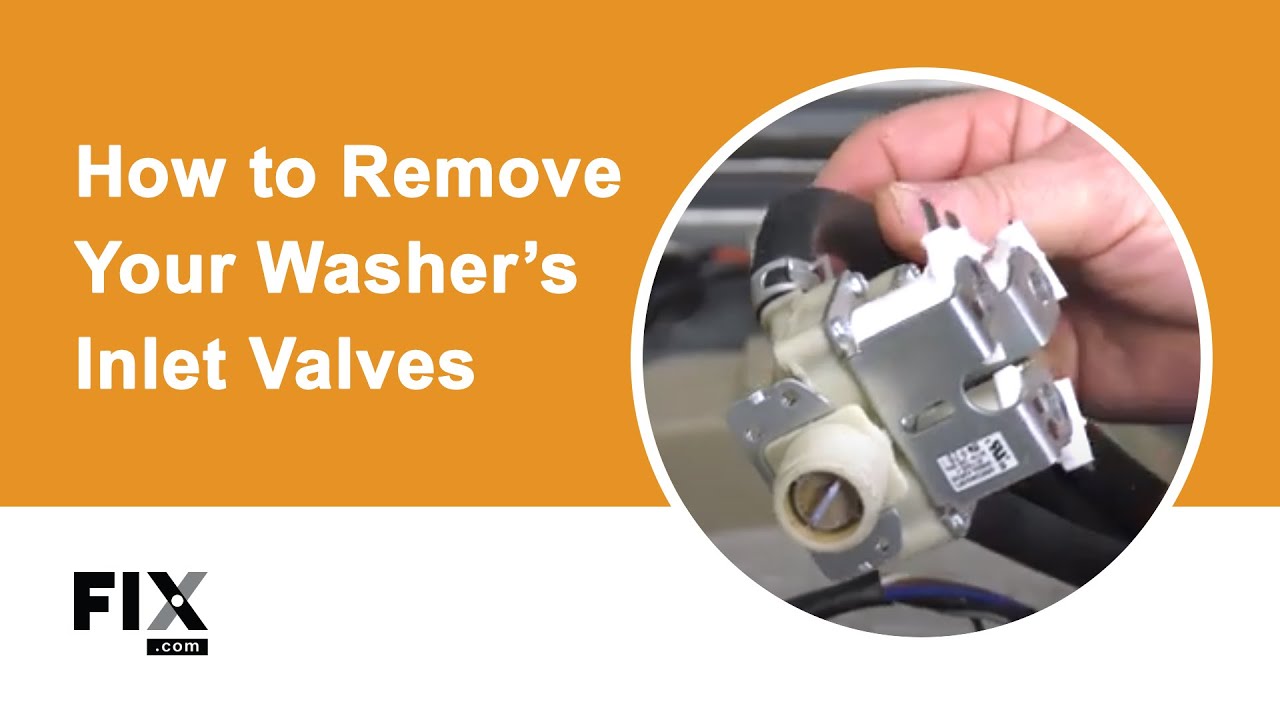
How to Access, Remove, and Inspect the Inlet Valve
- To prevent any electrical hazards, ensure that the washer is unplugged, and shut off the water supply.
- Remove the back panel from your washer and remove the hot and cold water supply lines from the water inlet valve.
- Note the position of the wires and disconnect the wires connected to the valve.
- Remove any clamps that may be securing the hoses to the valve and detach the hoses.
- Remove any screws that are securing the inlet valve and pull it out of the machine.
- Now examine the valve for any damage to its seal or to the body of the valve itself. If the inlet valve is damaged, it will need to be replaced.
- If there is no damage, test the inlet valve with a multimeter to see if it is receiving power. If it isn’t, it will need to be replaced.
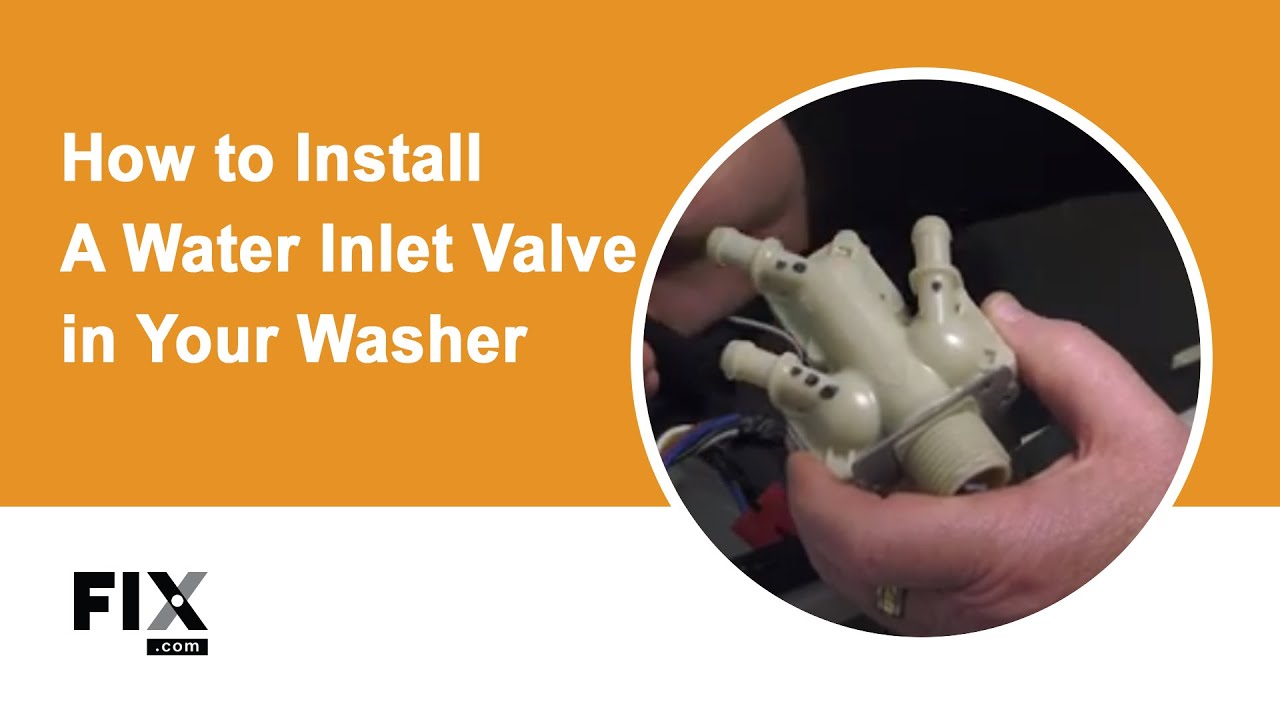
How to Install a New Inlet Valve
- Follow the steps for “How to Access, Remove, and Inspect the Inlet Valve in a Top-Load Washing Machine” to access the inlet valve.
- Take your new water inlet valve and fit it onto the machine.
- Reinstall any screws or tabs to secure the new inlet valve in place.
- Attach the hoses to the new valve and fit the clamps back on to hold them firmly in position.
- Reconnect the wires to their appropriate terminals.
- Reattach the hot and cold water supply lines and fit the back panel back on the machine and secure it in place.
- Plug your machine in and turn the water supply back on and your repair is complete.
Next: Troubleshooting the Drain Pump
Go To Main Page: Leaking