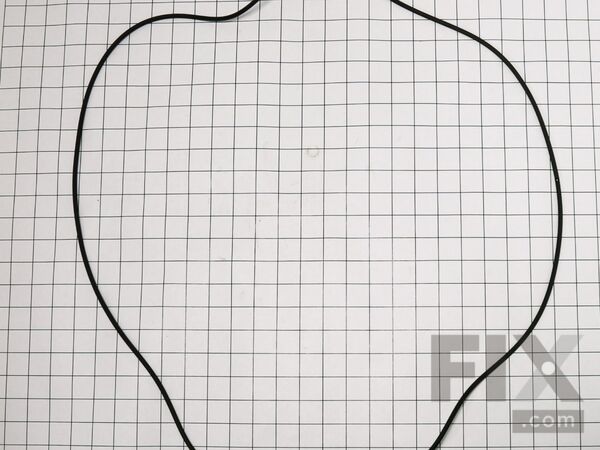
Part Location Diagram of 4036ER4001C LG Gasket
See part K141 in the diagram
( Grid squares measure 1x1 inch )

Gasket

Rated by 3 customers 

?

A Bit Difficult 

More than 2 hours 

Ratings submitted by customers like you who bought this part.

?
$21.71
On Order
Fix Number:
FIX3522860
Manufacturer #:
4036ER4001C
Manufactured by:
LG

Product Description

Questions and Answers

We're sorry, but our Q&A experts are temporarily unavailable.
Please check back later if you still haven't found the answer you need.

Installation Instructions Provided by Fix customers like you.

Average Repair Rating: 2.2 / 5.0, 3 reviews.
  • 1
Sort by:
Sorry, we couldn't find any existing installation instruction that matched.
Customer:
Mark from Garrison, ND
Parts Used:
MAP61913715, 4280EN4001B, 4036ER4001C, 4036ER2003A
Difficulty Level:
Difficult
Total Repair Time:
More than 2 hours
Tools:
Pliers, Screw drivers, Socket set, Wrench set
Washer was making a lot of noise in the spin cycle.
Decided that the problem was the rear tub bearings so watched several YouTube videos describing how to make the repair. These were very good. Really recommend this if you don't have any experience with appliance work. Went to the site and used diagrams to determine which parts I needed to order. Parts came very fast. Biggest part of job was dismantling the washer. Because of bearings location you have to take almost everything apart. Once tub was removed from washer and separated into two parts, I removed the seal and pounded out the bearings. Then I carefully installed the new bearings making sure not to damage them and put everything back together. Have used the machine quite a bit since making the repair and so far no problems. If you are a bit handy you should have no serious problems. If not, hire it done.
1 person found this instruction helpful.
Was this instruction helpful to you?
Thank you for voting!
Customer:
Frank from Ormand Beach, FL
Parts Used:
4434ER0003F, 4036ER4001C, 1TTL0403032
Difficulty Level:
Really Easy
Total Repair Time:
1- 2 hours
Tools:
Screw drivers
bouncing around the drum was shaking around realy bad
took the top off unplug the face plate then the plug on the door lock pulled the spring load ring around rubber seal only on front door put a 12'' piece of wood under the drum just behind the screws then pull just the 2 top pins out of front shocks left/right side only you don't have to take the back one off then unscrew all the screws ar ound the drum you will need a 10mm socket an ex/ratchet remove the balance waits gray one on top brown on the bottom then go around back and pull the small cover remove the bolt reach over the top hold drum loosen bolt almost there once bolt is removed the round winding cover once you done that go around to the front and slide drum out and there is the spider mine was all rotted out remove the 6 little bolts once you remove all the 6 bolts out take a small block of wood and tap with hammer once you have the spider in hand order your parts I replace the spider the rubber o ring gasket around the drum just because I was there that's easy to replace your already there just reverse the process o 1 more thing while you have the drum out clean it just wet it you wont belive all the dirt that is on the drum I save my self about 400 dollars or buying a new one I am back to washing thanks hope that is helpful
0 of 1 people found this instruction helpful.
Was this instruction helpful to you?
Thank you for voting!
Customer:
Thomas from Helendale, CA
Parts Used:
4434ER0003F, MAP61913715, 4280EN4001B, 4036ER4001C, 4036ER2003A
Difficulty Level:
A Bit Difficult
Total Repair Time:
More than 2 hours
Tools:
Nutdriver, Screw drivers, Wrench (Adjustable)
Spider drum drive cracked, violent shaking and banging of Drum
Remove rear panel, remove top (it slides backward) then remove control panel and soap dispenser, remove gasket from door side only, , leave rear gasket attached to outer drum, remove front panel . Remove nut off of spider shaft, remove all screws and the 2 shocks and 2 large springs and counter weights from around the outer drum then re move front of outer drum, inner drum or tub will pull out front, it may take some work to get shaft of spider out of bearings and seal in back. Once inner drum is out remove old spider bolts, heat will be necessary or you will ruin the bolts holding the spider to the inner drum. Replace spider and lock-tite bolts in, if seal and bearings are good, slide new spider and drum into place and bolt spider shaft into back of washer. Check outer drum gasket and replace if necessary. reassemble outer drum halfs, attaché shocks and springs, add front panel and attach door gasket, front panel and top.
0 of 1 people found this instruction helpful.
Was this instruction helpful to you?
Thank you for voting!
  • 1

Model Compatibility

This part works with the following models:
Fix Number: FIX3522860
Manufacturer Part Number: 4036ER4001C
Brand
Model Number
Description
LG
40021
Washer - LG Washing Machine Model 40021 Parts
LG
48842
Washer - LG Washing Machine Model 48842 Parts
LG
48842800
Washer Dryer Combo - Washer-Dryer
LG
48852
Washer - LG Washing Machine Model 48852 Parts
Kenmore
79640021900
Washer
Kenmore
79648842800
Washer
Kenmore
79648852800
Washer
LG
F1072FD
Washer - LG Washing Machine Model F1072FD Parts
LG
F1141FD
Washer - LG Washing Machine Model F1141FD Parts
LG
F1141FD1
Washer - LG Washing Machine Model F1141FD1 Parts
LG
WD-10580BD
Washer - LG Washing Machine Model WD-10580BD (WD10580BD, WD 10580BD) Parts
LG
WD-10583BD
Washer - LG Washing Machine Model WD-10583BD (WD10583BD, WD 10583BD) Parts
LG
WD-90282BD
Washer - LG Washing Machine Model WD-90282BD (WD90282BD, WD 90282BD) Parts
LG
WD-90286BD
Washer - LG Washing Machine Model WD-90286BD (WD90286BD, WD 90286BD) Parts
LG
WM1812CW
Washer - Lg Wm1812cw / Abweeus Washer
LG
WM1814CW
Washer - Lg Wm1814cw / Abweeus Washer
LG
WM1815CS
Washer - Lg Wm1815cs / Atteeus Washer
LG
WM2010CW
Washer - Residential WASHER
LG
WM2016CW
Washer - Residential WASHER