



Kenmore Ice Maker Parts
Find Parts Fast
Guaranteed Fit
Repair Videos


Popular Kenmore Ice Maker Parts
- Fix Number
- FIX11755842
- Manufacturer Part Number
- WPW10511923
- Fix Number
- FIX16555298
- Manufacturer Part Number
- W11542868
- Fix Number
- FIX8759230
- Manufacturer Part Number
- F2WC9I1
Installation Instructions
Shirley C from Houston, TX
- Fix Number
- FIX16730541
- Manufacturer Part Number
- W11566405
Installation Instructions
Robert from China Grove, NC
No ice
Board diagnostics stop at Cir pump. Replaced circulation pump. Made half of one cycle of ice. Stopped. Replaced control board. Problem solved. But, set thermosensor too low on bin wall. Made one cycle of ice and stopped. Set thermosensor higher on bin wall, just above the front threshold of the bin, now all is working great. Control circuit board swap was easy except for the 2 rear screws that hold the control panel case to the bin. The holes for these screws are not visible without a mirror and are tricky to start.
Read more...
- Fix Number
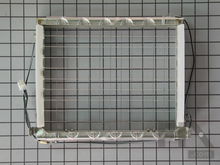
- FIX11740334
- Manufacturer Part Number
- WP2313637
Installation Instructions
John from Bakersfield, CA
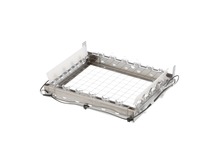
Cutter grid not heating up
It was an easy fix for a guy with absolutely ZERO appliance repair experience. I used a nut driver to unscrew two screws that were on each side of the front of the grid. There were two easy to reach electrical harnesses to unfasten, as well. The grid easily slid out and I had no problems inserting and securing the new grid. Just be very carful when handling the new grid as I'm sure the thin grid wires could easily be broken.
Read more...
- Fix Number
- FIX11770079
- Manufacturer Part Number
- W10919199
- Fix Number
- FIX12584655
- Manufacturer Part Number
- W11291138
Fixes these symptoms
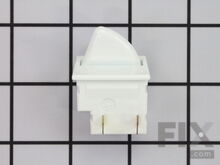
- Light not working
- See more...
Installation Instructions
Vernon from Halethorpe, MD
Light swithch stop working had to be replaced.
Use a flat head screw drive to pry the old switch out, remove the 2 wires and connected them to the new switch and pop the new switch back in done in 5 minutes tops.
Read more...
- Fix Number
- FIX11738179
- Manufacturer Part Number
- W10881366
Installation Instructions
Brian from St. Louis, MO
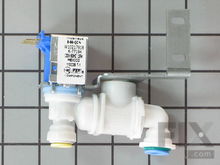
Replacing the original water inlet valve with the replacement
While the repair itself is simple, several things complicated it. First off, the valve did not come with any instructions at all. While I am no novice with appliance repairs, I had not run into the new quick plumbing connections before, so I had to look up info on the internet to make sure I was doing it right. The next problem is that the orientation of the valve is not the same, so the water inlet now comes in on the bottom, instead of from the top. Since mine had originally been done in copper tubing, I had to redo this piping as there was not enough to go. First trip to the hardware store to buy a flair connector to add a bit of tubing (which I happened to have). Once the inlet piping was done, I discover that the outlet piping connection is a completely different size on the new valve. The old valve had 1/4" on both connections, the new one has 1/4" inlet and 5/16" out. Kind of stupid, but that's what it is. Second trip to the hardware store to get a 1/4 X 5/16th compression fitting and some 5/16" plastic tubing, which is only sold in 10' lengths. So my "exact replacement" took two hours, counting hardware store trips, and an extra $15 worth of parts to make it work. It works great so far, but I'm not to happy. The electric and mounting brackets did match up exactly, so no problems there.
Read more...
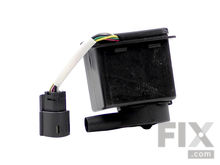
- Fix Number
- FIX16555297
- Manufacturer Part Number
- W11542867
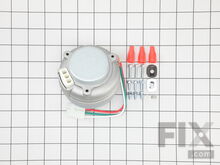
- Fix Number
- FIX11723170
- Manufacturer Part Number
- W10822259
Fixes these symptoms
- Freezer section too warm
- Fridge and Freezer are too warm
- Fridge too warm
- See more...
Installation Instructions
Richard from Grapevine, TX
The refridgerator wasn't cooling
Unplug the fridge. Removed the back panel using the nut driver. I believe it was a 1/4" or a 5/16". Set the panel aside. The fan is on the left side and is easily accessible. Disconnect the quick connect wire terminal. It has a simple click together design. I used a screw driver to push the tab in and at the same time pulled the terminal apart. The terminal on my motor was the same as the terminal on the new motor. The new motor comes with instructions, wire nuts and a new terminal if it isn't the same. The motor was covered in dust, lint, and in my case dog hair. I took the time to clean it off as best as possible - actually prior to buying the new motor. I guess the motor had been locked up by the debris long enough that it overheated and failed. There are 3 self tapping screws on the back side of the motor. I used a 1/4" Ratchet and a 5/16" socket to remove them. The fan simply pulls out toward the front of the fan and there is plenty of room to bring it to the back of the fridge. Once I removed the motor I removed the fan blade with a pair of pliers. It has a flat thin metal nut that is easy to remove. The new motor comes with a replacement nut. Take the fan blade and clean it off. I did this to make sure it was as in balance as possible. The motor is a relatively slow turning motor so balance isn't a big issue. Put the old fan on the new motor and attach with the nut. Just snug the nut hand tight. The nut is such that over tightening could damage the nut. Put the fan back in place and use the new self tapping screws to attach the fan to the bracket. Just a note the fan motor housing isn't threaded so the new self tapping screws go in a little tight. It's not difficult I was simply a little surprised that the housing wasn't tapped prior. I guess it is a money saving idea. Anyway once the screws are in and tightened reconnect the quick connect terminal. Put the back panel back on, plug the fridge back in and you are done. Realistically this takes no more than an hour. I took the back panel off a couple of days before I replaced the motor simply to find out what was wrong and if I could fix it. Once I figured out it was the condenser fan motor I looked on internet using the make a model number and quickly found a DIY video. In the mean time I took a small 10" fan and placed it behind the fridge and let it run until I received the new motor. The little 10" fan kept the fridge going for the 2 days I had to wait.
Read more...
Kenmore Ice Maker Appliance Types
Related Kenmore Ice Maker Parts
- Kenmore Ice Maker Brackets and Flanges
- Kenmore Ice Maker Caps and Lids
- Kenmore Ice Maker Hardware
- Kenmore Ice Maker Hinges
- Kenmore Ice Maker Hoses and Tubes
- Kenmore Ice Maker Ice Makers
- Kenmore Ice Maker Valves
- Kenmore Ice Maker Wire Plugs and Connectors
Popular Kenmore Ice Maker Models
- 106626332
- 10689599100 ICE CUBE MAKER
- 10689583707 ICE CUBE MAKER
- 106626334
- 10689482996
- 10689489996
- 10689483998 ICE MAKER FREE STANDING
- 10689583703 AUTOMATIC ICE MAKER
- 10689553102 FREESTANDING ICEMAKER
- 3638335
- 198887482
- 10689482993
- 10689583702 FREESTANDING ICEMAKER
- 10689482998 ICE MAKER FREE STANDING
- 10689583705 AUTOMATIC ICE MAKER
- 10689583706 AUTOMATIC ICE MAKER
- 10689589705 Kenmore Ice Machine Model 106.89589705 (10689589705, 106 89589705) Parts
- 10689582705 AUTOMATIC ICE MAKER
- 10689583700 ICE MAKER FREE STANDING
- 10689483995