Craftsman Nailer Parts

Craftsman Appliance Parts

Popular Craftsman Nailer Parts

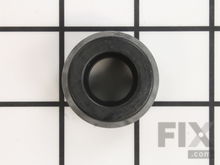
Grommet
$6.51
In Stock
Fix Number
FIX10171452
Manufacturer Part Number
391814-00
This is a genuinely sourced grommet for a stapler or nailer. Its function is to secure the hinge pins, which allow multiple parts of your nail gun to pivot. Over time, the grommet can become hard and break. When it breaks, the hinge can come loose and can get lost easily. To install this part, simply push it onto the end of the pin with your fingers.
WASHER FLAT
$6.51
In Stock
Fix Number
FIX12425945
Manufacturer Part Number
180449
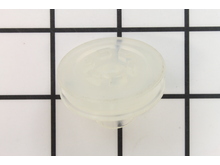
This is an authentic OEM product which is designed for Bostitch, DeWALT and Porter Cable nailers and staplers. It provides a tight seal for the valve piston. Over time the material may wear down causing air leaks. To replace this flat washer you will need a screwdriver and pliers. This item is sold individually and is made of durable material. Check the diagrams of your model for the proper installation.
O RING
$6.51
In Stock
Fix Number
FIX12420389
Manufacturer Part Number
180448
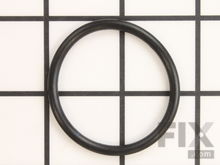
This is an OEM replacement O-ring for a nailer, sold individually. This O-ring is what seals the cylinder to the housing of the gun and creates separation between the upper and lower air chambers. Due to its rubber material, over time, it can wear. For this repair you will need to remove the cap, disassemble the head valve, remove the spring, and remove the old O-ring. Apply some lubrication to the new O-ring and place it on the valve.
EXHAUST DEFLECTOR
$6.51
In Stock
Fix Number
FIX18997093
Manufacturer Part Number
P0590000200
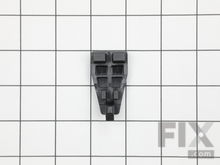
This is a black circular exhaust cover for staplers or nailers. This exhaust cover is designed to allow you to direct the air in any direction you want. Please be advised that the flange nut needed to secure this cover is sold separately, so it is a good idea to check its condition and order it as needed. To install this part, you will need a hex key or Allen wrench.
GASKET
$6.51
In Stock
Fix Number
FIX18997094
Manufacturer Part Number
P0590000400
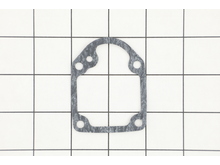
This is a genuine OEM sourced replacement part designed for nailers/staplers. This gasket provides an air-tight seal for the end cap. Over time this gasket will shrink, become brittle and crack allowing for air leaks. At that time it should be replaced. It is made out of composite material and it is sold individually. Replacing this item you would need a hex key/allen wrench.
O-RING
$8.30
In Stock
Fix Number
FIX12499532
Manufacturer Part Number
850607
Genuine Bostitch replacement part, this item is sold individually. The 850607 is used in the Bostitch pneumatic tools shown below. It is used in different areas of some of these tools.. The most popular is being installed on the piston of most of the nail guns shown to help create a seal. On the Staplers it is installed on the cylinder, also to create a seal. Over time seals will wear and crack and need to be replaced.
Magazing End Cap
$6.51
On Order
Fix Number
FIX12425939
Manufacturer Part Number
180201
Keep your nailer or stapler feeding reliably with this magazine end cap, a durable component that secures the end of the magazine while helping to protect the internal pusher and spring assembly. It plays an important role in maintaining proper fastener alignment and helping prevent debris from entering the magazine, supporting smooth and consistent operation. A cracked or damaged end cap can lead to feeding issues and reduced performance, making replacement an effective repair. Installation typically involves removing the retaining pins, replacing the end cap, and reassembling the magazine. Refer to your tool's parts diagram or service manual to confirm the correct placement before installation.
HEAD VALVE BODY
$6.51
In Stock
★★★★★
★★★★★
10 Reviews
Fix Number
FIX12417689
Manufacturer Part Number
180450-S
This head valve body regulates airflow within pneumatic nailers, helping generate the pressure needed to drive fasteners effectively. Built from durable materials, it supports consistent tool performance. Replacing a worn or faulty valve can resolve issues such as air leaks, reduced driving power, or failure to fire, restoring reliable operation.
Fixes these symptoms
  • Driver won't return
  • Leaks air from top
  • Won't fire
  • See more...

Installation Instructions

Stephen from GRANITE CITY, IL
Head valve on brad nailer was damaged.
Removed top of nailer assembly. Removed head valve and o ring. Used existing o ring and placed on replacement head valve and reassembled the nailer Read more...
PISTON DRIVER ASSEMBLY
$19.80
In Stock
Fix Number
FIX18990119
Manufacturer Part Number
9R195283-K
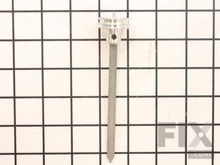
This is an authentic OEM sourced replacement part designed for use with brad nailers. The piston/driver assembly is the part of the nail gun that drives the nail into the material that is being used. Drivers do have a tendency to bend or break if not used correctly or if you are driving nails into extra hard material. This assembly is made out of metal and it is sold individually. To help extend the life of a pneumatic tool use the specified oil in it daily 4-5 Drops will do every time you use it. To replace this part you would need a screwdriver • First you want to remove 4 screws from cap • Remove the cap • Remove driver, and take out piston ring and o-ring • Secure the o-ring and piston ring on new driver • Install new driver • Reattach the cap with the 4 screws
BUMPER
$12.09
In Stock
Fix Number
FIX12415025
Manufacturer Part Number
180461
This genuine OEM bumper in your nailer absorbs the impact and provides cushioning when the piston retracts after driving a nail. It is seated at the bottom of the nail gun cylinder. Due to the repeated stress it undergoes during operation, the bumper wears out gradually. Signs that suggest the need for bumper replacement include unusual noises, reduced driving power, misfires, or visible damage to the bumper. To replace a worn-out bumper, remove the cap and detach the cylinder from the body. With the cylinder and piston removed, you can remove the old bumper. Install the new bumper by placing it in the bottom of the gun using pliers and seating it with the backside of a screwdriver. Reinstall the piston into the cylinder, ensuring it sticks out slightly. Insert this assembly back into the body, ensuring the ridges on the backside of the driver face towards the rear of the gun. Finally, reinstall the cap, place the seal onto it, align the gun body with the cap, and securely fasten it with the screws.

Craftsman Nailer Appliance Types

Related Craftsman Nailer Parts

Popular Craftsman Nailer Models