Some of the parts we sell are eligible for mail-in rebates since we can recycle them. We will display any applicable rebates in your shopping cart. To redeem your rebate, contact Customer Service after you have received your part.
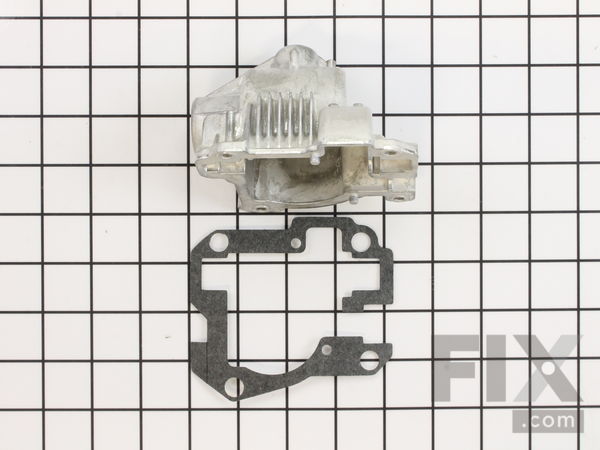
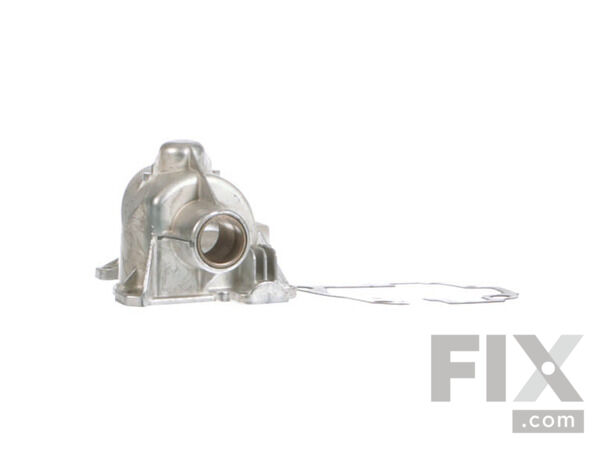
Gearcase Housing with Gasket
$60.08
In Stock
- Fix Number:
- FIX1871466
- Manufacturer #:
- 8212396
- Manufactured by:
- Whirlpool
- Product Description
- NOTE: This part has been upgraded from plastic to metal housing. Gasket is no longer available separately. ***Used with Stand Mixers.
- Works with the following brands:
- KitchenAid, Whirlpool, Jenn-Air
- Works with the following products
- Mixer
- Fixes the following symptoms
- Touchpad does not respond
- Part# 8212396 replaces these:
- AP4308824, 1266762, 8211779, 8212396, 9703381, 9703671, 9707425, 9709125, W10193480, W11601360
Part Number Cross Reference
Product Description
NOTE: This part has been upgraded from plastic to metal housing. Gasket is no longer available separately. ***Used with Stand Mixers.
-
Works with the following brands:KitchenAid, Whirlpool, Jenn-Air
-
Works with the following products:Mixer
-
Fixes the following symptoms:Touchpad does not respond
-
Part# 8212396 replaces these:AP4308824, 1266762, 8211779, 8212396, 9703381, 9703671 ... Show more , 9707425, 9709125, W10193480, W11601360 Show less
Questions and Answers
We're sorry, but our Q&A experts are temporarily unavailable.
Please check back later if you still haven't found the answer you need.
Related Parts Additional or alternate parts to consider.
Installation Instructions Provided by Fix customers like you.
- < Prev
- 1
- Next >
Sort by:
Search filter:
Clear Filter
Your search term must have 3 or more characters.
Keep searches simple. Use keywords, e.g. "leaking", "pump", "broken" or "fit".
Sorry, we couldn't find any existing installation instruction that matched.
- Customer:
- Lewis M from Seattle, WA
- Parts Used:
- 8212396
- Difficulty Level:
- Easy
- Total Repair Time:
- 15 - 30 mins
- Tools:
- Screw drivers
replace old gear housing
Seems a common problem with this mixer is a crack in the gear housing. really easy to fix. The replacement part is more durable metal. Simply remove the ribbon cover (one screw), remove the 4 screws, take off the top of the mixer, then remove the cracked plastic housing (4 screws). Messy part is salvaging as much grease as possible fro
... Read more
m the old housing. Don't forget to salvage the gear assembly (push from the outside where male mixer attachments enter the female receptor). Use the new gasket. Total job took 15 minutes and makes you feel competent. IF all goes well, your mixer and attachments will make less noise and stop leaking oil and won't be a problem when you knead bread.
Read less
1 person
found this instruction helpful.
Was this instruction helpful to you?
Thank you for voting!
Ruined / sheared gear
Four screws on transmission case, two on the circuit after taking a picture to make sure I plugged wires in right later. Three screws for the base and two for the motor. Thoroughly cleaned the gears to make sure no metal bits stayed in reassemble. New grease and put it back together. Unfortunately the main shaft was be
... Read more
nt and I didn't think to check it, not sure why... (reminder: if you run it hard enough to bust the case... check the shaft) Had been mixing heavy dough at a high speed. Had been doing it for years and must say it held up well for the stress I had put on it. Anyways, it had broken around the bushing holding the main shaft, in turn the gears weren't tight and eventually stripped. After getting the parts, I was a little concerned about them not being tapped but the pilot holes were drilled well and there was no problem.
Read less
0 of 1 people
found this instruction helpful.
Was this instruction helpful to you?
Thank you for voting!
worm gear warn out {2}
When installing the transmission housing I cant seem to get the two end bushing and ball bearing thrust washer all back in on the worm gear
0 of 1 people
found this instruction helpful.
Was this instruction helpful to you?
Thank you for voting!
- Customer:
- Jeff from Baltimore, MD
- Parts Used:
- WPW10170081, 8212396, WP9709231
- Difficulty Level:
- Easy
- Total Repair Time:
- 15 - 30 mins
- Tools:
- Screw drivers
gear popped through the gearcase, lost power
opened top , opened housing, cleaned out the old grease and parts, installed new parts, filled gearcase with new grease and put back together
0 of 1 people
found this instruction helpful.
Was this instruction helpful to you?
Thank you for voting!
Cracked housing/stripped wormgear
Housing cover(plastic) cracked causing wormgear to misalign. Removed band and mixer cover, removed housing cover and gear. Very easy with phillipshead. There are two bushings on either end of gear. Remove from old and put on new. New housing is made of metal. Took grease from inside old housing and coated all new parts. There are two nub
... Read more
s on bottom of housing cover that need to fit into holes in the base. The plastic nubs had broken off and were stuck in the holes and had to be drilled out. Carefully selected drill bit size(forget what size/sorry) and re-drilled holes. Carefully re-assembled. My wife has been making Xmas cookies and bread for the last two weeks and it has been working beautifully. Hope this helps. Hopefully Kitchenaid will discontinue the plastic housings.
Read less
0 of 1 people
found this instruction helpful.
Was this instruction helpful to you?
Thank you for voting!
Accessory input port striped. Not driving attachment.
Problem found is plastic transmission cover cracked causing too much play between gears causing them to skip and strip. New replacement cover is cast metal. Great improvement. Remove trim ring (one screw). Remove top cover (4 screws). Remove plastic transmission cover (4 screws). Remove snap rin
... Read more
g that holds too beveled gear. Replace gear and re install snap ring. Replace gear in transmission (other beveled gear) I also replace bronze bushings at each end of the adjacent worm gear. Re pack all gears and transmission cover with fresh grease. Reinstall all gears and transmission cover. Ensure all components are properly seated and lined up. Re instal cover and trim ring. Easy fix. Less than an hour. Works as good as new. Replacement parts fit perfectly.
Read less
0 of 1 people
found this instruction helpful.
Was this instruction helpful to you?
Thank you for voting!
- < Prev
- 1
- Next >
Model Compatibility
This part works with the following models:
Fix Number: FIX1871466
Manufacturer Part Number: 8212396
Manufacturer Part Number: 8212396
Brand
Model Number
Description
✖
Mail-In Recycling Rebate


