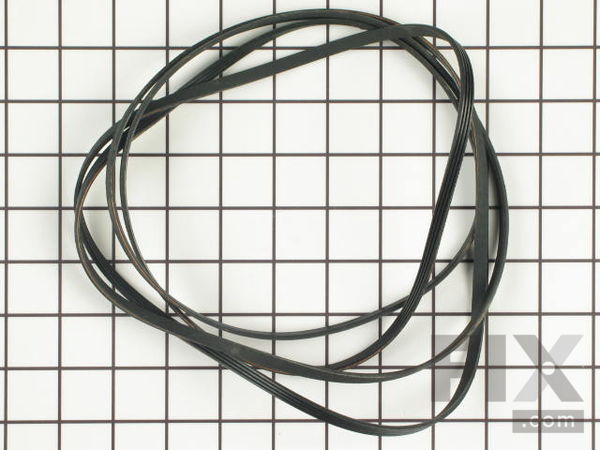
Part Location Diagram of WE03X29897 GE Drive Belt
See part 213 in the diagram
Replacing your General Electric Dryer Drive Belt
( Grid squares measure 1x1 inch )

Drive Belt WE03X29897

★★★★★
★★★★★
1 Review

Rated by 19 customers 

?

Really Easy 

30 - 60 mins 

Ratings submitted by customers like you who bought this part.

?
$36.10
In Stock
Fix Number:
FIX16542496
Manufacturer #:
WE03X29897
Manufactured by:
GE

Product Description

This 89.5-inch drive belt is for dryers. It has a 4-rib design on the inside for a better grip. If comparing the size of your current belt to the new one, keep in mind that a small amount of stretching and contortion will occur over time, and this belt will fit despite small inaccuracies. You will find this part wrapped all the way around the dryer drum, around a tension pulley, and around the drive motor pulley. This allows the parts to work together to spin the drum as the motor rotates. A common symptom of a broken drive belt is a drum that will not turn. This part is prone to wear and tear over time and will likely stretch or become brittle, leading to complete breakage of the part. The drum cannot spin without a drive belt, so it needs to be replaced immediately. For this repair, we recommend wearing work gloves to protect your hands from sharp edges, disconnect the power, remove the main panel, and access the motor drive to secure the new belt in place.

Videos For installing this part.

Replacing your Drive Belt

Replacing your Drive Belt

Questions and Answers

We're sorry, but our Q&A experts are temporarily unavailable.
Please check back later if you still haven't found the answer you need.

2 questions answered by our experts.
  • 1
Sort by:
Sorry, we couldn't find any existing answers that matched.
Try using some different or simpler keywords, or submit your new question by using the "Ask a Question" button above!
Terrence
February 18, 2023
Is this the drive belt for my dryer?
For model number GTDP490ED0WS
Fix.com logo
Hello Terrance, We are glad you asked! Yes, the Belt FIX16542496 you had chosen is compatible with your model. We also have a video for your view for installation information We are pleased to have been able to help.

18 people found this helpful.

Was this helpful?
Thank you for voting!
Wilton
December 27, 2022
what is the part # for the belt
For model number gtd65ebsj3ws
Fix.com logo
Hi Wilton, thank you for your inquiry. The compatible belt drive is part number PS16542496. Customer service is always available to help you place an order if you are having trouble doing so. Good luck with your repair.

2 people found this helpful.

Was this helpful?
Thank you for voting!
View More View Less
Drum Bearing Slide - Green (Sold individually)
$14.28
In Stock
Drum Bearing Slide - White (Sold individually)
$18.57
In Stock
Front Drum Bearing
$34.10
In Stock
Duct Felt Seal
$22.35
In Stock
Rear Drum Bearing Kit
$88.09
In Stock
Idler Pulley Wheel
$34.76
In Stock
Affresh Washing Machine Cleaner - 3 pack
$12.58
In Stock
Produce Preserver Filter
$21.50
In Stock
Affresh Dishwasher Cleaner Tablets - 6
$19.09
In Stock
Cooktop Cleaning Cream
$15.57
In Stock
Cooktop Cleaner
$17.74
In Stock
Affresh Cleaner
$19.09
In Stock

Installation Instructions Provided by Fix customers like you.

Average Repair Rating: 3.4 / 5.0, 19 reviews.
  • 1
  • 2
Sort by:
Sorry, we couldn't find any existing installation instruction that matched.
Customer:
Nae from BRENTWOOD, TN
Parts Used:
WE09X27634, WE03X29897, WE05X20431, WE3M26, WE1M504, WE2M96, WE12X83
Difficulty Level:
Really Easy
Total Repair Time:
30 - 60 mins
Tools:
Screw drivers
The dry was making a whining sound. Very loud.
I followed all the video on the website with all the parts I had purchased. Very easy. Just make sure you unplug the dryer first. Thank you,
8 of 9 people found this instruction helpful.
Was this instruction helpful to you?
Thank you for voting!
Customer:
Stephen from Bridgewater, NJ
Parts Used:
WH02X10383, WH38X10017, WH02X10265, WE03X29897, WH01X10302, WH2X1199, WH2X1198, WH2X1197, WE25M40
Difficulty Level:
Really Easy
Total Repair Time:
30 - 60 mins
noisy
New shaft, belt and housing. Installation was going fine until went to install belt and IT was way to short .THANKS
5 of 7 people found this instruction helpful.
Was this instruction helpful to you?
Thank you for voting!
Customer:
James from Baltimore, MD
Parts Used:
WE03X29897
Difficulty Level:
Easy
Total Repair Time:
30 - 60 mins
Tools:
Screw drivers
My gas dryer stopped running and sounded like the absence of the belt. I lifted the top and confirmed my guess.
I ordered the part and then watched the online installation video, which was REALLY helpful. The tech said and showed removing the top and then the front, get the new belt in position around the drum, plenty easy. He then put one arm in over the motor to manipulate the idler pulley and the other arm to guide the belt. I couldn't get my forearms in the available space, so I removed screws where the control panel meets the sides at the top-rear, and the screws that secure the sides at the bottom-front, all so I could move the sides further apart so I could get my arms in. My right hand/arm basically held the drum up so my left fingers could get the belt in place at the motor sheave and then move the spring-loaded idler pulley and arm to capture the belt. After getting the belt on, putting the machine back together, the 6 screws and the wires to the switch on the front panel took 5 minutes, so the whole job took me a tad over an hour.
2 of 2 people found this instruction helpful.
Was this instruction helpful to you?
Thank you for voting!
Customer:
Joseph from Paducah, KY
Parts Used:
WE03X29897
Difficulty Level:
Easy
Total Repair Time:
30 - 60 mins
Tools:
Screw drivers
Broken Dryer Belt
Unplug dryer from 220 outlet. Open dryer door and remove screws in each upper corner of dryer opening to remove top of dryer. Remove screws in upper front corners on right and left to remove the front of dryer. Be careful of wires at lower.left behind front of dryer. Mark these or take a picture. Remove these wires and lift away front of dryer. Gently spread the right and left sides of dryer to allow dryer drum to be lifted up or removed out of the front. Remove broken belt from bottom of dryer. Lift drum and put new belt on it. Be sure belt fits in dark track old belt made on drum. The belt fits dark grooved side against the drum. Put drum back into dryer. Be sure drum posterior fits in back drum bearing. Lift up drum reaching under to put belt on motor pulley. Be sure to pull over the belt idler pulley and put it.onto belt to tension it. The idler pulley can be locked.over.and released against the belt after putting it on motor pulley. Recommend wearing long sleeve shirt or light jacket to protect arms from sharp edges. I also wore mechanic gloves to protect my hands. Put front of dryerback in place. Put each wire back on its correct connector. Place dryer drum back into place on front of dryer. Place a screw ineach side of dryer front. Lift top of dryer up and place it under 3 connectors at back of top of dryer. Put dryer top down flat and replace screws inside dryer to attach top. Plug 220 connector into outlet.
2 of 3 people found this instruction helpful.
Was this instruction helpful to you?
Thank you for voting!
Customer:
Cheri from Creekside, PA
Parts Used:
WE03X29897, WE4M181
Difficulty Level:
Really Easy
Total Repair Time:
15 - 30 mins
Tools:
Pliers, Screw drivers
Dryer not heating
I came to PartSelect and put in my model number. I clicked on dryer not heating. The cycling thermostat was the part that causes this problem most often and I took the chance that this is what was causing my dryer to not heat. Replacing it was super easy. I watched the video on the replacement. My therm. was in a different location then t he one shown on the video but the same instructions still worked. I replaced my belt at this time too just because I use my dryer constantly. I have 7 kids so laundry is always being done. The repair went smoothly and quickly. Removed the top panel. Removed the Front panel and the wire assembly from the door and set that aside. Loosened the belt. Removed the drum. Took the wire harness off the thermostat, and took the old one out. Put in the new one and popped the wires back on. Slid the drum part way in, and placed the belt over the drum before putting in back in fully. Reached under and got the belt back on the tensioner and motor shaft. Replaced the front panel and top panel. I plugged it back in and tried it out. Unfortunately for me, this was not the cause of my problem. I am not a professional repairwoman. I got it wrong this time. I am replacing the gas coils tomorrow and if that does not do the trick, I will be calling a repair man. Usually part select allows me to fix my own appliances without any problems. This is the first time the top recommended part did not correct my problem. I have repaired my dryer once, washer once, dish washer three times. I have also been able to repair my sister's dryer, my mother's dryer and my mother in law's washer with the videos and parts from PartSelect. This truly is a very easy repair. It does not take long at all.
1 person found this instruction helpful.
Was this instruction helpful to you?
Thank you for voting!
Customer:
Paul from Pflugerville, TX
Parts Used:
WE03X29897, WE4M181
Difficulty Level:
A Bit Difficult
Total Repair Time:
1- 2 hours
Tools:
Screw drivers
Clothes were not dry at the end of the automatic cycles
Remove the top by opening the door and removing the two screws, one on each side, at the top of the door opening. Lift the front of the top, unlatch it from the back and slide it off. Remove the front by removing the two screws, one on each side, near the top inside holding the front on. Make sure you support the top of the front so i t doesn't fall forward and break the door switch by jerking on the wires. Lean the front out and unhook the wires to the door switch and the light. Then lift the front out of the holes on the bottom and set it aside. Remove the drum and belt. You've likely have to spread the sides out before the drum will slide out. Remove the wires from the thermostat at the back of the dryer then remove the one screw holding it in. I used pliers to loosen the screw from the underside because there's not enough room to get leverage with a stubby screwdriver. Remove and replace the thermostat and hook up the wires. Reinstall the drum and belt. I laid the dryer on its back to make it easier to reinstall the drum. Set the dryer back up to reinstall the belt on the motor and idler pulley. I set a block under the front of the dryer to put it up at an angle to make it easier to get my hand in under the drum to deal with the belt. Reinstall the front making sure to reconnect the door switch and light wires. Finally, reinstall the top and you're done. I found a good youtube video which showed all these steps. I don't recall the url but, with a little bit of searching, I'm sure you can find it.
1 person found this instruction helpful.
Was this instruction helpful to you?
Thank you for voting!
Customer:
Christine from Nantucket, MA
Parts Used:
WE03X29897, WE1M504
Difficulty Level:
Very Easy
Total Repair Time:
Less than 15 mins
Tools:
Screw drivers
worn drive belt & drum bearing slidesslides
My advice is to watch the instruction video from this site that arrives in the email telling you that your part is shipped. Also if the belt is worn make sure to buy the FOUR bearing slides because they will be paper thin & worn. They cost almost $9.00 each and you need to replace all four but it is worth it! The total cost including ship ping for these parts and to do this repair myself was less than $70.
0 of 1 people found this instruction helpful.
Was this instruction helpful to you?
Thank you for voting!
Customer:
walter from stratford, CT
Parts Used:
WE03X29897
Difficulty Level:
Very Easy
Total Repair Time:
30 - 60 mins
Tools:
Screw drivers
Drum wouldn't turn
I watch a video of the repair on this site & it was very helpful with out it I had no idea what to do it was fast and easy to install thanks for your help you guys are great!
0 of 1 people found this instruction helpful.
Was this instruction helpful to you?
Thank you for voting!
Customer:
Sherry from Hudson, MA
Parts Used:
WE03X29897
Difficulty Level:
Really Easy
Total Repair Time:
30 - 60 mins
Drive belt broken
After taking top and front of dryer off I fed the belt around drum and then looped belt around the pulley. I watched the installation video on the website which was helpful but keep in mind you are looking at a mirror image so you have to feel your way to determine which way the belt goes on
0 of 1 people found this instruction helpful.
Was this instruction helpful to you?
Thank you for voting!
Customer:
eduardo from salinas, CA
Parts Used:
WE03X29897, WE2M96, WE12X83
Difficulty Level:
Really Easy
Total Repair Time:
30 - 60 mins
Tools:
Screw drivers
Broken belt
Look at the video you sent me .and did the same thing on vedio it was easy to do thanks a lot
0 of 1 people found this instruction helpful.
Was this instruction helpful to you?
Thank you for voting!
  • 1
  • 2
Customer Reviews
Average Rating: (1 Review)
5.0
★★★★★
★★★★★
Filter By Rating:
  • 5
    1
  • 4
    0
  • 3
    0
  • 2
    0
  • 1
    0
  • 1
Sort by:
Sorry, we couldn't find any existing reviews that matched. Try using some different or simpler keywords.

Model Compatibility

This part works with the following models:
Fix Number: FIX16542496
Manufacturer Part Number: WE03X29897
Brand
Model Number
Description
Kenmore
2661532110
Washer Dryer Combo - LAUNDRY CENTER
General Electric
2661532210
Washer Dryer Combo
General Electric
2661532211
Kenmore
2661532212
Washer Dryer Combo - HOME LAUNDRY COMBO
Kenmore
2661532311
Washer Dryer Combo - LAUNDRY CENTER (ELECTRIC)
Kenmore
2661532312
Washer Dryer Combo - LAUNDRY CENTER
Kenmore
2661532412
Washer Dryer Combo - HOME LAUNDRY COMBO
Kenmore
2661532413
Washer Dryer Combo - HOME LAUNDRY COMBO
Kenmore
2661532513
Washer Dryer Combo - HOME LAUNDRY COMBO
Kenmore
26715321
Washer Dryer Combo - HOME LAUNDRY COMBO
Kenmore
2671532110
Washer Dryer Combo - LAUNDRY CENTER
General Electric
2671532210
Washer Dryer Combo
Kenmore
2671532211
Washer Dryer Combo - HOME LAUNDRY COMBO
Kenmore
2671532212
Washer Dryer Combo - HOME LAUNDRY COMBO
Kenmore
2671532311
Washer Dryer Combo - HOME LAUNDRY COMBO
Kenmore
2671532312
Washer Dryer Combo - HOME LAUNDRY COMBO
Kenmore
2671532412
Washer Dryer Combo - HOME LAUNDRY COMBO
Kenmore
2671532413
Washer Dryer Combo - HOME LAUNDRY COMBO
Kenmore
36361532110
Washer Dryer Combo - HOME LAUNDRY COMBO
Kenmore
36361532412
Washer Dryer Combo - LAUNDRY CENTER
Kenmore
36361542
Washer Dryer Combo - HOME LAUNDRY COMBO
Kenmore
36361542211
Washer Dryer Combo - HOME LAUNDRY COMBO
Kenmore
36361542310
Washer Dryer Combo - HOME LAUNDRY COMBO
Kenmore
36361542410
Washer Dryer Combo - HOME LAUNDRY COMBO
Kenmore
36361542411
Washer Dryer Combo - HOME LAUNDRY COMBO
Kenmore
36371532110
Washer Dryer Combo - HOME LAUNDRY COMBO
Kenmore
36371542
Washer Dryer Combo - HOME LAUNDRY COMBO
Kenmore
36371542211
Washer Dryer Combo - HOME LAUNDRY COMBO
Kenmore
36371542310
Washer Dryer Combo - HOME LAUNDRY COMBO
Kenmore
36371542410
Washer Dryer Combo - HOME LAUNDRY COMBO