Admiral Refrigerator Parts
Find Parts Fast
Guaranteed Fit
Repair Videos


Popular Admiral Refrigerator Parts
- Fix Number
- FIX11722130
- Manufacturer Part Number
- EDR4RXD1
Fixes these symptoms
- Fridge too cold
- Ice maker dispenses too little ice
- Ice maker not making ice
- See more...
Installation Instructions
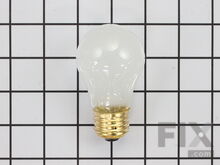
Blaine from Huntley, IL
- Fix Number
- FIX884734
- Manufacturer Part Number
- 8009
Installation Instructions
Helen from Quincy, MA
lightbulb in refrigerator went out
Removed plastic shield on top of refrigerator. Removed old bulb.. Replaced new bulb. Reinstalled plastic shield. Voila!
Read more...
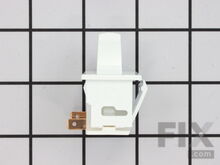
- Fix Number
- FIX12728638
- Manufacturer Part Number
- W11384469
Fixes these symptoms
- Light not working
- See more...
Installation Instructions
Marilyn from Dublin, OH
Light switch no longer worked
Turn off and unplug your refrigerator. I used the screwdriver on the left side of the part (where the plug is) and used the putty knife at the same time on the right side to push the spring lock portion of the part in. The part snapped out. I unplugged the left contact from the plug and put it on the new part, then I unplugged the right contact and put it on the new part. I did this so the wires would not go up into the refrigerator and be hard to find. I put the left side of the new part where the plug and contacts are in first then I snapped the right side in place. I plugged the refrigerator back in and it worked perfectly. Just take your time and gently remove and reconnect the new part. The store where I bought my refrigerator wanted $69.95 for a service call plus an hourly charge and part charge. Count on this site for your parts and do it yourself. I ordered the part on Monday, it was delivered on Tuesday around noon and I made the repair that afternoon.
Read more...
- Fix Number
- FIX11752501
- Manufacturer Part Number
- WPW10308477
Fixes these symptoms
- Element will not heat
- Little to no heat when baking
- Oven is too hot
- See more...
Installation Instructions
john from midland, NC
THE OVEN WAS 10 DEGREES OFF,NOT REACHING PROPER TEMPRETURE.
THE PROBLEM I HAD COULD HAVE BEEN TWO THINGS.SO AT THE PRICE OF THE TWO THINGS WAS A GREAT PRICE.SO I INSTALLED THE TWO PARTS. PULL THE STOVE AWAY FROM THE WALL.MAKE SURE TO UNPLUG THE CORD FROM THE WALL OUTLET.ONLY TOOL YOU NEED IS A PHILLIPS SCREW DRIVER.UNCREW THE TWO SCREW.MAKE SURE TO HOLD THE WIRE LEADS BECAUSE THEY CAN FALL INTO THE INSTULATION.PULL THE TWO LEADS OFF AND THEN REPLACE THE NEW LEADS OF THE NEW ELEMENT.PUT THE TWO SCREWS BACK IN AND THATS IT FOR THE ELEMENT.WITH THE SENSOR IS EASY.THE BACK OF THE STOVE HAS ABOUT 10 SCREWS ON THE BACK OF THE STOVE.UNSCREW ALL THE SCREWS,REMOVE THE BACK COVER AND UNSCREW THE TWO SCREW,THEN UNPLUG THE SENSOR CONNECTING LEAD.REPLACE THE NEW SENSOR,AN THEN REPLACE THE SCREWS,REPLACE THE BACK COVER,REPLACE THE SCREWS.PLUG THE STOVE INTO THE WALL SOCKET.TURN THE STOVE ON,THEN SET THE TEMPRETURE AND YOU REPAIRED YOUR STOVE WITH THE PROPER OVEN TEMPRETURE. THANK YOU.
Read more...
- Fix Number
- FIX2121513
- Manufacturer Part Number
- D7824706Q
Fixes these symptoms
- Clicking sound
- Doesn’t stop running
- Ice maker dispenses too little ice
- See more...
Installation Instructions
Edward from Casa Grande, AZ
Unit quit working. Wouldn't cycle any more. Made sounds like gears were maybe stripped..
Followed installation video on this web site. Works like a new one !
Read more...
- Fix Number
- FIX11746909
- Manufacturer Part Number
- WP9703438
Fixes these symptoms
- Noisy
- See more...
Installation Instructions
Brian from Novi, MI
Squeaking noises while running dryer
Followed the Video Directions from website. All went as planed. The dryer is running like new now.
Read more...
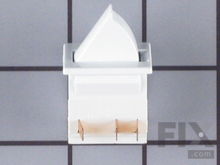
- Fix Number
- FIX12731166
- Manufacturer Part Number
- W11396033
Fixes these symptoms
- Ice maker not making ice
- Ice maker won’t dispense ice
- Light not working
- See more...
Installation Instructions
James from Aurora, IN
Left door light switch broken
Unlike the easy installation in the video, this model has the switch & connector glued in with injected foam. I had to pry and dig the old switch out of the door and then dig the connector out. This was all but impossible and I put some scrapes on the door panel doing it. Installation of the new switch was a breeze after almost destroying my fridge getting the old switch outI. If you have this model, I would recommend having a pro replace it for you! One more tip, this switch not only controls the light but also controls the ice maker, so if you botch the job, your ice maker won't work either!
Read more...
- Fix Number
- FIX11757023
- Manufacturer Part Number
- WPW10662129
Fixes these symptoms
- Clicking sound
- Freezer not defrosting
- Freezer section too warm
- See more...
Installation Instructions
Lisa from Yulee, FL
Both comparments very warm but fan working and lights on
Bought Capacitor, but I had to purchase Combo Start Up Kit that Cap goes into. The site said that 78% of the time my problem of both compartments being warm were resolved/repair by replacing Capacitor, but when the item was replaced it did not and my son looked further and found that it would then be the Combination Start Up Kit (Part# PS11740412), which starts the compressor. Thanks to this site the video used to install both parts. I was able to use the old Capacitor and I am returning the new one first purchased.
Read more...
- Fix Number
- FIX385132
- Manufacturer Part Number
- 72017
Installation Instructions
Al from Cape Coral, FL
No heat when trying to dry clothes .
Followed instructions on your videos. Everything went as planned and the dryer works like new....
Read more...
- Fix Number
- FIX11740991
- Manufacturer Part Number
- WP3196548
Fixes these symptoms
- Element will not heat
- Little to no heat when baking
- Little to no heat when broiling
- See more...
Installation Instructions
Derek from Houston, TX
oven wouldn't heat / bake or broil
remove back panel , remove thermostat where the blue and red wire join together . blue (broil) red (bake) . The thermostat burned out because of a bad electronic board that was caused when using the self clean. i also replace the board with a refurbished board and the range is working like new. won't use self clean again, it gets too hot.
Read more...
Appliance Type
Related Pages
- Admiral Refrigerator Compressors
- Admiral Refrigerator Dispensers
- Admiral Refrigerator Handles
- Admiral Refrigerator Hardware
- Admiral Refrigerator Hinges
- Admiral Refrigerator Ice Makers
- Admiral Refrigerator Seals and Gaskets
- Admiral Refrigerator Thermostats
- Admiral Refrigerator Trays and Shelves
Popular Admiral Refrigerator Models
- LTF2112ARW Top Freezer
- LSD2615HEZ Side-by-side
- LSD2615HEW Side-by-side
- LTF2112ARB Top Freezer
- LSD2615HEB Side-by-side
- LTF2112ARZ Top Freezer
- ATF1910DRW Top Freezer
- ATF2110DRW Top Freezer
- ATB1710DRW Top Freezer
- ATB1910DRW Top Freezer
- ASD2123DRW Side-by-side
- BDNS24L9A (BN91E)
- BDNS24L9A (BU85A)
- BDNS24L9A (BN91A)
- BDNS24L9A (BN92D)
- BDNS24L9A (BU85B)
- BDNS24L9A (BN91D)
- BDNS24L9A (BN92F)
- BDNS24L9A (BU86A)
- BDNS24L9A (AN92A)


