Admiral Dryer Parts
Start With Your Model Number
Find Parts Fast
Guaranteed Fit
Repair Videos
Need help finding your model number?

Popular Admiral Dryer Parts
$17.19
In Stock
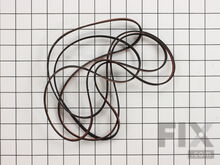
Multi Rib Belt - 92-1/4"
Fix Number FIX346995
Manufacturer Part Number 341241
This multi rib belt is an OEM replacement part for a dryer. It attaches to the drum, idler pulley, and motor pulley, and is responsible for spinning the drum. Over time, the belt can become frayed, brittle, and inflexible. If you can hear the motor running, but the drum does not turn, it is likely that the belt is broken. Other symptoms of a broken multi rib belt include unusual noises, failing to start, no heat, a burning smell, and an unresponsive touchpad. Depending on the model, you will find the belt by looking behind the front panel or under the main top of the dryer. This belt is 1/4-inches wide, has a length of 92-1/4-inches, and has four ridges and three groves on the belt. Each belt is sold separately.
Fixes these symptoms
- Drum Not Spinning
- Heat stays on after drum has stopped
- Noisy
- See more...
M Series New Style Coil Kit
Fix Number FIX334310
Manufacturer Part Number 279834
This OEM kit comes with two ignition coils (one three-terminal boost/hold coil, and one two-terminal secondary coil). Usually only one of them burns out, but you should replace them as a set as both have to be operational for the gas valve to open. The primary purpose of the part is to open the gas valve and allow the gas to enter the burner. This is a safety mechanism to make sure that there is never an unsafe buildup of gas inside the appliance. You will find the coils attached to the dryer gas valve. This is not an uncommon repair; it can fail due to normal material fatigue over time. To test your current parts, watch the burner, and if the igniter glows for a while and then shuts off without the gas is igniting, it usually means one of these coils is bad.
Fixes these symptoms
- Noisy
- Not Heating
- See more...
Installation Instructions
Dennis from ALISO VIEJO, CA
Dryer ran but did not dry clothing.
Best site I have ever used for repairs. First a list of what parts were needed was provided right from the start, no guessing. I followed all of the video's provided for installation instructions and and that was it. Very easy to make repairs and almost rebuilt my dated dryer to like new condition. Appliance was in very good physical condition just needed new components to bring it back. Highly recommend this site to anyone who can turn a wrench.
Read more...
$27.97
In Stock
Dryer Cycling Thermostat
Fix Number FIX11741405
Manufacturer Part Number WP3387134
This thermostat is an OEM replacement part for a dryer. It is sold individually. It measures approximately 2-inches by 1.5-inches, is black and silver, and constructed of plastic and metal material. You will find this part attached to the blower wheel housing. Cycling thermostats continually cycle the heating element off and on to maintain a constant inner temperature inside the dryer. This particular cycling thermostat will turn the heating element off once the temperature reaches 155F and cycles back on once the internal temperature drops by 25F. Do not forget to unplug the power to the dryer before you begin this repair. Keep in mind that you will need to pull the dryer out from the wall because this repair will need to be done from the back of the appliance with the back panel removed.
Fixes these symptoms
- Heat stays on after drum has stopped
- Not Heating
- Too hot
- See more...
Installation Instructions
gary from apex, NC
dryer not heating
Checked the heating element and found a break in the heating coil. Decided to change the thermal fuse and the the cycling thermostat because of the age of the dryer.
Read more...
$13.42
In Stock
Roller Support Tri-Ring
Fix Number FIX11755850
Manufacturer Part Number WPW10512946
This small but mighty OEM piece is called a tri-ring and is used to support the drum roller shaft and the idler pulley shaft in your dryer. It helps to provide a tight seal between components by evenly distributing pressure. The part is triangular in shape, and less than an inch in size. Overtime it can become brittle or compressed, which can lead to a noisy tumbling cycle, or your dryer not tumbling at all. The tri-ring itself is simple to replace, simply slip off the damaged one and slip on the new. However, to access the drum roller or idler pulley, you will need to remove the front panel and drum of your dryer. This may require tools like a Phillips screwdriver, a quarter inch nut driver, putty knife, a small flat blade screwdriver, and a pair of needle nose pliers depending on your model. Ensure that the power is disconnected before beginning your repair.
Fixes these symptoms
- Noisy
- See more...
Installation Instructions
JAMES from GREENSBURG, PA
Loud squeaking and squealing
Lint Filter - Removed old lint filter and inserted new lint filter. This is the first time I tried to fix a dryer. A handyman I am not. I found two very useful YouTube videos using basically my model of Kenmore (11067851600). Disassembly/Assembly - here is a difference between Kenmore 29" wide dryers and 27" wide dryers. Mine is 27". My effort was not a smooth as these videos. The bottom front panel's right most clip was quite troublesome. The moisture sensor wire required needle nose pliers to be disconnected and reconnected. The open door sensor was not easy to disconnect. Although with a few special magic words it came apart. The upper front panel was held in place with two T20 Torx screws. I had only had a T15 driver, therefore a trip to Home Depot was required. The first two tri rings were not easily removed, however, on third tri ring it became easier and not damaged. Replacement of tri rings was not troublesome. Support rollers snapped in place easily. However, I did thoroughly clean the housing. It was quite grimy. Actually, while I had the dryer open I cleaned everything including the heating element and electric motor. It now operates quietly. It took me a little over two hours because I am not handy and must take care not to make matters worse plus I thoroughly cleaned everything include scuff marks where the drum rubs. Anyone else probably should have it completed 30-60 minutes easily.
Read more...
$32.99
In Stock
Dryer Door Switch
Fix Number FIX11741701
Manufacturer Part Number WP3406107
This OEM dryer door switch is an on/off mechanism that detects when the door is open to prevent the dryer from operating. If your dryer will turn on but will not start or continues working while the door is open, you may have a faulty door switch. This part features the switch and three wires, is white in color, and measures 6.5 inches long. This switch replaces the two-wire switch that is on many models. You will find this part attached to the inside of the top end of the front panel. One end attaches to the wiring harness and the other goes through the panel to make contact with the door when the door is closed. This is a regular wear part due to such frequent use or continuous harsh handling. Depending on how the switch broke, it might make it impossible to start or stop your drying cycle. You can test the function of this part by pushing on the black tab that sticks out of the front panel to make contact with the dryer door. If there is no resistance in the tab and it does not make a clicking sound, it likely needs to be replaced.
Fixes these symptoms
- Door won’t close
- Running With Door Open
- Will Not Start
- See more...
Installation Instructions
David from Delmar, DE
dryer door switch didn't work
Very easy, whirlpool replaced the 2 wire switch with a 3 wire switch. After calling this site, and Whirlpool about the new 3 wire harness, they said it would work fine, which it did.
Read more...
Dryer High Limit Thermostat
Fix Number FIX11742185
Manufacturer Part Number WP3977767
This is a manufacturer-approved high-limit thermostat for your dryer. This part includes one high limit thermostat with a terminal extension arm. It is a safety mechanism that prevents your dryer from overheating. Once the temperature reaches 221 degrees Fahrenheit, this element will shut down power to the heating element until it decreases to 80 degrees Fahrenheit. If this part is faulty, your dryer may not heat. You will find this part located underneath the dryer vent behind the appliance. The terminal extension arm connects to the heater element terminal. The high limit thermostat can be tested with a multimeter. It should be tested while it is at room temperature, and will need to be replaced if the reading determines it is faulty.
Fixes these symptoms
- Not Heating
- Too hot
- See more...
Installation Instructions
Tim from Fargo, ND
Not getting hot enough, eventually no heat
I ordered the parts I thought may be the problem. If you watch any of the videos to help with a repair most of the video time is spent taking off and putting on the back panel. That being said once the panel was off it took me maybe 20 minutes to install the 4 parts I had ordered. Could have gone faster but also had 3 kids ages 2 and up to work around. This web site not only helps you trouble shoot but then gives discounts for the parts needed and helps with the repair through videos. Obviously the objective was to help customers from start to finish and I believe they achieved just that. Will use this site in the future and tell others about it as well. My instructions are to watch their video to do the repair. Don't rush or get anxious just focus on your task. My wife said the dryer works like new now.
Read more...
$19.63
In Stock
Dryer Thermal Fuse
Fix Number FIX11741460
Manufacturer Part Number WP3392519
The dryer thermal fuse, also sometimes referred to as the thermal cut off or temperature fuse, is a 2 by 1/2-inch, white, plastic safety mechanism that halts the flow of electricity to the motor circuit when a dryer overheats. If the fuse is missing or broken, your dryer will not start. A thermal fuse fails when the exhaust temperature exceeds the fuse rating, that is when the temperature rises above the temperature that the fuse is intended to manage. This can be caused by the heating element shorting, a regulating thermostat or thermistor failure, or with a partially restricted exhaust vent. The fuse attaches to the blower wheel housing. It must be replaced when there is no longer continuity between the terminals. This is a one-time fuse, meaning it cannot be re-set. The replacement part features two 3/16-inch terminals. While performing this repair, we recommend checking to make sure all vents are cleared and vacuumed. This OEM part is sold individually.
Fixes these symptoms
- Heat stays on after drum has stopped
- Not Heating
- Too hot
- See more...
Installation Instructions
gary from apex, NC
dryer not heating
Checked the heating element and found a break in the heating coil. Decided to change the thermal fuse and the the cycling thermostat because of the age of the dryer.
Read more...
$56.40
In Stock
Thermal Cut-Off Kit
Fix Number FIX334299
Manufacturer Part Number 279816
This thermal cut-off kit is for a dryer and is sourced directly from the manufacturer. The thermal cut-off is a safety mechanism that is designed to trip if your dryer is at risk of overheating, to prevent further damage. It may need to be replaced if your washer is no longer heating properly. This is a one-time fuse, meaning if it trips, it needs to be replaced immediately. A common reason for this part to fail is if the heater housing is not receiving proper airflow, normally caused by an obstruction in the exhaust vent, a clogged lint screen, or a broken blower wheel. This kit includes 1 high-limit thermostat with a limit of 250 degrees Fahrenheit, 1 thermal cut-off fuse with a limit of 309 degrees Fahrenheit, jumper wires and new female spade terminals. These components are attached to the heater housing.
Fixes these symptoms
- Heat stays on after drum has stopped
- Not Heating
- Too hot
- See more...
Installation Instructions
Tim from Fargo, ND
Not getting hot enough, eventually no heat
I ordered the parts I thought may be the problem. If you watch any of the videos to help with a repair most of the video time is spent taking off and putting on the back panel. That being said once the panel was off it took me maybe 20 minutes to install the 4 parts I had ordered. Could have gone faster but also had 3 kids ages 2 and up to work around. This web site not only helps you trouble shoot but then gives discounts for the parts needed and helps with the repair through videos. Obviously the objective was to help customers from start to finish and I believe they achieved just that. Will use this site in the future and tell others about it as well. My instructions are to watch their video to do the repair. Don't rush or get anxious just focus on your task. My wife said the dryer works like new now.
Read more...
$32.34
In Stock
Door Catch Kit
Fix Number FIX2162263
Manufacturer Part Number LA-1003
This kit comes in two pieces: the catch and the clip.
Fixes these symptoms
- Door won’t close
- See more...
Installation Instructions
James from Joshua, TX
Dryer plastic door catch was broke on dryer
I watched several videos on how to replace the latch, but my latch was broken on one side so I took a pair of pliers and a screwdriver and pried the old one out. Push the new one in, then replaced the male catch on the door. i didn't tighten the screw holding the male latch because they use it to allign the latch with the catch.
Read more...
$47.91
In Stock
Dryer Radiant Flame Sensor
Fix Number FIX11741429
Manufacturer Part Number WP338906
This genuine OEM part is a radiant flame sensor for your gas dryer. It is used to determine when the temperature of the igniter is hot enough to ignite the gas. Once the igniter is hot enough, it allows the valve to open to release the gas. This acts as a safety mechanism which prevents dangerous levels of gas from building up. If your dryer will not start, is not producing enough heat, not heating up at all, is taking too long to dry laundry, or is shutting off too soon, you may need to replace the radiant flame sensor. Please be sure to disconnect the power and gas supply to your dryer before beginning this repair.
Fixes these symptoms
- Not Heating
- See more...
Installation Instructions
William from Corsicana, TX
Oor dryer would not get hot.
I opened the bottom section and watched as the igniter got red hot as it should but the gas valve did not open. I wired around the sensor and the gas valve opened and the fuel ignited. VERY IMPORTANT: DO NOT RUN YOUR DRYER IN THIS STATE: IT WILL BLOW UP!! I did a VERY short test, then ordered the new sensor. Just one screw holds the sensor (as shown in the Parts video). One screw out, new sensor, one screw in and our dryer is back in full and proper running order.
Read more...
Appliance Type
Related Pages
- Admiral Dryer Brackets and Flanges
- Admiral Dryer Circuit Boards and Touch Pads
- Admiral Dryer Drums and Tubs
- Admiral Dryer Hardware
- Admiral Dryer Knobs
- Admiral Dryer Seals and Gaskets
- Admiral Dryer Switches
- Admiral Dryer Thermostats
- Admiral Dryer Valves
- Admiral Dryer Wheels and Rollers
- Admiral Dryer Wire Plugs and Connectors
Popular Admiral Dryer Models
- LNC7764A71 Residential
- ADE7005AYW Residential
- AED4475TQ0 Residential
- ADE7000AYW Residential
- AED4475TQ1 RESIDENTIAL DRYER
- AED4675YQ1 29" ELECTRIC DRYER
- ADG7005AWW Residential
- AED4675YQ0 29" ELECTRIC DRYER
- ADG7000AWW Residential
- LNC8764A71 Residential
- AGD4475TQ0 Residential
- AGD4475TQ1 RESIDENTIAL DRYER
- AED4370TQ0 Residential
- ADE20N3V Residential
- LNC7766A71
- AGD4675YQ2 29" GAS DRYER
- LNC8766A71
- AGD4370TQ0 Residential