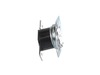
This oven temperature sensor plays a critical role in maintaining consistent cooking performance by monitoring the internal temperature and relaying that data to the control board. By regulating the h...
The oven door switch shuts the oven light off when you close the oven door.
In Stock
Order now and your part arrives by Mar 19
Questions and Answers
Ask our experts a question about this part and we'll get back to you as soon as possible!
5 questions answered by our experts.
< Prev
1
Next >
Sort by:
Search filter:
Clear Filter
Your search term must have 3 or more characters.
Keep searches simple. Use keywords, e.g. "leaking", "pump", "broken" or "fit".
Sorry, we couldn't find any existing answers that matched. Try using some different or simpler keywords, or submit your new question by using the "Ask a Question" button above!
David
May 1, 2023
The oven is not coming to temp, it gets stuck between 175-225.
For model number NE58H9970WS
Hi David, thank you for reaching out. Based on the description that you have provided, we would recommend checking the temperature sensor, part number FIX4240744, as it is the most likely cause of this issue. We hope this solves your problem!
Hi Mark,
Thank you for your question. If the left 2 burners are not working, you will need to check the elements, the switches that control the elements and the wiring between the parts to see which part is causing the issue. We have included a link that you may reference on how check these parts. We hope this helps! Good luck with the repair!
2 left induction burners showing a U code error. I have tried many sizes of pans all are magnetic and none work. what is the problem?
For model number NE58H9970WS
Hello Paul, thank you for your question. The Left Side Surface Burner Induction Coil is PS5576934. Both coils are the same for Front and Back on the left sides. We hope this helps.
What part do i need if my oven won't heat at all? The fan runs but the preheat stays at 175.
For model number NE58H9970WS
Hello Teri. thank you for writing. Determine if the bake element part FIX4240824 has burned out, use a multimeter to test the element for continuity. Next most likely issue will be the Main control Board part FIX11720474. Good luck with the repair.
Warming draw does not go in all the way on one side
For model number NE58H9970WS
Hello Gary, thank you for getting in touch. The issue seems to be with the warmer drawer slider. We would suggest replacing it, the part number is FIX8764968, to solve the problem. We hope this solves your problem!
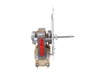
This oven has two fans that counter rotate. One spins clockwise, the other counterclockwise. Because of this, the motors and the fan blades are different. The schematic shows the counter clockwise rotating fan with a right hand threaded shaft/nut on the bottom and the clockwise motor and fan with the left hand nut on the top. My range
... Read more had the motors in the exact opposite orientation, but the fan blades on the motors as shown on the schematic. The incorrect assembly at the factory (I bought new in the box, so I know this is the first repair) meant that nether fan blade was turning the correct direction. So do yourself a favor, be sure you’re buying the right motor (clockwise or counterclockwise) and be sure you put the right fan blade on the right motor. The Samsung motor ending in F is the counterclockwise motor that has the right hand threaded shaft the clockwise motor with the left hand threaded shaft ends in E.
I took off the back cover after I looked at youtube similar problems. Then removed the little thermostat and un hooked the 2 wires. I looked up the part and after is was delivered couple days later I connected the 2 wies and after putting the back cover on the oven was back to normal. Was such an easy repair and the part was only $11.
Slide out the stove. Unplug the electricity. Remove the back panel with a screwdriver. Then go inside the oven and remove the two Philips head screws holding the fan cover. Then remove the nut holding the fan. Note, it is a left handed nut, so turn it right to loosen it. Pull off the fan. Return to the back and remove the nut and two scr
... Read moreews that hold the fan. The fan slides right out. The only problem I had was that the electrical contacts on the new motor were wider than the original. I had to break the plastic so I could separate the wire leads, so that they would fit the new motor. Works like a charm. John


 – Part Number: DG94-00550A")