


- What is a Belt?
- Where is the Belt Located?
- How to Access, Remove, and Inspect the Belt in a Top Load Washing Machine
- How to Install a New Belt in a Top Load Washing Machine
- How to Access, Remove, and Inspect the Belt in a Front Load Washing Machine
- How to Install a New Belt in a Front Load Washing Machine
How to Fix a Belt for a Washer With Draining Issues
If you find water standing in your washer after beginning a fresh load of laundry, your washer belt might be the cause. This is especially true if you also hear a squealing sound during the wash cycle. The belt is made of rubber and is prone to wear and tear due to the high friction it experiences. The belt is responsible for keeping the drum spinning smoothly. If it is worn down or not taut, the washer will simply not proceed to the spinning cycle and your washer will be stuck on the drain cycle.
However, there’s no need to worry because you are in the right place! Our expert repair guide will show you exactly how to find and examine the washer belt. If it is indeed the culprit behind your washer not draining, this guide will show you how to fix it. If you need a replacement belt, we will show you how to install a new one in a few simple steps.
What is a Belt?
The drive belt is a rubber belt that fits around the pulleys on the bottom of your washing machine motor. It helps to operate the pump. If the belt is hanging loosely or is worn down, the washing machine may have some difficulty draining or may not drain at all.
Where is the Belt Located?
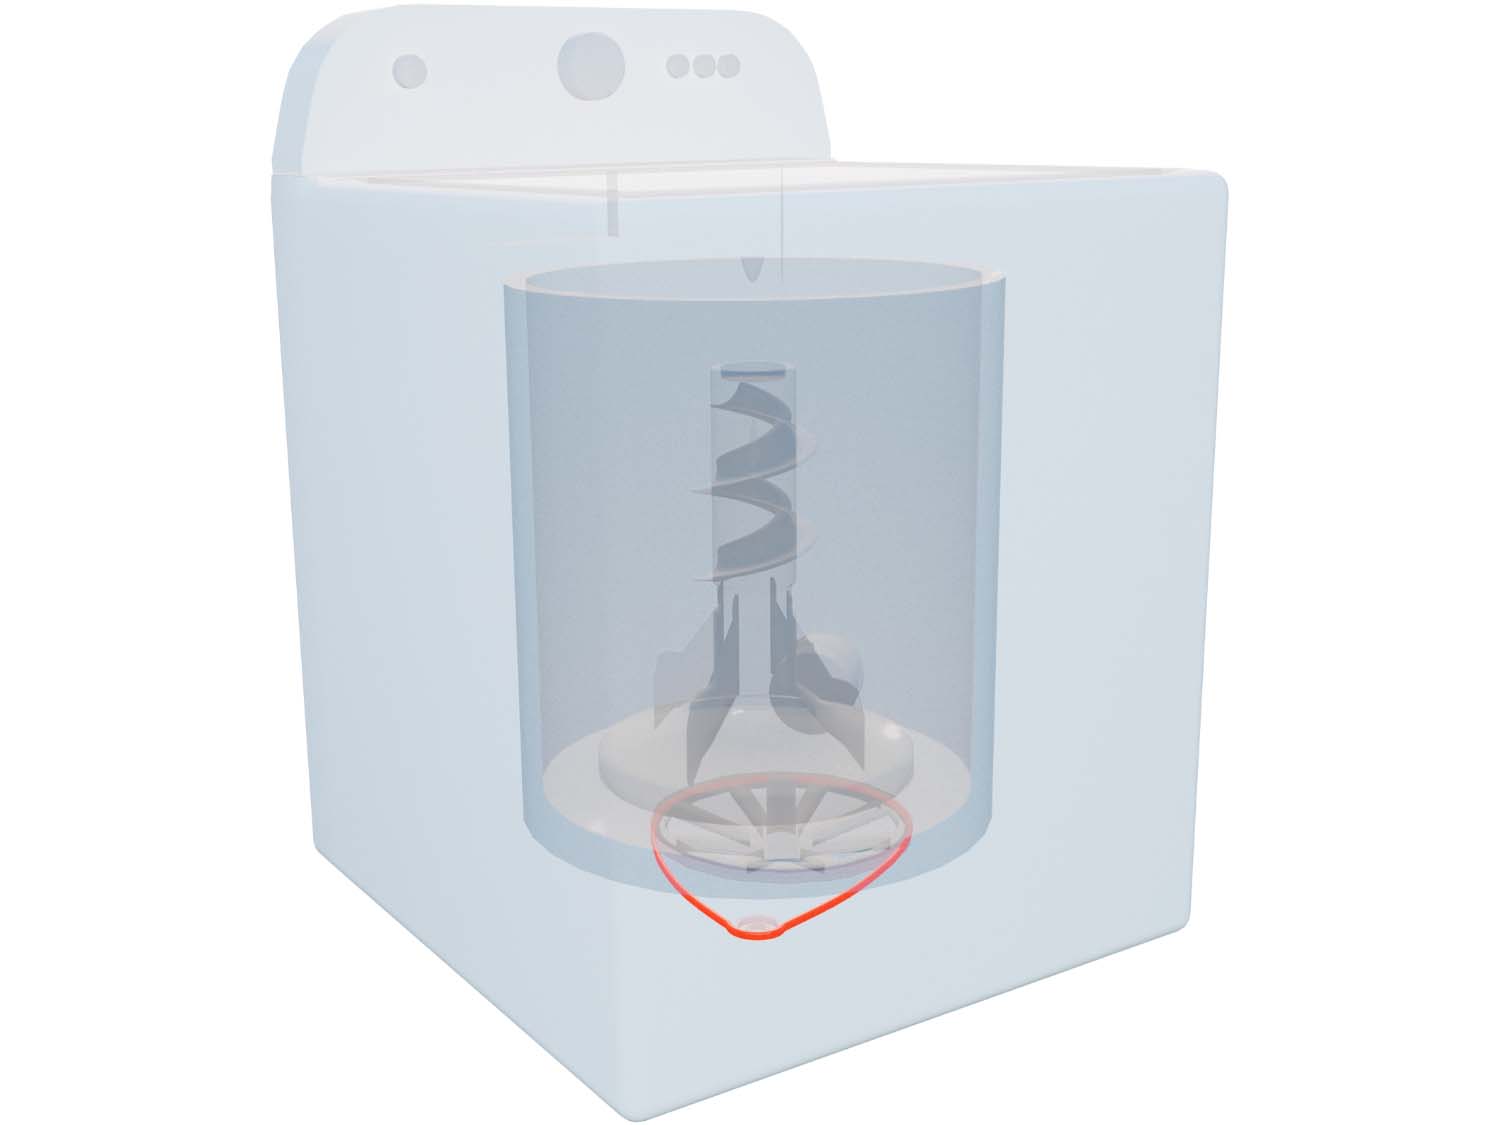
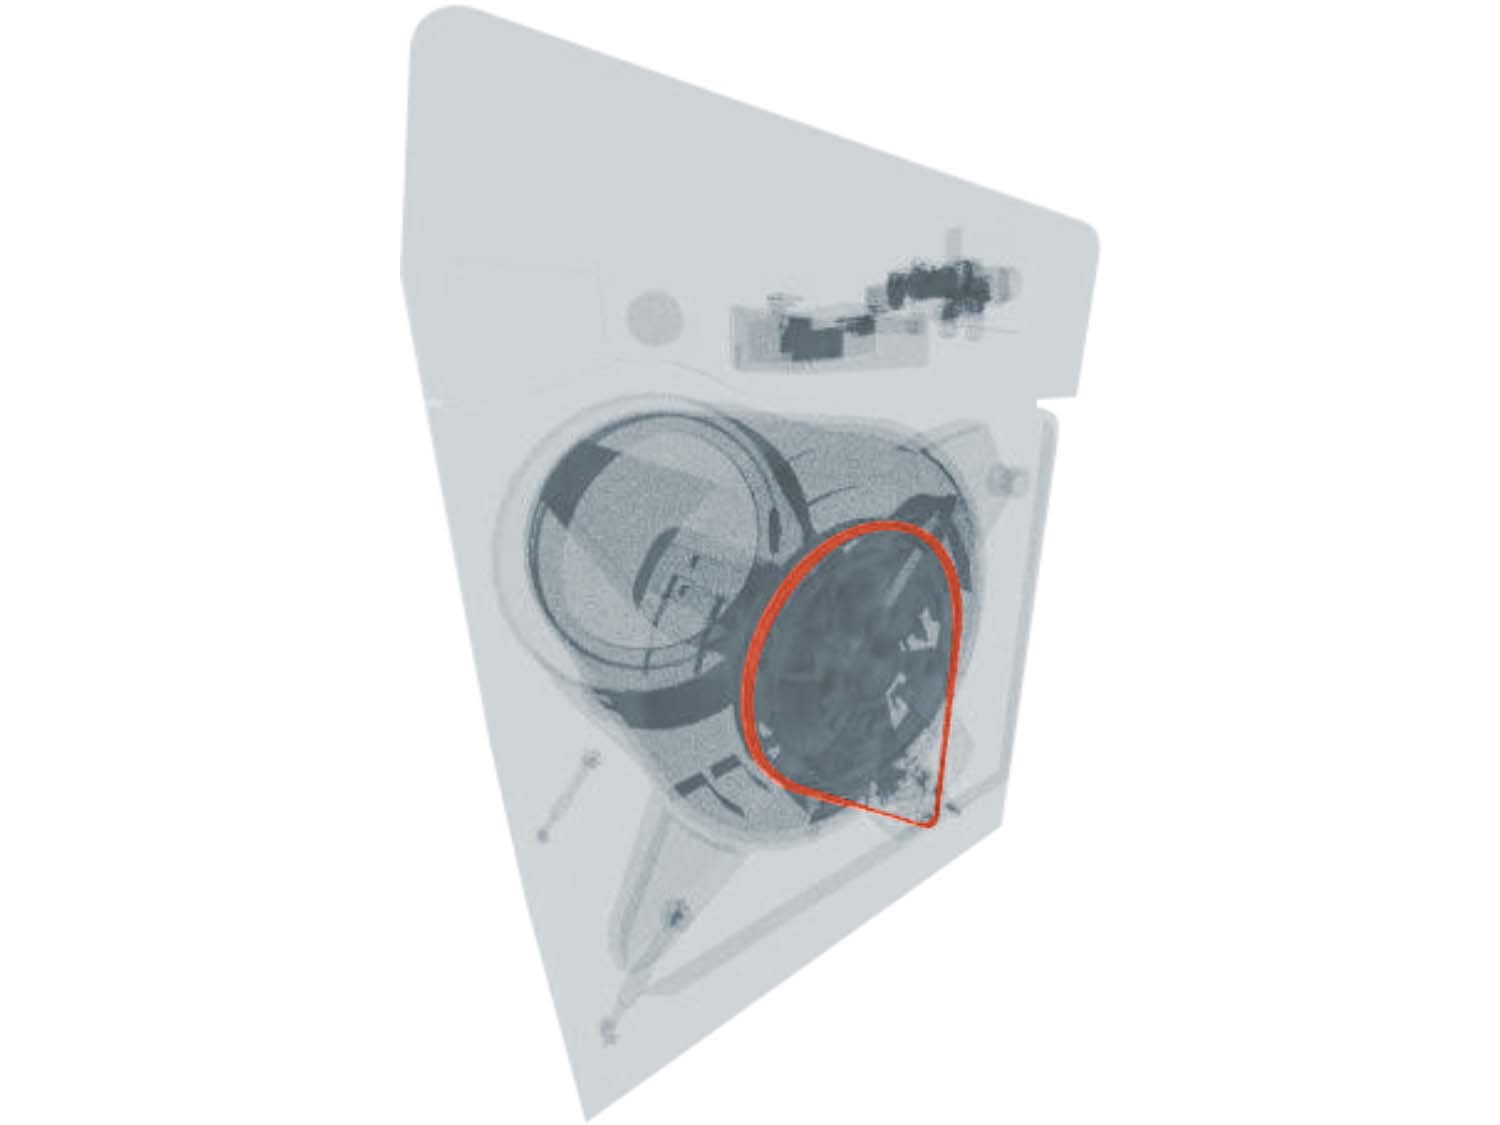
The belt is found near the bottom of the drum or toward the back of the drum.
General Location of the Drive Belt in a Top Load Washer
General Location of the Drive Belt in a Front Load Washer
How to Access, Remove, and Inspect the Belt in a Top Load Washing Machine
- You will need a stiff putty knife, a pair of wire cutters, a plastic wire tie, and a belt installation tool.
- Begin by disconnceting your washer from the its power source.
- Search inside the washing machine for a rubber belt stretched between the motor and the drum.
- The belts are underneath the washing machine on some top-load washers. Lay down a towel and carefully tilt the washing machine on its side to access the belts if you need to.
- Pull the old belt off the pulley and motor shaft. You may be able to slide it off if it is loose enough. However, if it is not, try sliding your screwdriver underneath the belt and prying it off.
- Inspect the belt for any damage. If it is damaged or hanging loosely, it will need to be replaced.

How to Install a New Belt in a Top Load Washing Machine
- Check ‘How to Access, Remove, and Inspect the Belt in a Top-Load Washing Machine’ for instructions on how to remove the belt.
- Take your new belt and fit it around the drum pulley with the flat/smooth side facing out. You may need to stretch it for it to fit.
- Secure the belt on one side of the drum pulley with a zip tie. You don’t need to use a zip tie, but it is helpful when trying to stretch a tight belt.
- At this point, you can slide a belt installation tool onto the motor shaft to make the installation easier.
- Loop the other end of the belt around the motor shaft.
- Rotate the drive pulley counterclockwise to help fully align the belt. As it rotates, the belt will align itself on the pulley and become tight.
- Once the belt is firmly on, cut the zip tie off the belt with scissors.
- Do not leave the zip tie on the belt as it could damage the belt or cause it to slip.
- Fit the cabinet back onto the washer and your repair is complete.

How to Access, Remove, and Inspect the Belt in a Front Load Washing Machine
- Begin by disconnceting your washer from the its power source.
- Remove the rear panel on the back of your front-load panel by removing the mounting screws securing the panel.
- Slide the panel down and off the machine.
- Rotate the tub drive pulley to help unthread the old drive belt and pull it free.
- Inspect it for any damage. If there is damage or it hangs too loosely, it will need to be replaced. If not, you will need to investigate another part of the machine.

How to Install a New Belt in a Front Load Washing Machine
- Check ‘How to Access, Remove, and Inspect the Belt in a Front-Load Washing Machine’ for instructions on how to remove the belt.
- Take your new belt and fit it around the drum pulley with the flat/smooth side facing out. You may need to stretch it for it to fit.
- Secure the belt on one side of the drum pulley with a zip tie. You don’t need to use a zip tie, but it is helpful when trying to stretch a tight belt.
- At this point, you can slide a belt installation tool onto the motor shaft to make the installation easier.
- Loop the other end of the belt around the motor shaft.
- Rotate the drive pulley counterclockwise to help fully align the belt. As it rotates, the belt will align itself on the pulley and become tight.
- Once the belt is firmly on, cut the zip tie off the belt with scissors.
- Do not leave the zip tie on the belt as it could damage the belt or cause it to slip.
- With the belt in place, slide the rear panel up into position and secure the mounting screws.
- Plug your machine back in and your repair is complete.

Next: Troubleshooting the Drain Pump
Go To Main Page: Draining Issues