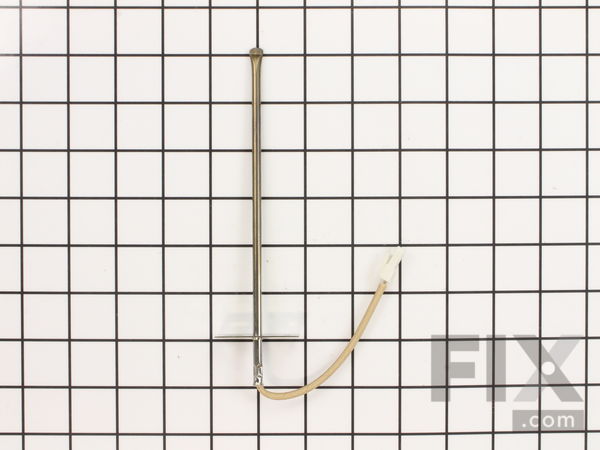
Part Location Diagram of WB23T10015 GE Oven Sensor
See part 253 in the diagram
Replacing your General Electric Range Oven Sensor
( Grid squares measure 1x1 inch )

Oven Sensor WB23T10015

Rated by 5 customers 

?

Really Easy 

30 - 60 mins 

Ratings submitted by customers like you who bought this part.

?
$36.65
In Stock
Fix Number:
FIX236398
Manufacturer #:
WB23T10015
Manufactured by:
GE

Product Description

This temperature sensor detects the temperature within the oven cavity.

Videos For installing this part.

Replacing your Oven Sensor

Replacing your Oven Sensor

Questions and Answers

We're sorry, but our Q&A experts are temporarily unavailable.
Please check back later if you still haven't found the answer you need.

Affresh Washing Machine Cleaner - 3 pack
$12.58
In Stock
Produce Preserver Filter
$21.50
In Stock
Affresh Dishwasher Cleaner Tablets - 6
$19.09
In Stock
Cooktop Cleaning Cream
$15.57
In Stock
Cooktop Cleaner
$17.74
In Stock
Affresh Cleaner
$19.09
In Stock

Installation Instructions Provided by Fix customers like you.

Average Repair Rating: 3.7 / 5.0, 5 reviews.
  • 1
Sort by:
Sorry, we couldn't find any existing installation instruction that matched.
Customer:
Sherrie from Eustis, FL
Parts Used:
WB23T10015
Difficulty Level:
Really Easy
Total Repair Time:
15 - 30 mins
Tools:
Screw drivers
No heat and received F2 and F3 codes indicating defective oven sensor.
Shut power to oven. Removed oven from cabinet and placed on stool. Unscrewed old oven sensor from inside of oven and detached sensor cord from back of oven to remove sensor. Screwed new sensor on inside oven and then ran connection cord through the back of oven and out to be plugged in on rear of unit. Slid oven back into cabinet. Tu rned power back on to oven and tested the oven to make sure it heats up properly. Very easy installation and it saved us a fortune. Cookies came out just perfect!
3 of 3 people found this instruction helpful.
Was this instruction helpful to you?
Thank you for voting!
Customer:
Dwayne from Yucca Valley, CA
Parts Used:
WB48X5108, WB23T10015
Difficulty Level:
Really Easy
Total Repair Time:
Less than 15 mins
Tools:
Socket set
Oven not heating
Removed Broiler and Oven Sensor, replaced Oven Sensor with new and reinstalled Broiler Element and Oven Sensor. Tested and return to service.
0 of 1 people found this instruction helpful.
Was this instruction helpful to you?
Thank you for voting!
Customer:
loren from Delmont, PA
Parts Used:
WB23T10015
Difficulty Level:
Easy
Total Repair Time:
1- 2 hours
Tools:
Screw drivers
Bad oven temperature sensor
Unscrew the the sensor from the inside of the oven (only 1 screw). I also removed the broiler screws for easier access but it isnt a necessary step. Remove 4 screws which attached the double oven to the cabinet. I put together a homemade stand for the oven to rest on while I pulled it out most of the way. Without this you will need two people to handle the weight. Remove 3-4 screws that hold the fan motor/wiring cover on the rear. You ll find the sensor plugged in with a simple clip at the top. Un-clip the bad sensor and pull it through from inside of the oven. Insert the new sensor wire through the same hole and plug in from the rear. Reassemble as you unassembled. I did not have to cut off power to replace the sensor, but it would be a good idea in case you come across (bad) exposed wires when you remove the rear panel.
0 of 1 people found this instruction helpful.
Was this instruction helpful to you?
Thank you for voting!
Customer:
Edward G from South Pittsburg, TN
Parts Used:
WB23T10015
Difficulty Level:
Really Easy
Total Repair Time:
30 - 60 mins
Tools:
Nutdriver
Oven would not maintain temperature nor achieve set temperature
Contrary to some of the advice given here this model oven is accessible only by removing a cover. Then to two screws holding the probe are accessible from inside the oven not from the rear. Removal/replacement is simple proceeds smoothly after that. It would have been easier had I removed the door, but I elected to leave the door on. Del ivery of the part was on time and the installation easy. The new probe appears to solve the problem.
0 of 1 people found this instruction helpful.
Was this instruction helpful to you?
Thank you for voting!
Customer:
alan from pinehurst, NC
Parts Used:
WB23T10015
Difficulty Level:
Really Easy
Total Repair Time:
30 - 60 mins
Tools:
Screw drivers, Socket set
oven temp fluctuated
Remove wall oven. Remove 2 screws at top of oven holding Temp Sensor. Remove oven back plate. Disconnect sensor power supply. Pull sensor out through inside oven. Install new sensor is reverse of removing old sensor.
0 of 1 people found this instruction helpful.
Was this instruction helpful to you?
Thank you for voting!
  • 1

Model Compatibility

This part works with the following models:
Fix Number: FIX236398
Manufacturer Part Number: WB23T10015
Brand
Model Number
Description
Kenmore
91141084993
Wall Oven
Kenmore
91141084994
Wall Oven
Kenmore
91141085993
Wall Oven
Kenmore
91141085994
Wall Oven
Kenmore
91141086993
Wall Oven
Kenmore
91141086994
Wall Oven
Kenmore
91141089993
Wall Oven
Kenmore
91141089994
Wall Oven
Kenmore
91141184993
Wall Oven
Kenmore
91141184994
Wall Oven
Kenmore
91141185993
Wall Oven
Kenmore
91141185994
Wall Oven
Kenmore
91141189993
Wall Oven
Kenmore
91141189994
Wall Oven
Kenmore
91141485993
Microwave Oven Combo
Kenmore
91141485994
Microwave Oven Combo
Kenmore
91141485995
Microwave Oven Combo
Kenmore
91141485996
Microwave Oven Combo
Kenmore
91141489993
Microwave Oven Combo
Kenmore
91141489994
Microwave Oven Combo
Kenmore
91141489995
Microwave Oven Combo
Kenmore
91141489996
Microwave Oven Combo
Kenmore
91147082100
Wall Oven
Kenmore
91147084100
Wall Oven
Kenmore
91147089100
Wall Oven
Kenmore
91147712200
Wall Oven
Kenmore
91147712201
Wall Oven
Kenmore
91147713200
Wall Oven
Kenmore
91147713201
Wall Oven
Kenmore
91147714200
Wall Oven