Some of the parts we sell are eligible for mail-in rebates since we can recycle them. We will display any applicable rebates in your shopping cart. To redeem your rebate, contact Customer Service after you have received your part.
Dispenser
$107.99
In Stock
- Fix Number:
- FIX11750038
- Manufacturer #:
- WPW10195175
- Manufactured by:
- Whirlpool
- Product Description
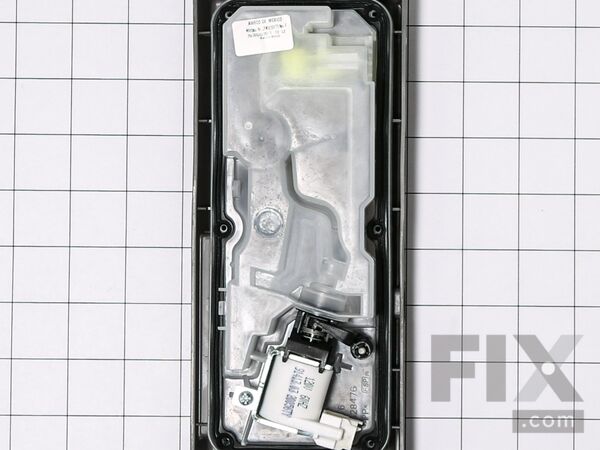
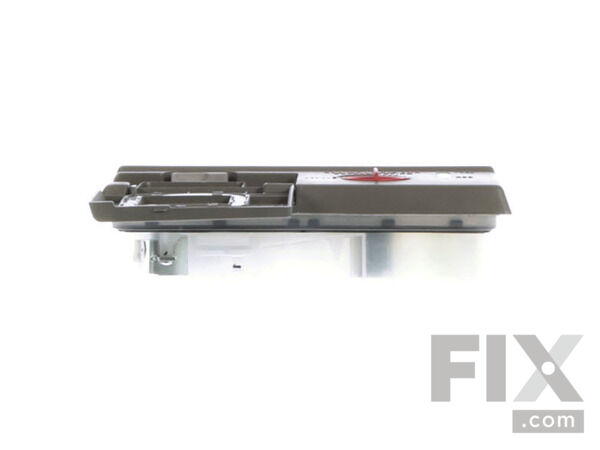
- This detergent dispenser assembly is for dishwashers. Detergent dispenser assembly holds the dishwasher detergent and rinses agent in covered compartments.
- Works with the following brands:
- Kenmore, Whirlpool, KitchenAid
- Works with the following products
- Dishwasher
- Fixes the following symptoms
- Will not dispense detergent, Door latch failure, Not cleaning dishes properly, Door won’t close
- Part# WPW10195175 replaces these:
- AP6016745, W10082855, W10158356, W10195172, W10195173, W10195174, W10195175, W10224432, W10224433, W10224434, W10224456, WPW10195172, WPW10195173, WPW10195174, WPW10195175VP
Part Number Cross Reference
Product Description
This detergent dispenser assembly is for dishwashers. Detergent dispenser assembly holds the dishwasher detergent and rinses agent in covered compartments.
-
Works with the following brands:Kenmore, Whirlpool, KitchenAid
-
Works with the following products:Dishwasher
-
Fixes the following symptoms:Will not dispense detergent, Door latch failure, Not cleaning dishes properly, Door won’t close
-
Part# WPW10195175 replaces these:AP6016745, W10082855, W10158356, W10195172, W10195173, W10195174 ... Show more , W10195175, W10224432, W10224433, W10224434, W10224456, WPW10195172, WPW10195173, WPW10195174, WPW10195175VP Show less
Videos For installing this part.
Replacing your Dispenser

Questions and Answers
We're sorry, but our Q&A experts are temporarily unavailable.
Please check back later if you still haven't found the answer you need.
Installation Instructions Provided by Fix customers like you.
- < Prev
- 1
- 2
- Next >
Sort by:
Search filter:
Clear Filter
Your search term must have 3 or more characters.
Keep searches simple. Use keywords, e.g. "leaking", "pump", "broken" or "fit".
Sorry, we couldn't find any existing installation instruction that matched.
- Customer:
- Betty from Royse City, TX
- Parts Used:
- WPW10195175
- Difficulty Level:
- Really Easy
- Total Repair Time:
- 30 - 60 mins
- Tools:
- Screw drivers
No Problem
Got parts list off internet and followed breakdown shown. .
3 of 3 people
found this instruction helpful.
Was this instruction helpful to you?
Thank you for voting!
- Customer:
- Patrick from Missoula, MT
- Parts Used:
- WPW10195175
- Difficulty Level:
- Easy
- Total Repair Time:
- 1- 2 hours
- Tools:
- Screw drivers, Socket set
Detergent dispenser broken
Removed the back of the door. Removed the dispenser unit and put the new one in its place
1 person
found this instruction helpful.
Was this instruction helpful to you?
Thank you for voting!
- Customer:
- Gerald from Wesley Chapel, FL
- Parts Used:
- WPW10195175
- Difficulty Level:
- Easy
- Total Repair Time:
- 30 - 60 mins
- Tools:
- Screw drivers, Socket set
The detergent dispenser didn't latch closed
I followed the instructions in the video. That was it. There were two varianciances from the video:(11) There were eight screws holding the front panel instead of four, and (2) the eight screw heads were of a type I have never used before, but I happened to have in my set of blades. Make sure to check the shape of the "slots" before ge
... Read more
tting too involved, so that if nece3ssary you can get the needed blades. Otherwise don't worry. The part installation is a snap.
Read less
1 person
found this instruction helpful.
Was this instruction helpful to you?
Thank you for voting!
- Customer:
- Scott from Salem, OR
- Parts Used:
- WPW10195175
- Difficulty Level:
- Easy
- Total Repair Time:
- 15 - 30 mins
- Tools:
- Nutdriver, Screw drivers
The plastic detergent dispenser cover latch was broken
Watched the video first. Used star driver (SMALL) to remove the door panel. The control panel is not attached, so be careful. Removed the dispenser bracket with 3/16" nut driver. The old dispenser snaps out with a little pressure on the two tabs shown in the video. I put the door back together alone. Use someone else and save yourse
... Read more
lf about ten minutes!!
Read less
1 person
found this instruction helpful.
Was this instruction helpful to you?
Thank you for voting!
- Customer:
- Thomas from Williamsport, PA
- Parts Used:
- WPW10195175, WP8268433
- Difficulty Level:
- Really Easy
- Total Repair Time:
- 15 - 30 mins
- Tools:
- Nutdriver, Pliers, Screw drivers
glasses in top rack not getting clean, rinse agent level not changing
Changed the spray arm seal. Toughest part was removing the stops at the end of the slides. Used pliers to squeeze the tabs and to pull the stops out. Pulled out rack, flipped over removed 1 screw, pulled spray arm off, old seal off, cleaned any debris and reinstalled in reverse order. Dispenser: Opened door, removed all screws, excep
... Read more
t the 2 next to the electronic panel. Even though the video for the detergent dispenser said it was for my model #, my front panel was different and I had to remove screws across the top of the door also. Used 2 squeeze clamps to hold front panel in place while removing and reinstalling screws. Good thing I did, there was a ribbon connector and wire to the electronics that could have been damaged if the panel was allowed to fall. Unplugged ribbon wire. Unplugged single wire to the dispenser. Removed the screws to the dispenser. Reverse for reassembly.
Read less
0 of 1 people
found this instruction helpful.
Was this instruction helpful to you?
Thank you for voting!
- Customer:
- Michael from Northridge, CA
- Parts Used:
- WPW10195175, WP8531233
- Difficulty Level:
- Easy
- Total Repair Time:
- 30 - 60 mins
- Tools:
- Nutdriver, Screw drivers
Basket had holes in bottom: Removed old and put in new; Detergent dispenser door was broken.
Basket: Removed old and put in new; To replace the detergent dispenser: followed the excellent video.
0 of 1 people
found this instruction helpful.
Was this instruction helpful to you?
Thank you for voting!
- Customer:
- Robert from Bel Air, MD
- Parts Used:
- WPW10404412, WPW10195175
- Difficulty Level:
- Easy
- Total Repair Time:
- 30 - 60 mins
- Tools:
- Nutdriver, Screw drivers, Socket set
Latch was broken and soap dispenser door was sticking.
Removed the door panel and replaced the latch mechanism and soap dispenser. A torx bit and small socket were all the tools needed.
0 of 1 people
found this instruction helpful.
Was this instruction helpful to you?
Thank you for voting!
- Customer:
- Eugene from Philadelphia, PA
- Parts Used:
- WPW10195175
- Difficulty Level:
- Easy
- Total Repair Time:
- 15 - 30 mins
- Tools:
- Nutdriver, Pliers
Detergent dispenser would not open/close
I followed other posts on this web site. Remove 6 star screws and pop off the front (outside) of the door. The panel on top does not need to be removed. Use pliers to disconnect wires from solenoid. Unscrew the detergent dispenser and replace with new one. Put everything back together.
0 of 1 people
found this instruction helpful.
Was this instruction helpful to you?
Thank you for voting!
- Customer:
- Steve from Kerrville, TX
- Parts Used:
- WPW10195175
- Difficulty Level:
- Easy
- Total Repair Time:
- 15 - 30 mins
- Tools:
- Nutdriver
Old dispenser quit dispensing
Remove front door panel. It's not necessary to remove the upper control panel. I took out the old part by removing 6 screws, then unplugged the wire that connects the part to the controller. The new part goes back into the same hole in the panel. Make sure you get the part oriented correctly, as it will fit in right side up or up side
... Read more
down. Reuse the splash shield in the same way as it was on the original part. I chose to reconnect the control wires after I'd installed the dispenser. Replace the door panel. Being a born pessimist, I ran part of a cycle with plain water to check the gasket seals. No leaks. Refill the rinse agent and check to make sure it's set for your water conditions (see your manual).
Read less
0 of 1 people
found this instruction helpful.
Was this instruction helpful to you?
Thank you for voting!
- Customer:
- Daniel from Saint Louis, MO
- Parts Used:
- WPW10195175
- Difficulty Level:
- A Bit Difficult
- Total Repair Time:
- 30 - 60 mins
- Tools:
- Nutdriver, Screw drivers, Wrench (Adjustable)
Soap dispenser was not opening as designed
Reveiwed other processes described on line. Removed screws, propped dishwasher door up on blocks because wires were too short for door face to lay on the floor and the inside of the door to be up. If I had four hands this part would not be necessary. Removed necessary plugs, depressed tangs used to hold dispenser in place, removed old and
... Read more
installed new. Very straight forward and would be great if it worked. Must be something else. Now I just put a detergent tab in the utensil holder and use the machine as usual. Have decided I am not going to play trial and error with expensive parts. Save yourself the money and put the washer tabs in the utensil holder and let her rip. Been cleaning just as good as before, maybe better.
Read less
0 of 1 people
found this instruction helpful.
Was this instruction helpful to you?
Thank you for voting!
- < Prev
- 1
- 2
- Next >
Model Compatibility
This part works with the following models:
Fix Number: FIX11750038
Manufacturer Part Number: WPW10195175
Manufacturer Part Number: WPW10195175
Brand
Model Number
Description
Kenmore
66213043K112
Dishwasher
- Kenmore Dishwasher Model 662.13043K112 (66213043K112, 662 13043K112) Parts
✖
Mail-In Recycling Rebate


