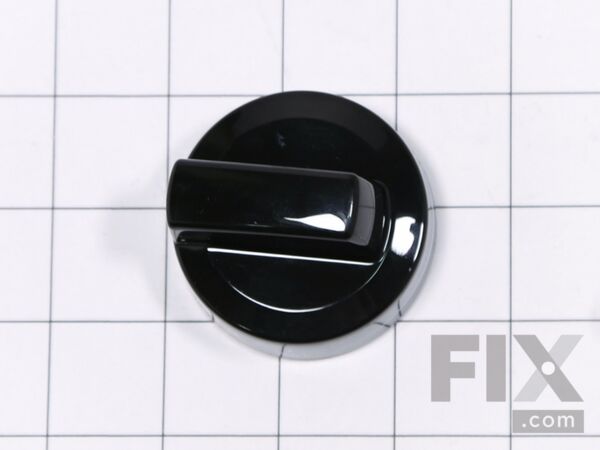
Part Location Diagram of WPW10160649 Whirlpool Burner Knob - Black
See part 6 in the diagram
( Grid squares measure 1x1 inch )

Burner Knob - Black

Rated by 1 customers 

?

Easy 

30 - 60 mins 

Ratings submitted by customers like you who bought this part.

?
$25.25
In Stock
Fix Number:
FIX11749264
Manufacturer #:
WPW10160649
Manufactured by:
Whirlpool

Product Description

This knob accepts a D shape shaft. Sold individually.

Questions and Answers

Be the first to ask our experts a question about this part!

Installation Instructions Provided by Fix customers like you.

Average Repair Rating: 3.3 / 5.0, 1 reviews.
  • 1
Sort by:
Sorry, we couldn't find any existing installation instruction that matched.
Customer:
James from Ft Lauderdale, FL
Parts Used:
WPW10293048, WPW10160649
Difficulty Level:
Easy
Total Repair Time:
30 - 60 mins
Tools:
Screw drivers, Wrench set
Replace gas regulator
The first thing you want to do before installing the new gas regulator is unplug the electrical cord (power for the electric ignitors and the digital front panel) and the gas connection.
Now you need to take off the old regulator. When looking at the back of the range where the regulator is located you see three gas connection points on the regulator- the in-coming gas, the out-going gas to the stovetop and the out-going gas to the oven. Disconnect all three with a wrench (the out-going connections need a smaller wrench than the in-coming connection) Open-end wrenches work better than a crescent-type wrench.
Next, unscrew the four mounting screws that hold the regulator onto back of the range. Now you need to move to the front side of the range and pull-out the broiler drawer.
Now you need to lie on the floor and look into the broiler area. You can see the front side of the gas regulator all the way in the back. You will need a flash light or small lamp to see what needs to be done next.
From this vantage point, you need to do three things. First, you need to disconnect three colored wires that are attached to a pin bracket attached to the gas regulator. Remember the color order when removing the wires (blue on top, orange in the middle and red on the bottom). Second, there is one more single wire to disconnect that is located to the left of the three wires (same type of disconnect). And third, disconnect the brass nut from the “j-shaped” copper flange sticking out of the front of the gas regulator.
Now everything is disconnected, almost. Now there is one final thing to do in order to “remove” the gas regulator from the range. From the back of the range, grab the regulator and pull away from the range AND at the same time “jimmy” in a few directions in order to dislodge the ‘j-shaped” copper flange from its mounting position. You might need to go back and look at this copper flange from the front to see just how this thing works.
When your mouth and tongue are in proper alignment and the proper “jimmying” has occurred, the gas regulator will be dislodged.
Now the new gas regulator can be installed.
Now, the first thing to do is mount the new gas regulator to the back of the range. Again we’re back to the notorious “j-shaped” copper flange. As you place the new gas regulator in position with the four mounting screw holes you also have to position the “j-shaped” copper flange into its mounting position inside the oven. It’s a two-fold proposition. You just have to “jack” with it until the flange is inserted in the proper position and the screw holes are in alignment.
If everybody is in-place, you install the four mounting screws. Next, attach the out-going gas connections to the regulator. Use Teflon tape or pipe thread sealant (for gas) before attachment.
Now move to the front of the range, with your light in place, attach the collared wires to the pin bracket and the single wire. Next, tighten the brass nut of the “j-shaped” copper flange. While you’re here, might want to re-check the wire connections again.
Last thing to do, connect the in-coming gas to the gas regulator.
Now you can plug the electric chord back in and turn the gas valve on.
If you don’t witness an explosion, go to the front of the range and push the BAKE button and the START button. If all went “according to Hoyle”, it’s time to cook a pizza.
Hope this helps someone.
0 of 1 people found this instruction helpful.
Was this instruction helpful to you?
Thank you for voting!
  • 1

Model Compatibility

This part works with the following models:
Fix Number: FIX11749264
Manufacturer Part Number: WPW10160649
Brand
Model Number
Description
Whirlpool
GFG461LVB0
Range - Freestanding, Gas
Whirlpool
GFG461LVB1
Range - Freestanding, Gas
Whirlpool
GFG461LVB2
Range - Freestanding 30" Gas
Whirlpool
GFG461LVB3
Range - Freestanding 30" Gas
Whirlpool
GFG461LVQ0
Range - Freestanding, Gas
Whirlpool
GFG461LVQ1
Range - Freestanding, Gas
Whirlpool
GFG461LVQ2
Range - Freestanding 30" Gas
Whirlpool
GFG461LVQ3
Range - Freestanding 30" Gas
Whirlpool
GFG461LVS0
Range - Freestanding, Gas
Whirlpool
GFG461LVS1
Range - Freestanding, Gas
Whirlpool
GFG461LVS2
Range - Freestanding 30" Gas
Whirlpool
GFG461LVS3
Range - Freestanding 30" Gas
Whirlpool
GFG461LVT0
Range - Freestanding, Gas
Whirlpool
GFG461LVT1
Range - Freestanding, Gas
Whirlpool
GFG461LVT2
Range - Freestanding 30" Gas
Whirlpool
GFG461LVT3
Range - Freestanding 30" Gas
Whirlpool
GFG464LVB0
Range - Freestanding, Gas
Whirlpool
GFG464LVB1
Range - Freestanding, Gas
Whirlpool
GFG464LVB2
Range - Freestanding 30" Gas
Whirlpool
GFG464LVQ0
Range - Freestanding, Gas
Whirlpool
GFG464LVQ1
Range - Freestanding, Gas
Whirlpool
GFG464LVS0
Range - Freestanding, Gas
Whirlpool
GFG464LVS1
Range - Freestanding, Gas
Whirlpool
GFG464LVS2
Range - Freestanding 30" Gas
Whirlpool
GFG471LVB0
Range - Freestanding, Gas
Whirlpool
GFG471LVB1
Range - Freestanding, Gas
Whirlpool
GFG471LVB2
Range - Freestanding 30" Gas
Whirlpool
GFG471LVB3
Range - Freestanding 30" Gas
Whirlpool
GFG471LVQ0
Range - Freestanding, Gas
Whirlpool
GFG471LVQ1
Range - Freestanding, Gas