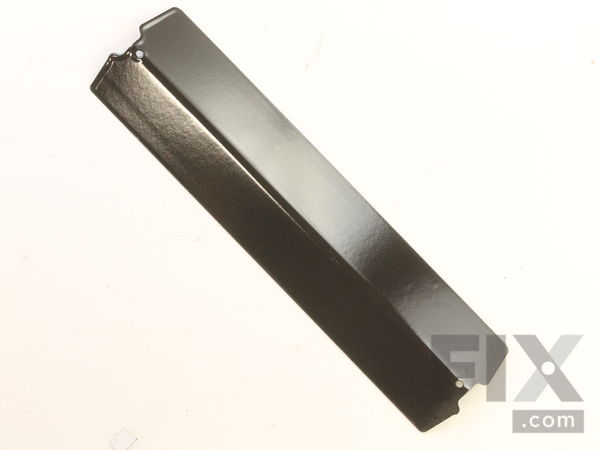
Flame Tamer
- Fix Number:
- FIX10295018
- Manufacturer #:
- G455-0009-W1
- Manufactured by:
- Char-Broil
- Product Description
- This part includes one manufacturer-approved heat tent for a grill. The heat tent keeps the grease and food drippings from making contact with the burner tubes. This helps to reduce flare-ups. It is common for heat tents to rust due to their exposure to extreme heat and moisture. For this quick and easy repair, just place it on the bracket over the burner, no tools needed.
- Works with the following brands:
- Char-Broil
- Works with the following products
- Grill
Product Description
This part includes one manufacturer-approved heat tent for a grill. The heat tent keeps the grease and food drippings from making contact with the burner tubes. This helps to reduce flare-ups. It is common for heat tents to rust due to their exposure to extreme heat and moisture. For this quick and easy repair, just place it on the bracket over the burner, no tools needed.
-
Works with the following brands:Char-Broil
-
Works with the following products:Grill
Questions and Answers
Ask our experts a question about this part and we'll get back to you as soon as possible!
- < Prev
- 1
- Next >
Try using some different or simpler keywords, or submit your new question by using the "Ask a Question" button above!

1 person found this helpful.


Related Parts Additional or alternate parts to consider.
Installation Instructions Provided by Fix customers like you.
- < Prev
- 1
- Next >
- Customer:
- Ryan from CATONSVILLE, MD
- Parts Used:
- G614-0095-W1A, 80029717, G455-0013-W1, G455-0012-W1, G455-0009-W1, G350-4400-W1A
- Difficulty Level:
- Easy
- Total Repair Time:
- 30 - 60 mins
- Tools:
- Pliers, Screw drivers
Opened grill and removed grill grates.
Disposed of rusted heat tents / flame tamers.
Used pliers to help remove cotter pins for carryover tubes and end of burner tubes.
Removed and disposed of rusted carryover tubes.
Used small, thin f ... Read more lat head screwdriver to remove electrode clips from front of burner tubes.
With gentle force, lifted rusted flat end of burner tubes to clear posts then gently moved burner tube away from the front of the grill until no longer inside the holes with the gas feeder tube.
Cleaned up all debris from inside the fire box.
Installed new burner tubes: clipped electrode onto the tube at same location as original burner tubes, ensure threaded cotter pin post hole faces up, insert round end with three rows of small holes on the burner into the fire box hole aligned with a control knob at the front of the fire box and onto the gas feeder inside, crimped end of the burner installed onto the post at the back of the fire box & secured with new cotter pin, installed cotter pin post into threaded hole on top of burner tube - finger tight only.
Installed new carryover tubes: with carryover tube flange facing towards the control knobs, install carryover tubes into adjoining burner tubes' cotter pin posts starting with the leftmost carryover tube. Secure left side of carryover tube with a new cotter pin, install the next carryover tube, then secure its left side with a new cotter pin. Repeat until all carryover tubes are installed and install the final cotter pin. Leave the cotter pin post a little loose when starting to ensure its hole is up high enough to install the cotter pin. Once the pin is installed, tighten cotter pin post to secure.
Removed rusted grease tray and disposed.
Removed rusted grease tray rails: removed single screw securing grease tray rail from inside cart below the control knobs & retain, slide far tab of grease tray rail out of slot at the back of the cart
Installed new grease tray rails: inserted tabbed end of grease tray rail into slot at the back of the cart, secured with retained screw into hole inside cart below the control knobs
Installed new grease tray into slot from behind the grill
Tested new burner tubes: reconnected propane tank, turned on, held igniter switch in to hear spark, and turned on each control knob in turn until each burner lit
After successful test and let them burn for a couple minutes, turned off control knobs and turned off propane tank.
Installed new flame tamers over each burner tube, each rested on their spots in the fire box.
Reinstalled grill grates after cleaning them.
- < Prev
- 1
- Next >
Model Compatibility
Some of the parts we sell are eligible for mail-in rebates since we can recycle them. We will display any applicable rebates in your shopping cart. To redeem your rebate, contact Customer Service after you have received your part.


