Some of the parts we sell are eligible for mail-in rebates since we can recycle them. We will display any applicable rebates in your shopping cart. To redeem your rebate, contact Customer Service after you have received your part.
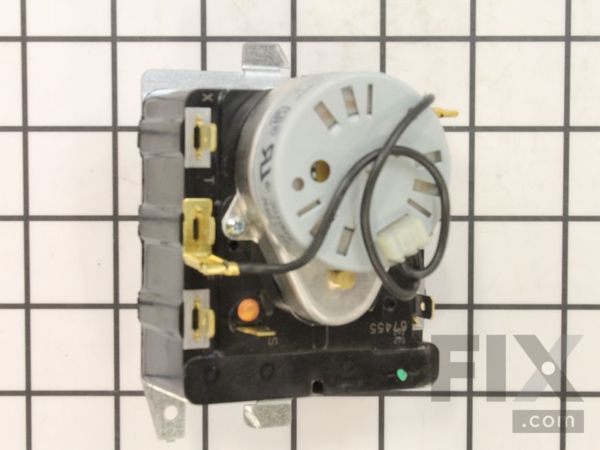
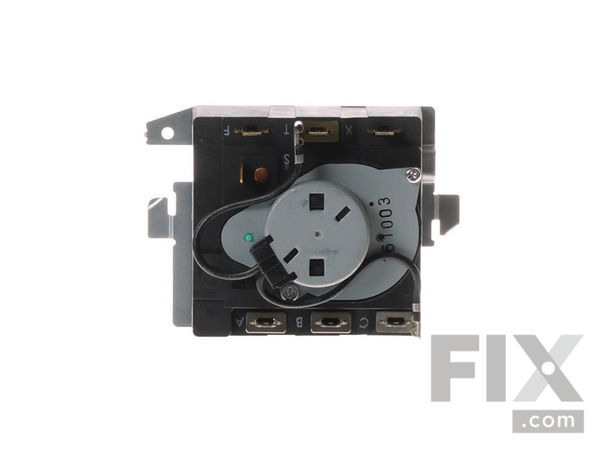
Timer
$78.46
In Stock
- Fix Number:
- FIX9491767
- Manufacturer #:
- WE04X20415
- Manufactured by:
- GE
- Product Description
- This dryer timer is used to control the unit's cycles by regulating the length of time that power is directed to each setting.
- Works with the following brands:
- General Electric, Hotpoint
- Works with the following products
- Dryer
- Part# WE04X20415 replaces these:
- AP5805477, WE4M355, WE4M357
Part Number Cross Reference
Product Description
This dryer timer is used to control the unit's cycles by regulating the length of time that power is directed to each setting.
-
Works with the following brands:General Electric, Hotpoint
-
Works with the following products:Dryer
-
Part# WE04X20415 replaces these:AP5805477, WE4M355, WE4M357
Questions and Answers
We're sorry, but our Q&A experts are temporarily unavailable.
Please check back later if you still haven't found the answer you need.
- < Prev
- 1
- Next >
Sort by:
Search filter:
Clear Filter
Your search term must have 3 or more characters.
Keep searches simple. Use keywords, e.g. "leaking", "pump", "broken" or "fit".
Sorry, we couldn't find any existing answers that matched.
Try using some different or simpler keywords, or submit your new question by using the "Ask a Question" button above!
Try using some different or simpler keywords, or submit your new question by using the "Ask a Question" button above!
Peter
December 12, 2021
Part WE4M357 (TIMER) has been superseded to Part WE04X20415
But the new part does not have terminal F for the white wire.
Where would the white wire go then?
For model number GTDX100GM2WW

Hello Peter, Thank you for your inquiry. We have included a link to our video on how to install a similar timer. We have also found the following wiring instructions: on the timer you'll want to connect yellow to X, white to T, red to B, orange to A and brown to C. The 6th wiring is a ground wire and is no longer used. We hope this helps.

Was this helpful?
Thank you for voting!
Related Parts Additional or alternate parts to consider.
Installation Instructions Provided by Fix customers like you.
- < Prev
- 1
- Next >
Sort by:
Search filter:
Clear Filter
Your search term must have 3 or more characters.
Keep searches simple. Use keywords, e.g. "leaking", "pump", "broken" or "fit".
Sorry, we couldn't find any existing installation instruction that matched.
- Customer:
- Sandra from San Diego, CA
- Parts Used:
- WE04X20415, WE1M654, WH01X10106
- Difficulty Level:
- Very Easy
- Total Repair Time:
- Less than 15 mins
- Tools:
- Pliers
Knob broke
My husband did
1 of 2 people
found this instruction helpful.
Was this instruction helpful to you?
Thank you for voting!
- Customer:
- Ralph from Covina, CA
- Parts Used:
- WE04X20415
- Difficulty Level:
- Really Easy
- Total Repair Time:
- 15 - 30 mins
- Tools:
- Screw drivers
When rotating timer to select cycle, It didn't feel right.
Replaced the timer but that wasn't the problem. It was the timer knob. After examining the timer knob,I went and bought a new one,and fixed the problem. Please replace the knob first before replacing the timer. It takes 10 seconds to replace the knob.
0 of 1 people
found this instruction helpful.
Was this instruction helpful to you?
Thank you for voting!
- Customer:
- Kevin from Harper Woods, MI
- Parts Used:
- WE04X20415, WE1M654
- Difficulty Level:
- Easy
- Total Repair Time:
- 15 - 30 mins
- Tools:
- Screw drivers
My timer knob broke.
I looked it up on you tube.
0 of 1 people
found this instruction helpful.
Was this instruction helpful to you?
Thank you for voting!
- Customer:
- RYAN from PARLIN, NJ
- Parts Used:
- WE01X20378, WE04X20415, WH01X10106
- Difficulty Level:
- Very Easy
- Total Repair Time:
- Less than 15 mins
- Tools:
- Screw drivers
Timer knob was broken
After dropping the top of the dryer I found the problem ordered the part and replaced the timer now working and like new.. Thank you..
0 of 1 people
found this instruction helpful.
Was this instruction helpful to you?
Thank you for voting!
- Customer:
- Frank from Oceanside, NY
- Parts Used:
- WE04X20415, WE4M519
- Difficulty Level:
- Very Easy
- Total Repair Time:
- Less than 15 mins
- Tools:
- Screw drivers
Timer would not shut off
New timer
0 of 1 people
found this instruction helpful.
Was this instruction helpful to you?
Thank you for voting!
- Customer:
- Jamie from Chicago, IL
- Parts Used:
- WE04X20415, WE1M654
- Difficulty Level:
- Really Easy
- Total Repair Time:
- Less than 15 mins
- Tools:
- Pliers, Screw drivers
Timer knob was worn down
Unscrewed the front panel, twisted off the timer and using the pliers I disconnected the wires one at a time while simultaneously connecting the wire to the new timer. Placed the new timer on the panel with a simple twist. Replaced panel and screws. Placed on new timer knob. Wahla! Received my parts in 2 days and it took me less than 15 m
... Read more
inutes total time to do
Read less
0 of 1 people
found this instruction helpful.
Was this instruction helpful to you?
Thank you for voting!
- Customer:
- dale from Houston, TX
- Parts Used:
- WE04X20415
- Difficulty Level:
- Really Easy
- Total Repair Time:
- Less than 15 mins
- Tools:
- Screw drivers
timer and knob was not working .
I used your instructions, and it was very simple to repair.
0 of 1 people
found this instruction helpful.
Was this instruction helpful to you?
Thank you for voting!
- Customer:
- Peter from Upland, CA
- Parts Used:
- WE04X20415
- Difficulty Level:
- Really Easy
- Total Repair Time:
- 15 - 30 mins
- Tools:
- Pliers, Screw drivers
Replace dryer timer
Easy,remove back of control panel with Phillips screwdriver, remove the timer knob may need a flat screwdriver to do this, now the timer can be removed from the back of front panel just twist and pull the timer out plenty of slack wire, remove blade connections one at a time (may need pliers) and install on new timer at same location, whe
... Read more
n complete re-install timer as you removed it by twisting it into place,install back panel, on the stem of old timer or still inside the knob you will see a metal piece you need this piece as the stem is too small without it.
Read less
0 of 1 people
found this instruction helpful.
Was this instruction helpful to you?
Thank you for voting!
- < Prev
- 1
- Next >
Model Compatibility
This part works with the following models:
Fix Number: FIX9491767
Manufacturer Part Number: WE04X20415
Manufacturer Part Number: WE04X20415
Brand
Model Number
Description
✖
Mail-In Recycling Rebate


