General Electric Freezer Parts

General Electric Appliance Parts

Popular General Electric Freezer Parts

Refrigerator Water Filter
$92.40
In Stock
Fix Number
FIX10063209
Manufacturer Part Number
RPWFE
This NSF-certified water filter helps to improve the taste, quality, and health of your water by removing a number of contaminants including mercury, lead, and trace pharmaceuticals. The filter should be replaced every six month or after 300 gallons of water have been filtered. If you are unsure if your filter is due for replacement, another indicator is if the water flow from the dispenser has slowed down considerably. Replacing this part is a simple task that does not require any tools or shutting off the water or power supply to your fridge. Once the new filter has been installed, be sure to run at least two gallons of water through before consuming.
Fixes these symptoms
  • Ice maker not making ice
  • Not dispensing water
  • See more...
Fix Number
FIX8746144
Manufacturer Part Number
MWFP
This is an OEM replacement water filter for your refrigerator. The manufacturer suggests replacing this filter every 6 months or 300 gallons of water. If not replaced regularly, you will risk contaminants getting into your water, and poor performance of your water dispenser and/or icemaker. This filter has a twist and lock design, making the replacement of this part very simple and tool-free. Please note that the manufacturer has updated this filter, so if this is the first time installing it you may require an adapter, which is sold separately. If your model has a reset button, do not forget to hold it down for a few seconds to reset the indicator once you?ve replaced this part. Adapter, PartSelect #: PS220347
Fixes these symptoms
  • Fridge too warm
  • Ice maker dispenses too little ice
  • Ice maker not making ice
  • See more...

Installation Instructions

saul from wylie, TX
the fridge would not stay cool
Replace the termostat and temp sensor for those two you have to cut and splice new wires. And the water filter easy twist off and twist back on for the heater and braket assembly it was pull out old and place new maybe hour long job Read more...
Fix Number
FIX12741350
Manufacturer Part Number
WR60X31522
This is an evaporator fan motor, located in the freezer compartment. It is sold as a single unit. It is responsible for moving air over the evaporator coils as the compressor is running. When this part is faulty you may hear loud sounds coming from the freezer area, your refrigerator may not stay as cold as normal, or the ice might take longer to freeze. This 115-volt 60Hz evaporator fan motor measures approximately 6.75 inches deep, 3.25 inches wide and 2.5 inches high. Do not forget to disconnect the power to the refrigerator before you begin this repair.
Fixes these symptoms
  • Clicking sound
  • Freezer section too warm
  • Fridge and Freezer are too warm
  • See more...

Installation Instructions

Francis from Rochester, NY
Noisey fan
Unplug power, remove several parts to access the fan motor located at the back of the freezer section. Disconnect fan motor. Remove impeller from motor shaft. Reassemble all parts. Very easy repair. Read more...
Refrigerator Water Filter
$88.89
In Stock
Fix Number
FIX16217433
Manufacturer Part Number
XWFE
This water filter is found in the rear upper-right corner of the interior of the refrigerator. If your model has a replacement indicator light it will turn red to signal the need for a replacement. If your model does not have an indicator light, the filter cartridge should be replaced every six months or earlier if you notice a decrease in the flow of water from the dispenser. The filter media is carbon black and reduces leads, some pharmaceuticals, and fifty other contaminates. It is 2 inches deep, 6 inches high, 2.25 inches wide and weighs approximately 1 lbs. When it comes time to replace the filter, first discard the old one by turning it to the left to remove. It will release itself when it has been turned far enough. Installation instructions are quick and simple but can vary slightly depending on if it is a bottom-freezer, side-by-side or multi-door bottom-freezer model. Refer to the user instructions for you filter. Do not forget to reset the filter change indicator if applicable. In bottom-freezer and side-by-side models this is done by pressing and holding the RESET WATER FILTER bottom for three seconds. On a multi-door bottom-freezer model, press the button underneath the Confirm Filter Change message while the water is dispensing. On select models this reset is done automatically once a new filter is installed.
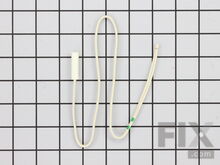
Temperature Sensor
$27.00
In Stock
★★★★★
★★★★★
1 Review
Fix Number
FIX304103
Manufacturer Part Number
WR55X10025
The temperature sensor, also referred to as a thermistor, is used to monitor the refrigerator and freezer internal temperatures. The sensor is a small capsule like device that is protected by a white plastic casing. The sensor sends the temperature reading to the control board, which uses this information to turn on the compressor and fan circuits. If this part is malfunctioning it may inaccurately signal the control board to turn off these components, resulting in warmer than normal temperatures in the fresh food and freezer sections. This part can break from material fatigue through normal use, and will need to be replaced when this happens. You will find this part attached to the evaporator and control housing in your appliance. This OEM part measures roughly 1.25 inches with 18-inch long wire leads. For this repair, you will need a 1/4 inch nut driver, a pair of strippers and crimpers, and a pair of wire splice connectors.
Fixes these symptoms
  • Doesn’t stop running
  • Freezer not defrosting
  • Freezer section too warm
  • See more...

Installation Instructions

Steven from Indio, CA
Fresh food section not cooling
Online info suggested thermal sensor was the issue (coils cleaned, fans functional). I ordered the part and received it in 2 days. Finding the sensor was the issue. I removed the shelves, then removed a temp control knob, the lights and the protective panel covering them. I removed a long white panel (no screws), removed two panels (one with 2 screws, one with three screws. The thermal sensor was behind the last panel removed. The cooling coils with the thermal sensor were covered with a styrofoam like device. Used a hair dryer to melt the ice. The new sensor was then put in place as per other videos on this topic. It took longer to melt the ice then to remove the panels giving access to the sensor. All in all a pretty easy repair. BTW, refrigerator is working fine (0-2F in freezer, 37F in fresh foods side). Read more...
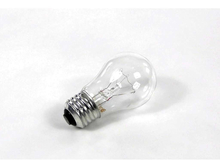
Light Bulb - 40W
$11.02
In Stock
Fix Number
FIX217532
Manufacturer Part Number
40A15
This 40-Watt light bulb is sold individually and is a genuine OEM replacement option for your home appliances. It is specially designed to withstand extreme temperatures, so this bulb is compatible with a variety of appliance types including refrigerators, ranges, microwaves, and dryers. It features a frosted glass bulb with a standard metal socket base, which allows you to easily unscrew the burnt-out light and twist the new bulb into place. Depending on your appliance, there may be a guard or cover protecting the lightbulb, in which case you may require additional tools to remove the cover. We recommend disconnecting the power supply to your appliance before changing the lightbulb.

Installation Instructions

Jeffrey from SEATTLE, WA
Bake element replacement
1. Turn of over power at the breaker.
2. Remove bake element cover. There's 2 quarter inch nuts.
3. Disconnect old element. For me there was not much play in the wires so when I disconnected the old element I lost the wire in the insulation. If this happened you can remove the central plate cover on the back of the oven and you can easily find the wires again.
4. Connect the replacement element.
5. Screw the bake element cover back in.
6. Turn power back on.
Read more...
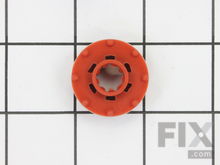
Evaporator Fan Grommet - Red
$13.21
In Stock
Fix Number
FIX963756
Manufacturer Part Number
WR02X12008
The evaporator fan grommet is used to provide a cushion between the fan motor and the motor mounting bracket in your freezer. This genuine OEM part is about one inch in diameter and is red in color. It is part of the motor assembly found behind the evaporator fan cover at the back of your freezer. If the fan has become quite noisy, it may be time to replace the grommet. To complete this repair, you will need to remove everything from the freezer including the ice tray, the fan cover, freezer floor, evaporator cover, and the fan motor assembly. The tools you will need for this job include a pair of needle nose pliers, a Philips screwdriver and a small flat blade screwdriver, along with a 1/4-inch and a 5/16-inch nut driver. Please ensure that you disconnect the power supply to your fridge before you begin this repair.
Fixes these symptoms
  • Clicking sound
  • Freezer section too warm
  • Fridge too warm
  • See more...

Installation Instructions

Michael from Burlington, MA
Fan was missing a left bumper from manufacturer & causing noise/vibration
Unplugged refrigerator then emptied freezer and removed wire shelf. In back removed phillip head screws. Removed circulation cowling & carefully pulled up and out styrofoam insert. Removed fan bracket & unplugged unit from tabs. Replaced front & back grommets and lid bumpers. Eliminated excessive noise from fan due to heavy vibration. Read more...
Ice Maker
$216.23
In Stock
★★★★★
★★★★★
4 Reviews
Fix Number
FIX1993870
Manufacturer Part Number
WR30X10093
The ice maker assembly makes ice by filling the tray with water from the inlet valve, freezing it until solid cubes are formed, and then ejecting them into the ice bucket. This process will repeat until the bucket has reached capacity. If your fridge is no longer making ice, the assembly may need to be replaced. This is a genuine OEM replacement that measures 10 inches by 5 inches in size and will make seven crescent shaped pieces of ice each cycle. The kit is mainly made of white plastic, and includes a 4-pin round plug-in connector, a 6-post plug-in connector, tube, and fill cup. Depending on your frequency of use, the ice maker may need to be replaced every three to ten years. Regular wear and tear is the main reason this part may need to be replaced but be mindful of accidental damage.
Fixes these symptoms
  • Ice maker dispenses too little ice
  • Ice maker dispenses too much ice
  • Ice maker not making ice
  • See more...

Installation Instructions

marion from raleigh, NC
Ice maker stopped making ice
Super easy. Loosen 2 screws. Disconnect power line. Take out broken part and plug in new part then slide icemaker back in place and tighten 2 screws. Saved me the $89 service call plus whatever they would have overcharged for the part! And no waiting around for repair guy! Read more...
Temperature Sensor
$38.48
In Stock
Fix Number
FIX10059162
Manufacturer Part Number
WB21X22134
If your oven is running hot, not heating evenly, not coming up to temperature, or just not heating up at all, there may be an issue with the temperature sensor. This sensor is usually found in the back of the oven or fitted onto the broil assembly, and is used to measure the temperature inside the cavity of the oven. It then sends that information back to the electronic control, which adjusts the temperature as necessary. If you need a new sensor, this is a genuine OEM replacement part. Before beginning the repair, be sure to disconnect the power supply to your oven, along with the gas if applicable.
Fixes these symptoms
  • Element will not heat
  • Little to no heat when baking
  • Little to no heat when broiling
  • See more...

Installation Instructions

Stuart from Parrish, FL
Oven temperature was erratic and finally would not preheat.
I was lucky to stumble on this website. There seemed to be many with the same problem. I ordered the part and hoped for the best. It arrived and I installed just as others had described. First, I unplugged the range. Removed the back cover (a central panel) with 4 screws. Familiarized myself with the plug-in thermal sensor. Went around front and loosened the single set screw for the probe (near the top of oven). Threaded the bad element out and rethreaded the new element from the front. In back, reinstall the plastic plug-in connector. Tightened set screw in the oven, plugged it in and tested. It worked! Put the back on and it was done. It took 31 minutes. Actually took longer to clean behind the stave than the repair. Thanks to all for advice. Read more...
Light Switch
$8.56
In Stock
Fix Number
FIX8758429
Manufacturer Part Number
WR23X10725
The light switch in your refrigerator is used to turn the light on and off when the fridge door opens or closes. This is considered a closed switch, which means that when the fridge door depresses the button there is no continuity and the light turns off. When the fridge door opens and the button is released, there is continuity, and the light turns on. If the light in your fridge is not burned out but will not come on, the switch may need to be replaced. This genuine OEM replacement light switch is spring loaded and made of a white plastic. This is an easy repair that will require a flat blade screwdriver and a pair of needle nose pliers to complete the job. Since you will be working with electrical components, please be sure to disconnect the power supply to your fridge before beginning this repair.
Fixes these symptoms

Installation Instructions

Sheila from los angeles, CA
Door would not close after insatallation
Followed the video with no problems, but the door would not close. There is a rubber bumper that the light switch strikes, This bumper was not horizontal, and just had to be twisted to a horizontal position. The door then closed tightly, Total repair time was about 5 minutes! Read more...

Appliance Type

Related Pages

Popular General Electric Freezer Models