Commonly referred to as dog ears, these agitator directional cogs are manufacturer approved replacement parts that come in a package of 4 and are usually used with direct drive washing machines. We re...
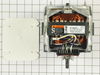
This is an OEM direct drive motor coupling, which provides a cushioned connection between the transmission and the motor shaft. This is the newer version of this part, made with new metal sleeves for ...
This is an OEM agitator repair kit that includes an agitator cam, four directional cogs, a bearing, thrust spacer, inner cap seal, and washer. These parts are found inside the agitator auger near the ...
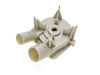
The direct drive water pump is used in washing machines that do not have belts, to remove water from the tub during the drain cycle. It is located on the motor and attached by two clips. The drain pum...
This suspension spring is a genuine OEM replacement part for a variety of washers and washer-dryer combos. The primary purpose of the suspension spring is to support the outer tub and keep the tub ste...
The lid switch is a part of the washing machine that is found mounted to the underside of the cabinet top panel. This genuine OEM part is also known as a washer lid switch, a lid switch assembly, or a...
There are many symptoms that may indicate an issue with your water inlet valve. These can include your washer not filling with water, it will not stop filling, the washer is leaking, or it is both fil...
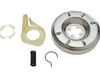
This is a genuine OEM replacement clutch assembly for your washing machine. A clutch assembly, also known as a clutch or a washer clutch, is responsible for spinning the tub during the spin cycle. If ...
This bolt is a genuine OEM replacement part, used to secure the agitator in your washing machine. Overtime the bolt can become worn out due to the vibrations of the washer, and will need to be replace...
This tub spring is a genuine OEM replacement part for your washing machine and is sold individually. There are other names that the tub spring goes by, such as the suspension spring, balance spring, o...
The thrust spacer is a genuine OEM part that is more commonly known as a retainer ring. The spacer is made of white plastic and measures approximately 2.5 inches in diameter. This part is found in bet...
Also known as an O-Ring. This black o-ring seal is three inches in diameter.
In Stock
Order now and your part arrives by Jul 9
Questions and Answers
Ask our experts a question about this part and we'll get back to you as soon as possible!
2 questions answered by our experts.
< Prev
1
Next >
Sort by:
Search filter:
Clear Filter
Your search term must have 3 or more characters.
Keep searches simple. Use keywords, e.g. "leaking", "pump", "broken" or "fit".
Sorry, we couldn't find any existing answers that matched. Try using some different or simpler keywords, or submit your new question by using the "Ask a Question" button above!
Bridgette
October 13, 2021
Hi!, I like to use the the normal wash setting, on heavy, after the washer fill with water it doesn’t start agitating, it just sit there. So I have been using the permanent press setting in the mean time, which my clothes are coming out all that clean, but at least the cycles are advancing. I thought I needed a new timer, but that didn’t fix the problem. Any thoughts on what’s wrong?
For model number LSR8233EQ0
Hello Bridgette, Thank you for the question. This could be an indication the Lid Switch is defective and not telling the controls the lid is closed when its time to start the wash cycle. The easiest thing to listen for is a clicking sound. If you do not hear the clicking sound next step is to use a multi-meter tool to check for a closed continuity when closed. We hope this helps!
Will only spin on normal cycle and if the button is on medium for load size. I replaced the spin latch. What should I replace next.
For model number LSR8233EQ0
Hello Paula, thank you for writing. We recommend the Timer FIX11742022. The timer controls most of the operations of the washer: water level, tub filling and emptying, length of cycles, and cycle setting sequences. If you need help placing an order, customer service is open 7 days a week. Please feel free to give us a call. We look forward to hearing from you.
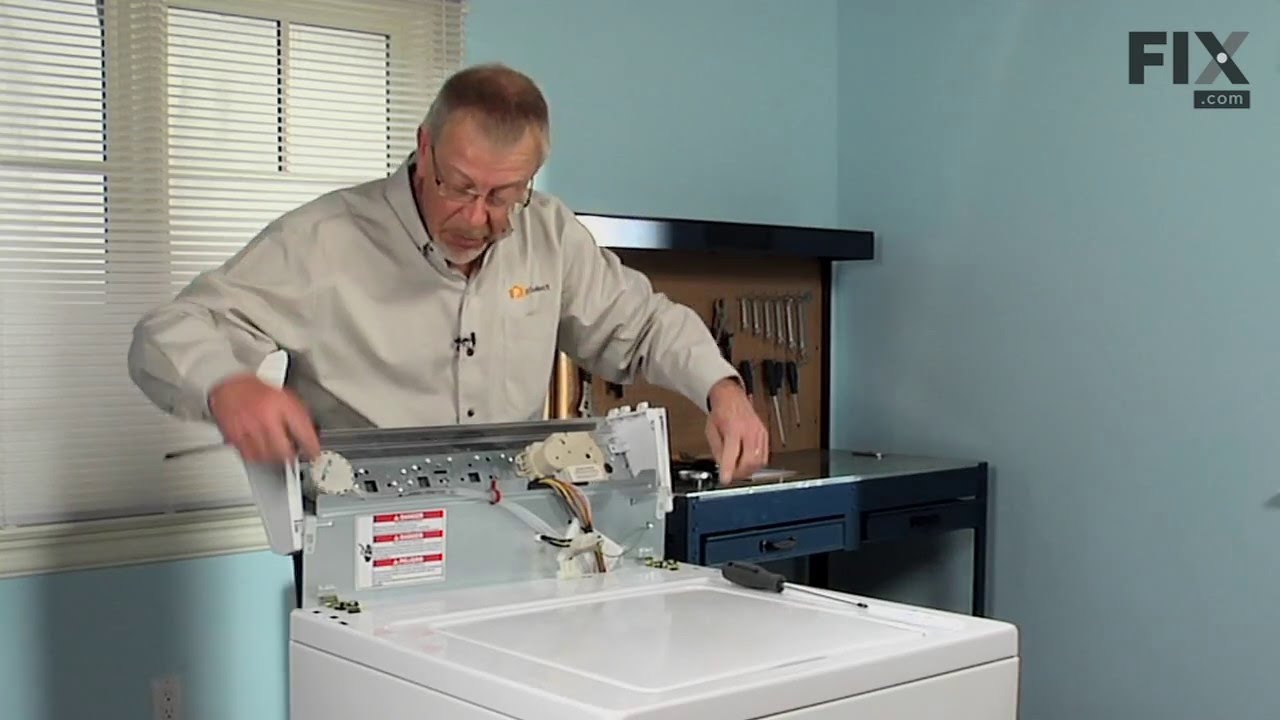
The job looked intimidating but turned out to be very easy. First take off the water pump by removing the two clips that hold it in place. Place a shallow pan under the pump to catch the water that is in the pump and hoses. Open the hose clamps with a pair of pliers or channel locks (better) and slide the hoses off of the water pum
... Read morep. The motor comes off next. Unplug the electrical connector from the motor and two wires from the capacitor. Remove the two screws holding the clamps in place and then pop off the two clamps. You will need to hold up the motor with one hand while you remove the clamps or it will fall to the floor once the clamps are removed. One piece of the coupling assemble will be attached to the motor and the other will be attached to the gearcase drive shaft. If you want to clean up the mess created by the shredded rubber center piece of the coupling assembly you will have to take off the motor mounting plate. It is held on by two bolts and removing it makes installing the coupling easier but probably not necessary. Push the back half of the coupling on to the gearcase drive shaft until the shaft is flush with the face of the coupling. Install the new rubber center piece on to the coupling then re-install the motor mounting plate. Install the other half of the coupling on to the motor shaft and lift the motor up to the coupling. You have to rotate the motor shaft by spinning the fan blades until the coupling lines up so you can slide it into the other half of the coupling. Then just reattach the motor, connectors and water pump in the reverse order of disassembly.
Read less
1124 of 1228 peoplefound this instruction helpful.
1. Unplug washer. 2. Remove screws at control panel end caps. 3. Flip control panel back to expose wiring. 4. Detach lid switch wiring harness from control panel. 5. Use screwdriver to pry the 2 brass clips holding the back panel of the washer to the front and sides piece. 6. Tilt the front/sides piece over to exp
... Read moreose lid switch. 7. Use nutdriver to detach ground wire. 8. Use screwdriver to remove 2 screws holding lid switch in place. 9. Install new lid switch. Make sure wiring harness piece is facing the right direction. 10. Put washer back together in same order it was disassembled. Make sure front/sides piece connects to the clips at the bottom.
Read less
1025 of 1051 peoplefound this instruction helpful.
First pry off the cap of the agitator. Then using a socket remove the bolt that holds the plastic cup in place. Remove this cup by prying it loose from the two tabs that hold it in place. Once this cup is removed you can get to the broken cogs. Slip the new cogs into the underside of the cup, and slide the cup back down in the a
... Read moregitator housing using the slots on the side for a guide. (You may want to remove the entire agitator and assemble everything upside down, then flip it all back over to mount, so the cogs don't fall out). Tighten the bolt, snap the cap back in place on top of the agitator and your'e done. Easy repair.