



Models
>
7MWFC9822HC0
7MWFC9822HC0 Whirlpool Washer
Jump to:
Find Part by Name
Keep searches simple, eg. "belt" or "pump".
Diagrams for 7MWFC9822HC0
Viewing 6 of 6


Keep searches simple, eg. "belt" or "pump".
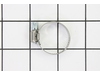
$7.60
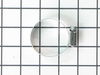
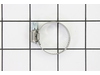
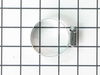
This hose clamp extends from half an inch to an inch in diameter. It is made entirely of metal and is intended for use with Maytag brand washing machines.
In Stock
Order now and your part arrives by Sep 21
This three count package of Affresh Washing Machine Cleaner helps remove odor causing residue from inside the washer, each slow dissolving tablet works throughout the wash cycle and is suitable for al...
Special Order
In Stock
Order now and your part arrives by Sep 21
In Stock
Order now and your part arrives by Sep 21
In Stock
Order now and your part arrives by Sep 21
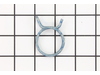
$9.79
This clamp helps to prevent leaking by holding the end of water hose in place.
In Stock
Order now and your part arrives by Sep 21
$8.70
Note: This part has been updated by the manufacturer. It may appear different but will still function the same as the original.
In Stock
Order now and your part arrives by Sep 21
In Stock
Order now and your part arrives by Sep 21

In Stock
Order now and your part arrives by Sep 21
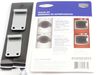
$68.99
This stacking kit allows compatible front-load washer and dryer models to be stacked vertically. It is designed to maximize laundry space and can be used on various models. Please use your model numbe...
In Stock
Order now and your part arrives by Sep 21
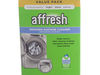
This Affresh Washing Machine Cleaner deep cleans to help remove the odor-causing residues and grime that daily loads leave behind. The time-release tablets are EPA Safer Choice certified, septic-safe ...
In Stock
Order now and your part arrives by Sep 21
In Stock
Order now and your part arrives by Sep 21
Common Problems and Symptoms for 7MWFC9822HC0
Viewing 6 of 6Leaking
Fixed by these parts

How to fix it
Lid or door won’t close
Fixed by these parts
How to fix it
Will not drain
Fixed by these parts
How to fix it
Locking Issues
Fixed by these parts
How to fix it
Will Not Start
Fixed by these parts
How to fix it
Draining Issues
Fixed by these parts
How to fix it

Keep searches simple. Use keywords, e.g. "leaking", "pump", "broken" or "fit".
- Customer:
- Terry from JUPITER, FL
- Parts Used:
- W11266654
- Difficulty Level:
- A Bit Difficult
- Total Repair Time:
- Less than 15 mins
- Tools:
- Screw drivers
It took two of us to hold the ring and slide it on around the opening with the assistance of screwdrivers the spring was very tight
Two people to screwdrivers, stretching the spring out and around and that’s the last part to go on
Was this instruction helpful to you?
Thank you for voting!
- Customer:
- John from SHERIDAN, WY
- Parts Used:
- W11565030
- Difficulty Level:
- Really Easy
- Total Repair Time:
- Less than 15 mins
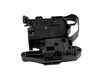
Displayed “Door Loc” which was not correct error message
Replaced door latch after removing rubber seal from tub to access door latch. Simple replacement but did not correct issue. Notified service technician to determine error codes and had to replaced display panel and control module.
Was this instruction helpful to you?
Thank you for voting!
- Customer:
- FRANK from COVINA, CA
- Parts Used:
- W11318722
- Difficulty Level:
- A Bit Difficult
- Total Repair Time:
- 30 - 60 mins
- Tools:
- Nutdriver, Pliers, Screw drivers
replaced the front bellow seal
i had no clue, yet when you you tube it, there are a few ones that are pretty good. Be patient, follow the directions, do not cut any corners or it will leak! The hardest part is putting the front clamp back on, here's how you do it;
put the wire clamp on at the top, and pull it around on the left side, then, by using the needle no ... Read more se pliers, have the wire clamp at about 3:00 o clock on the right, there is a spring on that wire clamp, put that at 3:00 o clock as well, pull down as hard as you can at the spring which stretches the clamp, then work it around with your other hand, or your wife if she isn't scared like mine was
Best of luck,
put the wire clamp on at the top, and pull it around on the left side, then, by using the needle no ... Read more se pliers, have the wire clamp at about 3:00 o clock on the right, there is a spring on that wire clamp, put that at 3:00 o clock as well, pull down as hard as you can at the spring which stretches the clamp, then work it around with your other hand, or your wife if she isn't scared like mine was
Best of luck,
Read less
Was this instruction helpful to you?
Thank you for voting!