


Models
>
WF206ANS
WF206ANS Samsung Washer
Jump to:
Find Part by Name
Keep searches simple, eg. "belt" or "pump".
Models for WF206ANS
Click on the best match to narrow your results.
Diagrams for WF206ANS
Viewing 8 of 0


Keep searches simple, eg. "belt" or "pump".

This washing machine cleaner includes three time-release tablets designed to remove odor-causing residues, grime, and buildup from high-efficiency and top-load washing machines. The tablets work by cl...
Special Order

In Stock
Order now and your part arrives by Jul 3

In Stock
Order now and your part arrives by Jul 3

On Order

On Order

$40.69
This oil seal (part number DC62-00223A) is for washers. Oil seal DC62-00223A presses into the rear drum to prevent oil from leaking past the basket spin shaft. Unplug the appliance before installing t...
In Stock
Order now and your part arrives by Jul 3

$176.29
This door boot (part number DC64-00802A) is for washers. Door boot DC64-00802A forms a seal between the wash tub and the door, preventing leaks. Unplug the washer before installing this part. Wear wor...
In Stock
Order now and your part arrives by Jul 3

In Stock
Order now and your part arrives by Jul 3

On Order

In Stock
Order now and your part arrives by Jul 3

In Stock
Order now and your part arrives by Jul 3

In Stock
Order now and your part arrives by Jul 3
Common Problems and Symptoms for WF206ANS
Viewing 4 of 4Lid or door won’t close
Fixed by these parts

How to fix it
Water Filling Issues
Fixed by these parts
How to fix it
Will not drain
Fixed by these parts

How to fix it
Leaking
Fixed by these parts

How to fix it


Keep searches simple. Use keywords, e.g. "leaking", "pump", "broken" or "fit".
- Customer:
- Arthur from WILLARD, OH
- Parts Used:
- DC64-00519B
- Difficulty Level:
- Easy
- Total Repair Time:
- 15 - 30 mins
- Tools:
- Screw drivers
The washing would stop in mid cycle and the door would be locked.
An initial issue was getting the door to unlock. I tired several things but finally was able to pull the door as if to open it and put something between the door handle and the front of the washer while I ran a washer cycle. There is a way to take the washer top off and reach down inside the unit and pull down on a release, but I did no
... Read more
t try that.
The washer has a rubber boot between the washer frame and the wash tub. There is a metal wire ring that secures the outer edge of the boot to the washer frame. Peel back the outer edge of the boot at the bottom to reveal a metal ring that has its ends connected by a small spring. Use a flat tip screw drive to pry this ring off. Peel back the boot from the washer frame.
Next use a Phillips screw drive to remove the two screws that protrude through the wash frame on the right side of the door.
Reach between the washer tub and the frame and the tub and pull the switch through the opening and the washer tub. You will have to wiggle the switch around to remove it. There are three sets of wires attached to the switch by plugs.
The switch is covered with a plastic protective cover. Remove this. You will have to use a screw driver to release various catches to do this.
Remove the three set of wires. There are catches that secure the wire plugs in place. pry them back with a small screw drive.
Attach the new switch to the sets of wires.
Attach the protective cover to the switch. The wires feed through a small slot toward the bottom of the switch.
Slide the switch through the opening where you removed it. and re-attach it using the two screws.
Put the rubber boot in the channel in the washer frame. Replace the metal ring. This was the most challenging part of the repair for me. I had to play around with this to get it into position. You have to work it around the gasket and stretch out the spring.
By the way, The service was great and exceeded by expectations.
Read less
Was this instruction helpful to you?
Thank you for voting!
- Customer:
- scott from DEERFIELD, OH
- Parts Used:
- DC62-00202A
- Difficulty Level:
- A Bit Difficult
- Total Repair Time:
- 30 - 60 mins
- Tools:
- Pliers, Screw drivers, Socket set
The drain check valve leaked
The part did not fit this model. The flap part fit the hole but the seal ring is too big. I cut 1\4inch out and used super glue the make it small enough to fit and seal the hose. Make sure you only use a drop of glue and keep the seal even and flat so it will seal
Was this instruction helpful to you?
Thank you for voting!
- Customer:
- Gary from Peachtree City, GA
- Parts Used:
- DC62-30312J
- Difficulty Level:
- Really Easy
- Total Repair Time:
- 15 - 30 mins
- Tools:
- Screw drivers
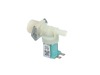
OE error code, water keeps flowing during spin cycle, softener dispenser left half full of water, clothes wet after washer stops
Found a repair video of a Samsung washer that looks like mine (9 years old). Removed two screws from the back of the washer, slid the top a few inches toward the front and lifted it off. Disconnected the two double electrical connections, the two rubber tubes from the solenoids, the cold water hose from the back and removed the two scre
... Read more
ws holding the valve in place. Installed the new valve by reversing those steps, slid the top back into place and secured it with the two screws and viola (as Kelly Bundy would say)! The washer now functions normally. I'm waiting for my next water bill to arrive to see whether the sudden increase in usage decreases to its normal amount. We have three adults and four small children in the household so the washer is constantly in use.
Read less
Was this instruction helpful to you?
Thank you for voting!