



Models
>
WT1501CW
WT1501CW LG Washer
Jump to:
Find Part by Name
Keep searches simple, eg. "belt" or "pump".
Models for WT1501CW
Click on the best match to narrow your results.
Diagrams for WT1501CW
Viewing 3 of 3


Keep searches simple, eg. "belt" or "pump".
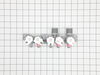
$148.42
This is an authentic LG water inlet valve for a top-load washer. It is designed to control the flow of water into the washer. If your washer is filling slowly, making loud noises, overflowing, or stop...
In Stock
Order now and your part arrives by Oct 16
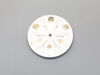
$178.17
This is a pulsator assembly, also known as an agitator, for your washing machine. This pulsator sits at the bottom of your washer and is what is used as the main driving force to wash your clothes. If...
In Stock
Order now and your part arrives by Oct 16
In Stock
Order now and your part arrives by Oct 16

In Stock
Order now and your part arrives by Oct 16
In Stock
Order now and your part arrives by Oct 16
In Stock
Order now and your part arrives by Oct 16
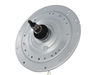
This clutch housing assembly with mode shifter, or washer drive shaft and shifter assembly, is made for your washer. It connects the appliance wash plate to the motor so the washer can shift the drive...
In Stock
Order now and your part arrives by Oct 16
In Stock
Order now and your part arrives by Oct 16
In Stock
Order now and your part arrives by Oct 16
On Order
In Stock
Order now and your part arrives by Oct 16
In Stock
Order now and your part arrives by Oct 16
Common Problems and Symptoms for WT1501CW
Viewing 10 of 10Leaking
Fixed by these parts
How to fix it
Will not agitate
Fixed by these parts
How to fix it
Water Filling Issues
Fixed by these parts
How to fix it
Lid or door won’t close
Fixed by these parts

How to fix it
No hot or cold water
Fixed by these parts
How to fix it
Will Not Start
Fixed by these parts
How to fix it
Draining Issues
Fixed by these parts
How to fix it
Spinning Issues
Fixed by these parts
How to fix it
Does not dispense fabric softener or detergent
Fixed by these parts
How to fix it
Marks left on clothes
Fixed by these parts
How to fix it
Keep searches simple. Use keywords, e.g. "leaking", "pump", "broken" or "fit".
- Customer:
- John from SAN JOSE, CA
- Parts Used:
- MEF62462103
- Difficulty Level:
- Very Easy
- Total Repair Time:
- 15 - 30 mins
- Tools:
- Screw drivers
The right side hinge that holds the washer top door broke and needed to be replaced.
Popped out the plastic "doors" that cover the metal actuators. Removed the metal actuators on both right and left sides of the door then unscrewed (3 screws each actuator) them from door frame. Slid the actuators out to enable the door to be removed. Unscrewed 2 screws on the top front of the washer which enabled me to angle the top of
... Read more
the washer to expose the screws that hold the plastic hinges. Unscrewed the hinges (2 screws each) and replaced both of the hinges (I figured I'd do both of them now so I don't have to do it again for another 15 years). Put everything back together and all works like new.
Read less
Was this instruction helpful to you?
Thank you for voting!
- Customer:
- Flora from MIAMI, FL
- Parts Used:
- AJU75152601
- Difficulty Level:
- Very Easy
- Total Repair Time:
- 30 - 60 mins
- Tools:
- Screw drivers, Wrench (Adjustable)
Water continued leaking into washer after the end of cycle through the water inlet valve.
Did the repair Myself. Saved $ 400.00 in the process.
Was this instruction helpful to you?
Thank you for voting!
- Customer:
- Jay from JACKSONVILLE, FL
- Parts Used:
- AGM73832002, MEF62462103
- Difficulty Level:
- Easy
- Total Repair Time:
- 15 - 30 mins
- Tools:
- Nutdriver, Screw drivers
Right side plastic hinge broke after the damper went bad. Replaced right hinge and both dampers.
Started by lifting lid and removing the 2 rectangular plastic pieces that cover the hinge dampers (very small, thin flathead screwdriver). Removed hinge dampers (3 screws each) then removed lid. Removed the 2 top, front screws (covered with plastic caps). Then I removed the 2 screws on the top, back panel (nut driver). This allows the
... Read more
top to be lifted in a way that allows you to remove the screws (2 each) that secure the plastic hinge. Be careful here. The top has a wiring harness connected to it. Removed the screws from underneath the hinge and removed the hinge. Inserted the new hinge and screwed it in. After the hinge is installed you can reattach the top. Took this opportunity to clean everything with the lid removed. I then installed 2 new dampers. You’ll have to align the with the hinges so that the 2 flats on the damper shaft fit back into the hinge to secure the lid (easy). Tighten all the screws and voila!
Read less
Was this instruction helpful to you?
Thank you for voting!