



Models
>
WCCB2050T6AC
WCCB2050T6AC General Electric Washer
Jump to:
Find Part by Name
Keep searches simple, eg. "belt" or "pump".
Models for WCCB2050T6AC
Click on the best match to narrow your results.
Diagrams for WCCB2050T6AC
Viewing 4 of 4


Keep searches simple, eg. "belt" or "pump".
$45.00
This genuine OEM part is an agitator coupling kit for your washing machine. Also known as an agitator drive belt, this part is used to connect the transmission drive shaft to the base of the agitator....
In Stock
Order now and your part arrives by Oct 15
$61.32
This is an authentic agitator for your washer, responsible for moving clothes inside the tub. Please note, it does not come with the fabric dispenser, so you will need to either transfer the old one t...
In Stock
Order now and your part arrives by Oct 15
This pump helps expel water from the washing machine and is activated after the spin speed is maintained for a specific period of time.
In Stock
Order now and your part arrives by Oct 15
$20.72
If your washer is leaking when it is filling or agitating, you may need to replace the tub seal. The tub seal is found between the transmission and the outer tub in your washing machine. This genuine ...
In Stock
Order now and your part arrives by Oct 15

In Stock
Order now and your part arrives by Oct 15

In Stock
Order now and your part arrives by Oct 15
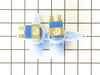
$96.81
This water inlet valve attaches the water lines to the back of your appliance. The attaching solenoids on the valve open and close according to the desired temperature, or amount of water needed.
Special Order

In Stock
Order now and your part arrives by Oct 15
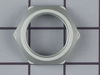
$25.10
This part is the hub nut, or lock down nut for your washing machine. It is designed to hold the inner tub on to the transmission. If your hub nut is stripped or damaged, it may need to be replaced. T...
In Stock
Order now and your part arrives by Oct 15

$15.26
This is a replacement hub washer for your washing machine. If your washer is noisy, leaking, shaking, or pumping without spinning, you may need to replace the hub washer. The hub washer is found under...
In Stock
Order now and your part arrives by Oct 15
$22.95
This is a water pressure switch hose, also known as the air dome tube, for your washer. It is made of clear plastic and is sold individually. The hose transports water to your water pressure switch, s...
In Stock
Order now and your part arrives by Oct 15
Common Problems and Symptoms for WCCB2050T6AC
Viewing 12 of 12Will not agitate
Fixed by these parts

How to fix it
Leaking
Fixed by these parts

How to fix it
Will not drain
Fixed by these parts
How to fix it
Burning smell
Fixed by these parts
How to fix it
No hot or cold water
Fixed by these parts
How to fix it
Marks left on clothes
Fixed by these parts
How to fix it
Shaking and Moving
Fixed by these parts
How to fix it
Spins slowly
Fixed by these parts
How to fix it
Spinning Issues
Fixed by these parts
How to fix it
Noisy
Fixed by these parts

How to fix it
Water Filling Issues
Fixed by these parts
How to fix it
Noisy and Marks Left on Clothes
Fixed by these parts

How to fix it

Keep searches simple. Use keywords, e.g. "leaking", "pump", "broken" or "fit".
- Customer:
- molly from laguna niguel, CA
- Parts Used:
- WH49X10042, WH01X39337
- Difficulty Level:
- Easy
- Total Repair Time:
- 30 - 60 mins
- Tools:
- Nutdriver, Socket set
broken dampening strap and loose agitator
first remove the front washer cover by finding the two pressure clips that hold it to the top lid. gently push the putty knife into the clips one at a time. this will raise and separate them from the front panel. the panel will tilt forward and u can now remove it from the bottom clips by sliding it up and out. to open the top cover u rem
... Read more
ove the two 1/4 in screws on the sides of the front panel and lift the top. make sure to secure it in place or unplug the single electrical connection at the rear and remove the whole top from the clips, its really simple and the most convenient mehtod. to remove the straps u can now get to all four without much interference. there are two size screw heads so make sure u have a nut driver or small socket set. after changing the straps i went to change the agitator coupling. the agitator pulled directly up without a problem. just put your two hands under and pull straight up with one good jolt. the plastic coupler has one bolt in the middle that came out easily with a small socket set. my problem arose when the plastic coupler would not come off the metal shaft. after a short time of pulling and prying i finally decided to cut it off. using a small hacksaw and taking my time i put two cuts into the coupler. they were on opposite sides and where vertical, running along the steel shaft. i could now split it in two and it came off very easily and quickly. now when putting on the new one make sure the splines line up. push as far down as u can then use the center bolt to seat the gear all the way down. the agitator also has to be lined up just right. it also has splines on the interior that allow it to line up with the coupler and merely push down until it reseats itself in place. replace the top of the washer and then the front panel. don't forget to rebolt the top panel to the frame. push the front panel in until it snaps into place. full replacement time was about 40 minutes and actually not bad with the right tools.
Read less
Was this instruction helpful to you?
Thank you for voting!
- Customer:
- Mark from Lexington, KY
- Parts Used:
- WH49X10042
- Difficulty Level:
- Easy
- Total Repair Time:
- Less than 15 mins
- Tools:
- Socket set
Agitator would not move during wash cycle
I placed both hands under the agitator 180 degrees apart, gave a quick jerk, and seperated the agitator from the coupling. With the agitator removed, use a socket and ratchet to remove the bolt holding the coupling to the spline. Remove the old coupling and slide the new one over the spline. Lightly tap on the coupling if necessary. I
... Read more
nsert the bolt with the ratchet and slide the agitator back over the coupling and you are done.
Read less
Was this instruction helpful to you?
Thank you for voting!
- Customer:
- Wayne from Saint Augustine, FL
- Parts Used:
- WH02X10265, WH49X10042, WH38X10002, WH2X1199, WH2X1197, WH2X1193, WH02X10383
- Difficulty Level:
- A Bit Difficult
- Total Repair Time:
- More than 2 hours
- Tools:
- Nutdriver, Pliers, Screw drivers, Socket set
Tub seal leaked, rusted the transmission bearing which locked up
I followed the instructions in the GE Consumer Service Training Technician Manual Pub. No. 31-10008.
I also power washed the basket and tub before reassembly.
The tub seal comes with the transmission and brake assembly so it's not necessary to order another seal.
The agitator coupling kit contai ... Read more ns a redesigned coupler and longer screw with new o-ring.
I bought the hub nut, split ring, tub bearing, agitator coupling kit and washer hub because these are all the parts that go on the transmission shaft. I felt it was best to spend a few dollars more to replace every part involved with the spin and agitation of the washer.
I used the channel lock and a hammer with a shortened handle to remove and replace the hub nut. Use caution as the nut is aluminum.
The entire job took 5 hours.
I also power washed the basket and tub before reassembly.
The tub seal comes with the transmission and brake assembly so it's not necessary to order another seal.
The agitator coupling kit contai ... Read more ns a redesigned coupler and longer screw with new o-ring.
I bought the hub nut, split ring, tub bearing, agitator coupling kit and washer hub because these are all the parts that go on the transmission shaft. I felt it was best to spend a few dollars more to replace every part involved with the spin and agitation of the washer.
I used the channel lock and a hammer with a shortened handle to remove and replace the hub nut. Use caution as the nut is aluminum.
The entire job took 5 hours.
Read less
Was this instruction helpful to you?
Thank you for voting!