



Models
>
GFW850SSN3WW
GFW850SSN3WW General Electric Washer
Jump to:
Find Part by Name
Keep searches simple, eg. "belt" or "pump".
Diagrams for GFW850SSN3WW
Viewing 10 of 10


Keep searches simple, eg. "belt" or "pump".

In Stock
Order now and your part arrives by Oct 1
$188.30
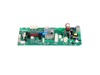
This main control board is a vital component for managing the core functions of your home appliance. It processes commands from the user interface and ensures accurate execution of settings such as te...
In Stock
Order now and your part arrives by Oct 1
In Stock
Order now and your part arrives by Oct 1

$27.28
This long shipping bolt is a heavy-duty fastener designed to secure the washer’s tub to the frame during transport, preventing internal damage caused by vibrations. It is essential for safe shipping a...
In Stock
Order now and your part arrives by Oct 1

$16.35
This washer door latch is a genuine replacement component designed for select models from GE, Hotpoint, Haier, Monogram, and Café. It plays a critical role in securing the washer door during operation...
In Stock
Order now and your part arrives by Oct 1

In Stock
Order now and your part arrives by Oct 1

This drain pump access door is a durable component designed to cover the drain pump area on front-load washing machines, providing protection from dust and debris while allowing easy access for mainte...
In Stock
Order now and your part arrives by Oct 1

$27.28
This shipping bolt secures internal components during transport to prevent movement or damage. Proper use helps maintain alignment and protection. Replacing a missing bolt restores safe handling and transport readiness.
In Stock
Order now and your part arrives by Oct 1
$21.95
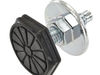
This leveling leg is designed to stabilize the appliance by allowing precise height adjustment on uneven floors. Proper leveling helps reduce vibration, noise, and door alignment issues, making this a...
On Order
$35.34
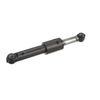
This suspension damper helps stabilize the appliance by absorbing movement and vibration during operation. It supports smooth performance and helps reduce noise or excessive motion. Replacing a worn d...
In Stock
Order now and your part arrives by Oct 1

$16.35
This clamp secures the boot gasket in place, ensuring a tight seal between connected components. Proper fastening helps prevent leaks and maintains alignment during operation. Replacing a loose or dam...
On Order
In Stock
Order now and your part arrives by Oct 1
Common Problems and Symptoms for GFW850SSN3WW
Viewing 9 of 9Will not drain
Fixed by these parts
How to fix it
Will Not Start
Fixed by these parts


How to fix it
Locking Issues
Fixed by these parts
How to fix it
Leaking
Fixed by these parts

How to fix it
Spinning Issues
Fixed by these parts
How to fix it
Draining Issues
Fixed by these parts
How to fix it
Lid or door won’t close
Fixed by these parts
How to fix it
Cycle Not Advancing
Fixed by these parts
How to fix it
Water Filling Issues
Fixed by these parts

How to fix it
Keep searches simple. Use keywords, e.g. "leaking", "pump", "broken" or "fit".
- Customer:
- Patrick from GLEN ALLEN, VA
- Parts Used:
- WH23X29553
- Difficulty Level:
- Easy
- Total Repair Time:
- 30 - 60 mins
- Tools:
- Pliers, Screw drivers
Squealing Water Valve When Water Is Filling Washer Tub
Sediment in your water will ruin these water inlet valves over time. It will reduce the amount of water filling the tub & will be very noisy making a squealing sound.
You’ll need a #2 Philips screwdriver & a standard set of pliers.
UNPLUG ELECTRIC SUPPLY FROM WASHER, TURN OFF WATER VALVES, THEN DISCONNECT WATER LIN ... Read more ES & DRAIN HOSE. Pullout the detergent dispenser drawer. Remove 2 self-tapping screws and & 3 sheet metal screws. Slide front control panel to the right and let it rest on the machine. Remove 3 sheet metal screws to release the top lid cover. Pull the lid towards you and lift off. You’ll see water inlet valves in the left rear. Remove Philips head screws securing water inlet valve. Disconnect electrical wires from the water inlet valve solenoids. Using pliers, squeeze hose clamps and slide down small hoses. Pull off or twist the small hoses from the old water inlet valve. Install the small hoses onto the new Walter inlet valve and reconnect electrical harness to water inlet valve solenoids. Mount new water inlet valve, reconnect water supply hoses & turn on water supply. Check for any leaks before going any further. If no leaks, reinstall top lid & front panel. CONTROL PANEL IS DIFFICULT TO LINE UP WHEN SLIDING IT TO THE LEFT TO REINSTALL. LINE UP THE SLOTS FOR THE SCREWS WHEN REINSTALLING THE CONTROL PANEL. Refasten all screws and slide dispenser drawer back into dispenser pocket. Reconnect electrical supply. Washer should operate normally.
You’ll need a #2 Philips screwdriver & a standard set of pliers.
UNPLUG ELECTRIC SUPPLY FROM WASHER, TURN OFF WATER VALVES, THEN DISCONNECT WATER LIN ... Read more ES & DRAIN HOSE. Pullout the detergent dispenser drawer. Remove 2 self-tapping screws and & 3 sheet metal screws. Slide front control panel to the right and let it rest on the machine. Remove 3 sheet metal screws to release the top lid cover. Pull the lid towards you and lift off. You’ll see water inlet valves in the left rear. Remove Philips head screws securing water inlet valve. Disconnect electrical wires from the water inlet valve solenoids. Using pliers, squeeze hose clamps and slide down small hoses. Pull off or twist the small hoses from the old water inlet valve. Install the small hoses onto the new Walter inlet valve and reconnect electrical harness to water inlet valve solenoids. Mount new water inlet valve, reconnect water supply hoses & turn on water supply. Check for any leaks before going any further. If no leaks, reinstall top lid & front panel. CONTROL PANEL IS DIFFICULT TO LINE UP WHEN SLIDING IT TO THE LEFT TO REINSTALL. LINE UP THE SLOTS FOR THE SCREWS WHEN REINSTALLING THE CONTROL PANEL. Refasten all screws and slide dispenser drawer back into dispenser pocket. Reconnect electrical supply. Washer should operate normally.
Read less
Was this instruction helpful to you?
Thank you for voting!
- Customer:
- Peter from CLAYTON, NC
- Parts Used:
- WH11X39237
- Difficulty Level:
- Easy
- Total Repair Time:
- 30 - 60 mins
- Tools:
- Nutdriver, Pliers
No spin, no drain
Disassemble according to instructions then remove pump...my only issue was I ordered the pump and paid $11.95 for t
2 to 3 days shipping. I didn't get the part until the following Saturday which was like 6 to 7 days...horrible delivery
2 to 3 days shipping. I didn't get the part until the following Saturday which was like 6 to 7 days...horrible delivery
Was this instruction helpful to you?
Thank you for voting!
- Customer:
- Cheston O from Clayton, NC
- Parts Used:
- WH11X39237
- Difficulty Level:
- A Bit Difficult
- Total Repair Time:
- 30 - 60 mins
- Tools:
- Pliers, Screw drivers
Pump Replacement
The first thing to get is a baking sheet/pan and a bucket. You'll want to get it as close to the drain as possible. Be ready for ALOT of water to be in there. Ease it out and dump the water into the bucket until it's all out. Next you'll have to prop up the front of the machine at least 4 or 5 inches. You'll need pliers to loosen the hos
... Read more
e clamp. There's only 4 screws so it's pretty easy, but you'll only be able to see the 2 in front. The other 2 you'll have to feel your way thru it.
Read less
Was this instruction helpful to you?
Thank you for voting!