


Models
>
KWS839ZAS0
KWS839ZAS0 Frigidaire Washer
Jump to:
Find Part by Name
Keep searches simple, eg. "belt" or "pump".
Diagrams for KWS839ZAS0
Viewing 4 of 4


Keep searches simple, eg. "belt" or "pump".

$23.05
If your washer drum is not spinning, there may be an issue with your drive belt. The drive belt wraps around the motor pulley and helps the basket to spin. Other signs there are issues with the belt i...
In Stock
Order now and your part arrives by Mar 26


$24.10
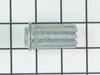
This is a screw and it is used with a variety of home appliances. It is less than 1/2 an inch long, and is #8-18 x 3/8. This part is a pan head, sheet metal, screw. It is made of metal.
In Stock
Order now and your part arrives by Mar 26

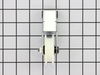
Mounting bracket on this part replaces old style ( You may need to drill off old bracket before mounting new lock).
No Longer Available

$118.17
This dual action agitator moves clothes during the wash cycle to improve cleaning and reduce tangling. It helps mix detergent and water evenly for better stain removal. If your washer isn’t cleaning w...
In Stock
Order now and your part arrives by Mar 26


In Stock
Order now and your part arrives by Mar 26


In Stock
Order now and your part arrives by Mar 26


In Stock
Order now and your part arrives by Mar 26

$77.56
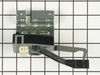
This part is located behind the control panel. It helps determine the level of water in the washer. As the water fills the hose, while tub is filling, it will push the air against a diaphragm inside t...
Special Order
Questions and Answers
We're sorry, but our Q&A experts are temporarily unavailable.
Please check back later if you still haven't found the answer you need.
Common Problems and Symptoms for KWS839ZAS0
Viewing 8 of 8Burning smell
Fixed by these parts

How to fix it
Will not agitate
Fixed by these parts

How to fix it
Will not drain
Fixed by these parts
How to fix it
Spins slowly
Fixed by these parts
How to fix it
Noisy
Fixed by these parts

How to fix it
Leaking
Fixed by these parts


How to fix it
Will Not Start
Fixed by these parts
How to fix it
Spinning Issues
Fixed by these parts
How to fix it


Keep searches simple. Use keywords, e.g. "leaking", "pump", "broken" or "fit".
- Customer:
- rodney from fairfield bay, AR
- Parts Used:
- 134511600
- Difficulty Level:
- Really Easy
- Total Repair Time:
- 15 - 30 mins
- Tools:
- Screw drivers
replace broken drive belt
carefully pry up on front washer top to release plastic keeper pins,remove 2 phillips screws from beneath lower front washer panel,slightly lift upward on panel to release.remove old broken belt,push new belt beneath large tub pulley,put belt on small motor pulley,push back belt tension /idler arm,start belt on large tub pulley,turn tub p
... Read more
ulley by hand to run belt on,release tension on idler arm.replace front panel and lower top.WALAAH!!!! you are done.
Read less
Was this instruction helpful to you?
Thank you for voting!
- Customer:
- BRIAN from UPLAND, CA
- Parts Used:
- 131605901
- Difficulty Level:
- Really Easy
- Total Repair Time:
- Less than 15 mins
- Tools:
- Socket set
Clicking due to agitator dogs slipping
One bolt (after removing the fabric softener dispenser and a water tight cover you will see it). Remove the bolt and slide it straight up and then it's the reverse to put in the new one. Very simple repair and very inexpensive if you willing to do it yourself.
Was this instruction helpful to you?
Thank you for voting!
- Customer:
- Jenessa from Tacoma, WA
- Parts Used:
- 134101800
- Difficulty Level:
- Easy
- Total Repair Time:
- 15 - 30 mins
- Tools:
- Screw drivers
Lid Lock Assembly broke
The Lid Lock Assembly came super fast! The install would have been flawless, but the "pre-drilled" holes on the new Lid Lock Assembly were way to small. We found that out after we had reconnected the wires and gotten it into place. Aside from that small set back, the install went great! This repair is definitey not one that you would
... Read more
need to pay a repair person to do!
Read less
Was this instruction helpful to you?
Thank you for voting!