



Models
>
LW3903W
LW3903W Amana Washer
Jump to:
Find Part by Name
Keep searches simple, eg. "belt" or "pump".
Models for LW3903W
Click on the best match to narrow your results.
Diagrams for LW3903W
Viewing 10 of 10


Keep searches simple, eg. "belt" or "pump".
In Stock
Order now and your part arrives by Oct 24
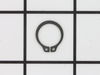
$13.07
This metal retaining ring is well under an inch long. Use it for your Maytag brand clothes washer or your clothes dryer.
In Stock
Order now and your part arrives by Oct 24
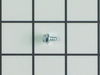
$7.60
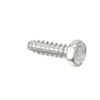
This is a multi-use screw and can be used on a variety of appliances. The measurements of the screw are: 8/18 x 3/8. *Please note: the screw is sold individually. Refer to the manual provided by the m...
In Stock
Order now and your part arrives by Oct 24
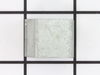
$9.79
This front cover spring retaining clip is not quite an inch long. It is made entirely of metal and is used for some washing machines.
In Stock
Order now and your part arrives by Oct 24
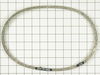
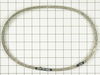
This v-style drive belt is thirty-two and a half inches long and half of an inch wide.
Special Order
$7.60
Sold individually. NOTE: The color on the screw may not be the same as the image, but will still function the same.
In Stock
Order now and your part arrives by Oct 24

In Stock
Order now and your part arrives by Oct 24
In Stock
Order now and your part arrives by Oct 24
In Stock
Order now and your part arrives by Oct 24
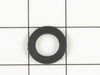
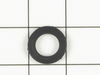
This high pressure inlet hose washer is black. It is an inch in diameter, made of rubber, and used with many washing machines, refrigerators, and dishwashers.
No Longer Available

Special Order
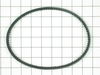
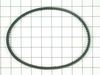
This V-style cogged tooth pump belt is used in conjunction with the drive belt in your washing machine. This belt is all black in color and is made entirely of rubber. It is twenty-two and a half inch...
No Longer Available
Common Problems and Symptoms for LW3903W
Viewing 6 of 6Noisy
Fixed by these parts
How to fix it
Leaking
Fixed by these parts

How to fix it
Will not agitate
Fixed by these parts
How to fix it
Burning smell
Fixed by these parts
How to fix it
Will not drain
Fixed by these parts
How to fix it
Spins slowly
Fixed by these parts
How to fix it

Keep searches simple. Use keywords, e.g. "leaking", "pump", "broken" or "fit".
- Customer:
- John from Milton, PA
- Parts Used:
- WP28808
- Difficulty Level:
- Really Easy
- Total Repair Time:
- 15 - 30 mins
- Tools:
- Nutdriver, Screw drivers
Frayed V-belt
VERY EASY!!!
SAFETY FIRST-Always unplug the appliance.
Use 8mm socket to remove front panel screws. Loosened up two hose clamps connected to the pump and removed both lines (Hoses contain water, use a towel) which is located underneath the motor. Disconnect motor electrical connector on the left side of the motor. With socket, r ... Read more emove 4 mounting bracket screws that secure the motor and pump assembly. Pull back the tension/idler pulley to loosen belt off the main pulley to the washer drum. Tilt and pull out motor/pump assembly. Underneath the pump, use star-bit to remove the pump from motor assembly to remove the belt. Install new belt on motor pulley (Good time to check for debris or anything restricing free movement of pump) and re-install pump. Install the motor/pump assembly and loosely secure the motor/pump assembly. Place the belt onto the motor pulley and pull back the tensioner/idler pulley to allow slack of belt to be placed on washer drum pulley. Put the belt on the lip of the drum pulley and rotate while pulling back the tensioner/idler pulley until the belt is seated on the groove of the drum pulley. Tighten the motor/pump assembley. Re-attach the 2 hoses and tighten down the clamps. Re-connect the electrical connector to the motor...Don't forget to plug in the washer and secure the front panel...Piece 'O cake, you're done! About 15 minutes to do the job. Much like changing a belt on most vehicles.
SAFETY FIRST-Always unplug the appliance.
Use 8mm socket to remove front panel screws. Loosened up two hose clamps connected to the pump and removed both lines (Hoses contain water, use a towel) which is located underneath the motor. Disconnect motor electrical connector on the left side of the motor. With socket, r ... Read more emove 4 mounting bracket screws that secure the motor and pump assembly. Pull back the tension/idler pulley to loosen belt off the main pulley to the washer drum. Tilt and pull out motor/pump assembly. Underneath the pump, use star-bit to remove the pump from motor assembly to remove the belt. Install new belt on motor pulley (Good time to check for debris or anything restricing free movement of pump) and re-install pump. Install the motor/pump assembly and loosely secure the motor/pump assembly. Place the belt onto the motor pulley and pull back the tensioner/idler pulley to allow slack of belt to be placed on washer drum pulley. Put the belt on the lip of the drum pulley and rotate while pulling back the tensioner/idler pulley until the belt is seated on the groove of the drum pulley. Tighten the motor/pump assembley. Re-attach the 2 hoses and tighten down the clamps. Re-connect the electrical connector to the motor...Don't forget to plug in the washer and secure the front panel...Piece 'O cake, you're done! About 15 minutes to do the job. Much like changing a belt on most vehicles.
Read less
Was this instruction helpful to you?
Thank you for voting!
- Customer:
- Jeff from Columbus, OH
- Parts Used:
- 31969
- Difficulty Level:
- Easy
- Total Repair Time:
- 15 - 30 mins
- Tools:
- Nutdriver, Pliers, Screw drivers, Socket set
Washer leaked when in use.
This washer leaked when it was about 7 years old and I replaced the seals at the bottom of the drum. That was a difficult repair but I'm glad I did it because the thing has run just fine for the 11 years since then.
This time when it leaked I started shopping for new washers, thinking it was the same thing. Just to be sure I op ... Read more ened it up to see if it was leaking somewhere else. The pump is right in the front of the washer and sure enough, it started dripping just a few minutes into the cycle. I hopped onto the interwebs and found Parts Select, they shipped me the new part and it arrived the next day!
First I removed the washer front (two screws). Then the bracket holding the pump came off by removing the two screws in front and loosening the screw behind then sliding it toward the back of the washer. The belt comes off once the tension slacks and the pump and bracket come right out. Remove the two hoses from the pump and four screws holding the pump to the bracket and you are ready to reverse the procedure.
If you care about your floor, be prepared to catch the water somehow when you remove the hoses. Be careful not to cross-thread the plastic when you screw the new pump on.
The toughest part was replacing the two hoses. One was held on by one of those clamps that you squeeze with pliers, not the screw kind. The space is kinda tight and a third hand would have been useful if there was room for it. I think I re-attached the bracket and pump to the washer to hold it in place.
I finished the whole thing in less than 30 minutes. It was super-easy except for the hoses. I would have bought a clamp that screws if I had thought ahead, but there must have been a reason for the manufacturer to use two different kinds of clamps.
I just realized it probaby took me as long to type up this story as it did to fix the thing. I just couldn't see spending ten times the money to buy a new washer!
This time when it leaked I started shopping for new washers, thinking it was the same thing. Just to be sure I op ... Read more ened it up to see if it was leaking somewhere else. The pump is right in the front of the washer and sure enough, it started dripping just a few minutes into the cycle. I hopped onto the interwebs and found Parts Select, they shipped me the new part and it arrived the next day!
First I removed the washer front (two screws). Then the bracket holding the pump came off by removing the two screws in front and loosening the screw behind then sliding it toward the back of the washer. The belt comes off once the tension slacks and the pump and bracket come right out. Remove the two hoses from the pump and four screws holding the pump to the bracket and you are ready to reverse the procedure.
If you care about your floor, be prepared to catch the water somehow when you remove the hoses. Be careful not to cross-thread the plastic when you screw the new pump on.
The toughest part was replacing the two hoses. One was held on by one of those clamps that you squeeze with pliers, not the screw kind. The space is kinda tight and a third hand would have been useful if there was room for it. I think I re-attached the bracket and pump to the washer to hold it in place.
I finished the whole thing in less than 30 minutes. It was super-easy except for the hoses. I would have bought a clamp that screws if I had thought ahead, but there must have been a reason for the manufacturer to use two different kinds of clamps.
I just realized it probaby took me as long to type up this story as it did to fix the thing. I just couldn't see spending ten times the money to buy a new washer!
Read less
Was this instruction helpful to you?
Thank you for voting!
Machine stopped in spin cycle and smell of burnt plastic.
Removed pump/motor assembly. Had a difficult time removing pump from motor. Was not aware that the shaft was not connected some way! After looking over the internet for help....I finally realized that the shaft was siezed in the pump. After much persuasion on my part....it broke loose... I did use some WD-40....but don't know if it...
... Read more
.or my prying between the pulley and the pump finally did the trick. Found that the idler pulley was seized. When I replaces both belt and pulley... It worked fine...
Read less
Was this instruction helpful to you?
Thank you for voting!