


Models
>
MLE19PDAGW
MLE19PDAGW Maytag Washer Dryer Combo
Jump to:
Find Part by Name
Keep searches simple, eg. "belt" or "pump".
Diagrams for MLE19PDAGW
Viewing 16 of 16
 Diagram and Parts List for Maytag Washer Dryer Combo")
 Diagram and Parts List for Maytag Washer Dryer Combo")
 Diagram and Parts List for Maytag Washer Dryer Combo")
 Diagram and Parts List for Maytag Washer Dryer Combo")
 Diagram and Parts List for Maytag Washer Dryer Combo")
 Diagram and Parts List for Maytag Washer Dryer Combo")
 Diagram and Parts List for Maytag Washer Dryer Combo")
 Diagram and Parts List for Maytag Washer Dryer Combo")
 Diagram and Parts List for Maytag Washer Dryer Combo")

 Diagram and Parts List for Maytag Washer Dryer Combo")

 Diagram and Parts List for Maytag Washer Dryer Combo")
 Diagram and Parts List for Maytag Washer Dryer Combo")

Keep searches simple, eg. "belt" or "pump".

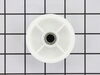
$22.91
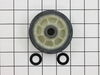
This OEM drum support roller kit contains the parts needed to replace one roller on your dryer. This kit includes one drum roller and two bearings. Most dryers use two drum rollers, and it is recommen...
In Stock
Order now and your part arrives by Jul 23

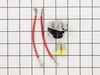
$13.07
This part is located on the front bulkhead of the dryer and helps the drum to rotate smoothly and quietly. If you notice a screeching or metal-on-metal noise while your appliance is operating, you may...
In Stock
Order now and your part arrives by Jul 23

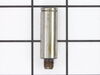
The roller shaft is also known as a support roller shaft or a drum roller axle. It is a part in your dryer that the drum rollers spin on, helping your dryer to tumble. If your appliance is noisy while...
No Longer Available

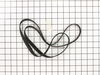
If your dryer is noisy while operating, or will not tumble at all, there may be an issue with the drum belt. Over time, the rubber can become brittle and snap, and the belt will need to be replaced. T...
In Stock
Order now and your part arrives by Jul 23

$6.51
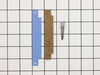
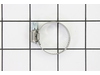
Sometimes referred to as a retaining clip, the retaining ring is used to hold the drum support roller onto the shaft in your dryer. The clip may need to be replaced if you find that your dryer is nois...
In Stock
Order now and your part arrives by Jul 23

If your dryer is making excessive noise, or it will not tumble, there may be an issue with the idler pulley wheel. The idler pulley wheel is attached to the idler bracket and is used to secure the dry...
In Stock
Order now and your part arrives by Jul 23

$13.07
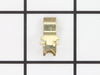
This roller shaft washer is just under an inch in diameter and is used for some of Whirlpool's brands of clothes dryers.Sold individually.
In Stock
Order now and your part arrives by Jul 23

$13.07
This idler pulley shaft washer is used with many clothes dryers. It is less than an inch long, and it is black in color.
In Stock
Order now and your part arrives by Jul 23

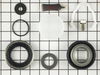
$19.63
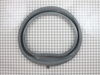
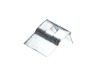
This seal can be used for the front or rear drum. Adhesive is NOT included. For adhesive search: WPY055980
In Stock
Order now and your part arrives by Jul 23

In Stock
Order now and your part arrives by Jul 23

$29.98
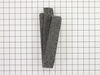
This part moves the clothes around inside your dryer and helps to direct the flow of hot air during the drying cycle.
NOTE: Screws are NOT included.
In Stock
Order now and your part arrives by Jul 23

$33.20
This part moves the clothes around inside your dryer and helps to direct the flow of hot air during the drying cycle.
In Stock
Order now and your part arrives by Jul 23
Common Problems and Symptoms for MLE19PDAGW
Viewing 16 of 16Noisy
Fixed by these parts
How to fix it
Leaking
Fixed by these parts

How to fix it
Door won’t close
Fixed by these parts

How to fix it
Marks left on clothes
Fixed by these parts
How to fix it
Drum Not Spinning
Fixed by these parts
How to fix it
Too hot
Fixed by these parts

How to fix it
Burning smell
Fixed by these parts
How to fix it
Not Heating
Fixed by these parts
How to fix it
Will not agitate
Fixed by these parts
How to fix it
Spins slowly
Fixed by these parts
How to fix it
Will not drain
Fixed by these parts
How to fix it
Won’t Start
Fixed by these parts
How to fix it
Spinning Issues
Fixed by these parts
How to fix it
Door Pops Open
Fixed by these parts
How to fix it
Door latch failure
Fixed by these parts
How to fix it
Will Not Start
Fixed by these parts
How to fix it


Keep searches simple. Use keywords, e.g. "leaking", "pump", "broken" or "fit".
noisy rollers, broken latch
first, I unplug the power supply of the dryer then I removed the two screws at the bottom of the dryer then pulled out the front part of the dryer,unplugged the blue & yellow wire for the on/off switch for the door,at the back of the dryer I unscrew the pannel for the belt,disconect the belt,and I unscrew the four screws on both side of t
... Read more
he front pannel to remove the front cover of the drum. Once I removed the front cover of the drum I can now remove the drum itself to access the drum support roller. I unscrew the rollers then replace it with the new once. It was an easy job.
Thank you.
Thank you.
Read less
Was this instruction helpful to you?
Thank you for voting!
- Customer:
- gerald from park city, MT
- Parts Used:
- WP6-3129480, WP33001443, WP312535, 12001541, WP9703438
- Difficulty Level:
- Easy
- Total Repair Time:
- 1- 2 hours
- Tools:
- Pliers, Screw drivers, Socket set, Wrench set
dryer squeeking
removed front panel,lifted top, removed drum and drive belt,remove old rollers and acc and instlled new and reinstalled dryer parts.
Was this instruction helpful to you?
Thank you for voting!
- Customer:
- Richard from Greenville, NH
- Parts Used:
- 12002022
- Difficulty Level:
- A Bit Difficult
- Total Repair Time:
- More than 2 hours
- Tools:
- Nutdriver, Pliers, Screw drivers, Socket set, Wrench (Adjustable), Wrench set
Spinner making loud whining noise.
As Typical with this Neptune front load washer, the Water Seal fails to keep water from getting into the bearings. The bearings start to sound like a jet engine at high speed spins once the grease is washed out (nice grease splatter at the back of the cabinet). You can replace the Lip Seal but the bearings are not part of the kit. It i
... Read more
s a waste of time to replace the seal kit if the bearings are already bad or going bad. You can't buy the bearings from here or any other appliance part store. You have to purchase a new tub in order to get new bearings, at $500+. Not worth it. I purchased the Lip Seal Kit with the intention of removing the bearings and replacing. The instructions that come with the kit explain with diagrams how to disassemble. In order to remove the spinner from the outer tub, I had to remove the whole tub, place it face down on some 2x4's and hit the spinner shaft with a hammer and block of wood to get it out of the old bearings. It came out fairly quickly. I removed the old lip seal (you can use the two access holes at the back of the outer tub to bang out the lip seal with a nail) and using a hammer and screwdriver, banged out the front bearing in the outer tub from the back and through the back bearing. This took a little while of moving around the bearing edge and tapping out, especially since there is a pipe spacer between the 2 bearings. It can be moved partly out of the way. The spacer will fall out with the front bearing. I then removed the C-clip that holds in the back bearing and banged out using the same method as the front bearing but from the inside. It too took a lot of tapping around the edges due to lots of corrosion. Once I had the bearings out, I looked up the make and model printed on the covers. Order using a DDU designation which is a rubber seal on both sides, like originals. I cleaned up the bearing mounting surfaces using a dremel tool and wire brush attachment. Make sure you get the metal free of any contamination. Use grit paper if necessary. I also sanded down the spinner shaft and got the spindle nice and shiny. I inserted the larger front bearing first (use a little grease on outside edge), it was a very tight fit and had to tap in using a hammer and metal rod. Make sure it is all the way in. Install the new seal kit (mine was the crummy original design, not the revised one). With the spinner tub on the floor shaft up on some 2x4's (light coating of grease on shaft), place the outer tub over the spinner with the shaft inserting through the new bearing and out the back. The shaft isn't an interference fit with the front bearing so it should slide in easily. WIth the shaft fully inserted, install the pipe spacer (cleaned up) then place the back bearing (outside edge greased) over the shaft and into the outer tub. This is an interference fit and will have to be tapped into place. It also was a tight fit into the tub. WIth it part of the way into the tub, I installed the belt pulley and tightened it down using a longer bolt than supplied, and this pushed the bearing the rest of the way in. I then installed the the C-ring. Not sure why the C-ring is needed with the bearing being such a tight fit. I installed the tub assembly back into the washing machine cabinet and installed the pulley and belt.. After reassembling the complete washer (after much cleaning of dust and soap scum, etc) I ran the unit once with no clothes to make sure any contaminates (grease, etc) where washed out first. So far so good, nice and quiet. If it last me another 5-10 years I will be happy. It will fail again for the same reason since I had to use the same lame seal kit and didn't have the revised version un
Read less
Was this instruction helpful to you?
Thank you for voting!